Configuring MAB policies in Cisco ISE
I've been doing quite a lot of 802.1x posts lately and that's mainly because I'm currently in the middle of deploying it in my home network. So to continue on with some more 802.1x, I'm going to run through MAB policies in this post.
MAB or, MAC Authentication Bypass, is a way for accessing an 802.1x enabled network without using 802.1x authentication methods such as usernames and passwords or certificates. MAB works by taking the devices MAC address and attempting to authenticate with the configured Radius server in order to enable network access on the port. If the Radius server has a policy configured to allow network access for that particular MAC address, then access is granted and the configured policies are applied. If not, then the device is denied network access.
You might ask, why use MAB instead of other 802.1x methods like EAP-TLS or PEAP. The simple answer is that not all devices support those authentication methods. Think TVs, or legacy network equipment, or even some printers and phones. Not all devices have the ability to do 802.1x username and password or user/device certificate authentication methods and MAB allows you to lock down your network switch ports with 802.1x and still provide access to these network devices based on MAC address. While this isn't 100% fool proof in regards to security as you can easily spoof a MAC address, it does provide at least some extra security over having an open port.
For this post I'm actually going to configure a MAB profile for my home security DVR. This device does not support 802.1x in any way so makes for a good use case.
To get started, first I'll create the Endpoint Identity Group that allocate that to the MAB devices. For this example I'm just going to create a single MAB device group for all MAB devices that I want to authenticate, but you could create one for TV's, one for phones, one for printers etc. Having multiple groups allows for finer policy set configuration and also profiling which I'll discuss in a future post.
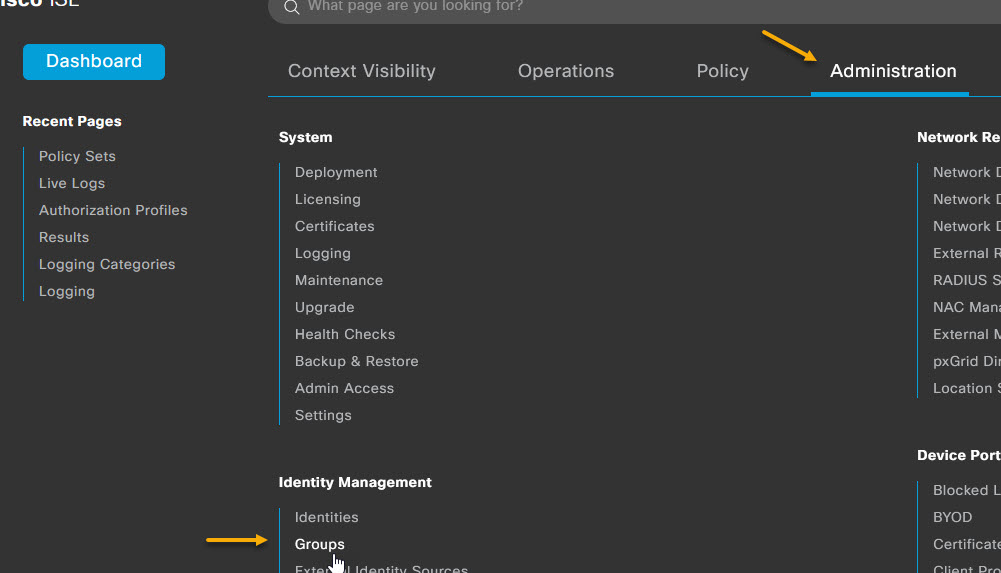
To configure the Endpoint Identity Group navigate to Administration -> Identity Management -> Groups
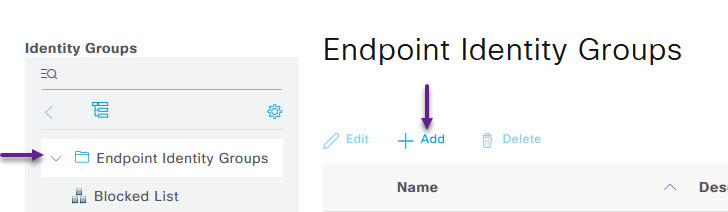
Select Endpoint Identity Groups from the menu on the left, and click the +Add button
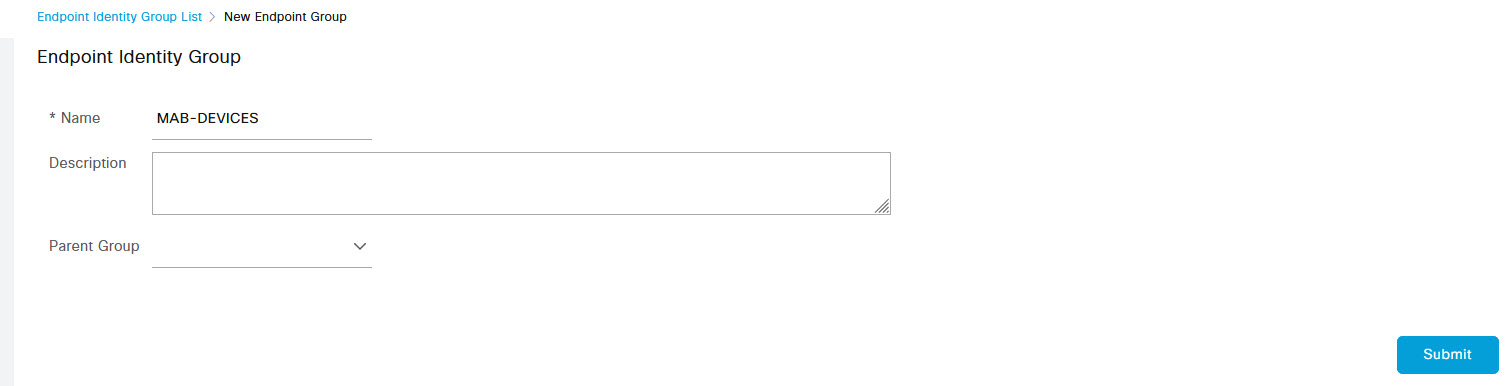
Give the group a name and a description if you choose, and then click the Submit button.
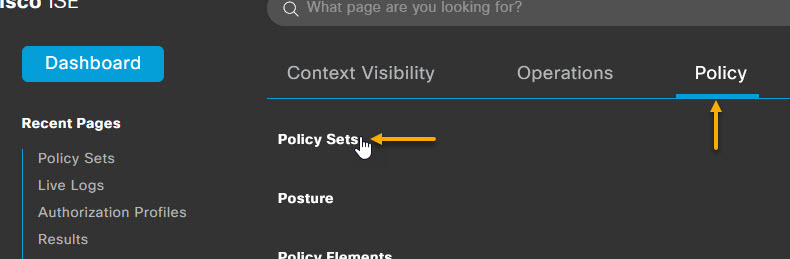
Once you have your Endpoint Identity Group created, it's time to create the policy for MAB authentication. Navigate to Policy -> Policy Sets
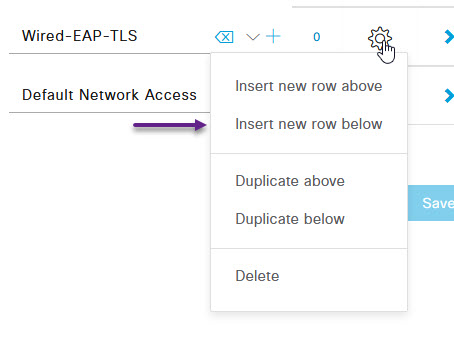
For MAB authentication, you need to create a new policy specific for Wired MAB as MAB does not use the same frame type as Wired or Wireless 802.1x so ISE will not match it against those policies. In order to create a new Policy Set for Wired MAB, select the cog icon to the right of one of your other policies, and select either Insert new row above or below.
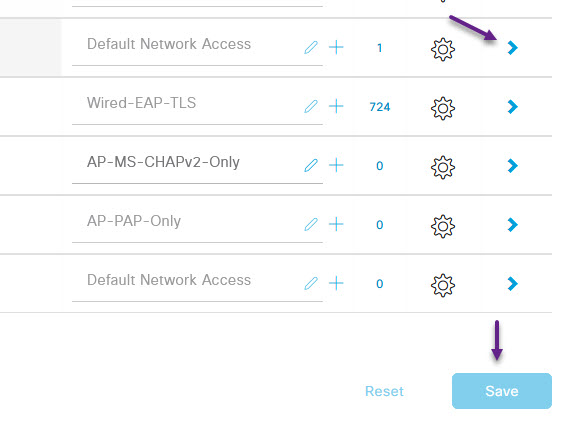
Give the policy set a name such as Wired MAB and select the Allowed Protocols/Server Sequence of Default Network Access. Once done, click the + to add a condition.

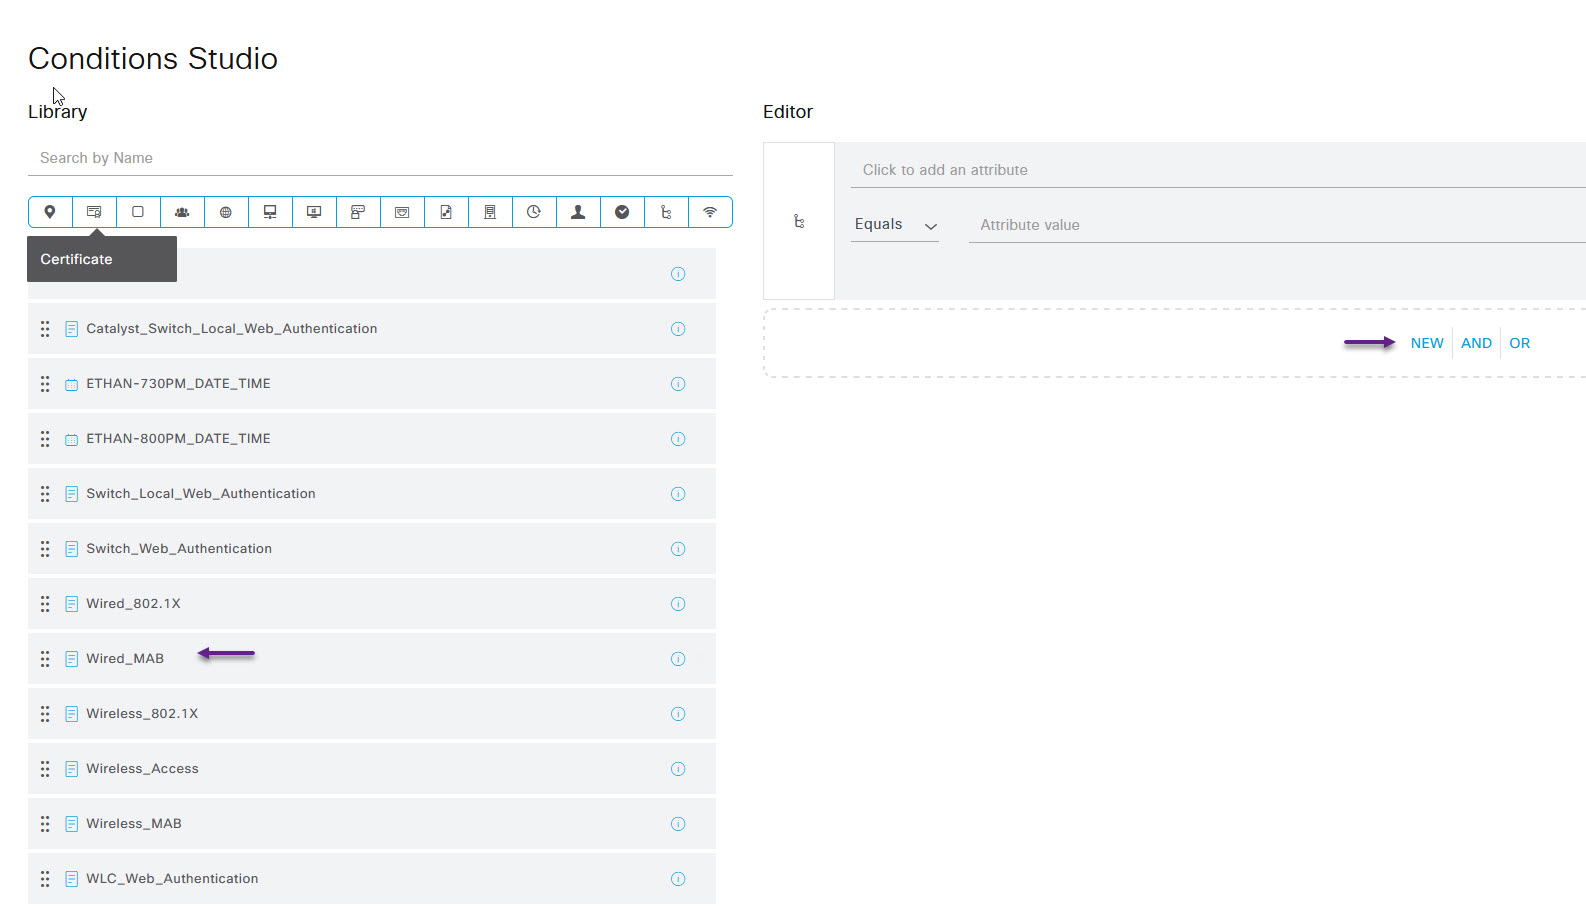
On the Conditions Studio page, in the Library options on the left, you should see Wired_MAB option, select that and drag it over to the NEW|AND|OR section of the Studio page.
Once that's done, scroll to the bottom of the Conditions Studio page and click Use. Now click Save at the bottom of the Policy Sets page, and then click on the > arrow to the right of your new Wired MAB Policy.
On the Policy Set page for the Wired MAB policy, expand the Authentication Policy section. There are a couple of options here, you can either add a new policy and define the authentication profile, or simply use the Default policy and define the profile. I've chosen to use the default policy so the only thing you may need to set if it's not already, is the Use column. This will need to be set to Internal Endpoints. Once you've selected that, expand the Authorization Policy section at the bottom of the page.

Under the Authorization Policy section, create a new policy by clicking on the cog to the right of the Default policy, and selecting Insert new row above.
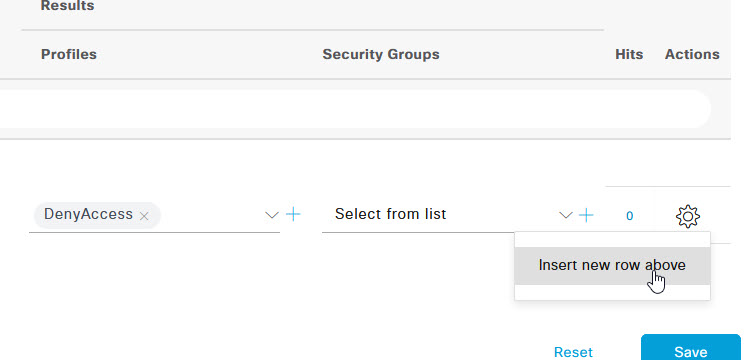
In the new policy options, give it a name such as MAB_Devices, and select the Profile as PermitAccess. Once those are set, click the + to add a new condition.

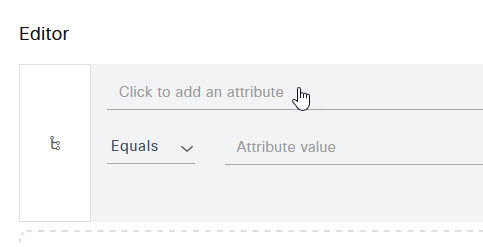
On the Conditions Studio page, select the Click to add an attribute line.
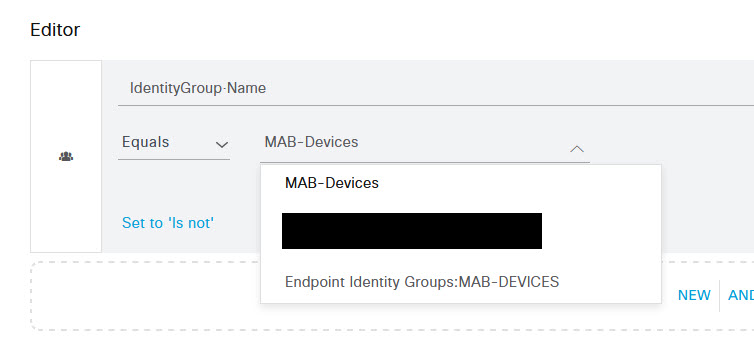
In the Select attribute for condition page, select the menu at the top that looks like a group of people, and select IdentityGroup Name from the list.

Once selected, in the menu next to Equals, start typing in the MAB Devices group name that you created and select it from the drop down list. Once done, scroll to the bottom of the Condition Studio page and click use. Once back on the Wired MAB policy set page, click the Save button on the bottom right.
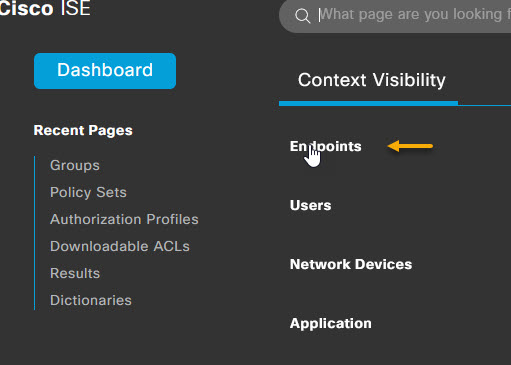
Now that you have your MAB policy, it's time to configure the endpoint. To do that, you must have already connected the device to the network and had it attempt to authenticate using 802.1x or MAB, so if you haven't already, connect it to an 802.1x enabled port and ensure the port has gone through its process of trying to authenticate. Once that's done, in ISE, navigate to Context Visibility -> Endpoints.
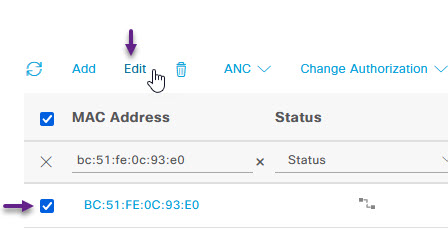
In the MAC Address column of the Enpoints page, type in the MAC address of your device that you want to configure for MAB Authentication.
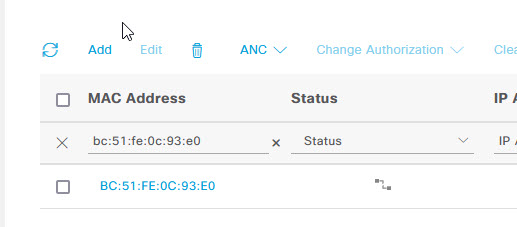
Once you have found your device, select the tick box on the left of it, and click Edit.
On the Edit Endpoints page, tick the checkbox for Static Group Assignment and under the Identity Group Assignment drop down, select the MAB Devices group that you created earlier. (I had actually created a group called EIG-MAB-DEVICES instead of MAB-DEVICES but you will need to select the group that you created earlier)
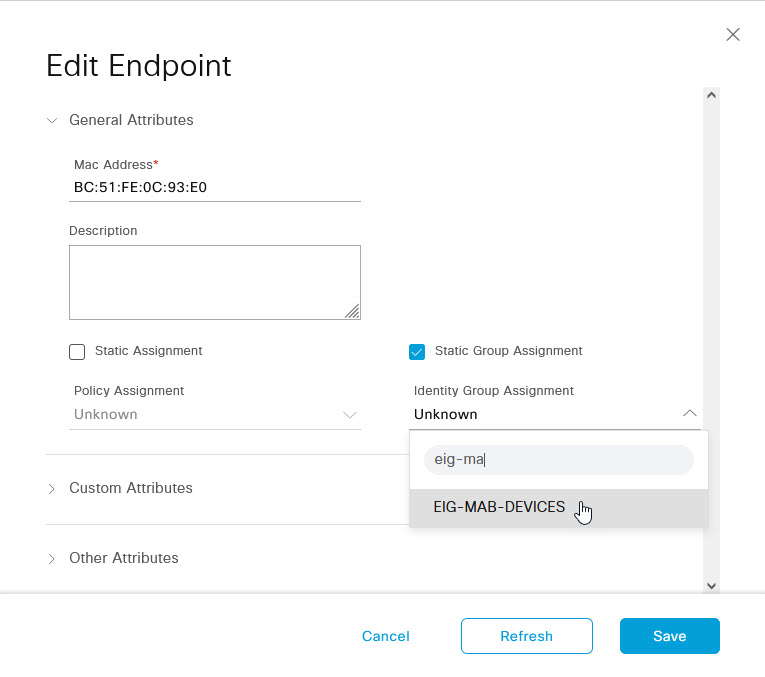
Once that's done, click save and that's it. Now you should be able to connect your device to the network, and once the port has attempted MAB authentication, the ISE policy should allow it and away you go.
There are many configuration options for 802.1x on Cisco switches, but for reference this is the port configuration I used for this. Keep in mind, I don't specify a VLAN here, because I use Cisco ISE authorisation profiles to assign a VLAN to the switch port which I will cover in a future post.
interface GigabitEthernet0/8
 description PC 8021X
 switchport mode access
 ip access-group DOT1X_DEFAULT in
 authentication event fail action next-method
 authentication event server dead action authorize vlan 15
 authentication event server alive action reinitialize
 authentication host-mode multi-auth
 authentication order dot1x mab
 authentication port-control auto
 authentication timer restart 300
 authentication timer reauthenticate server
 authentication violation restrict
 mab
 dot1x pae authenticator
 dot1x timeout tx-period 10
 spanning-tree portfast
If you've noticed anything missing or have any issues with this post or just want to say Hi, please leave a comment.
Add new comment