Configuring Wireless 802.1x with Cisco ISE
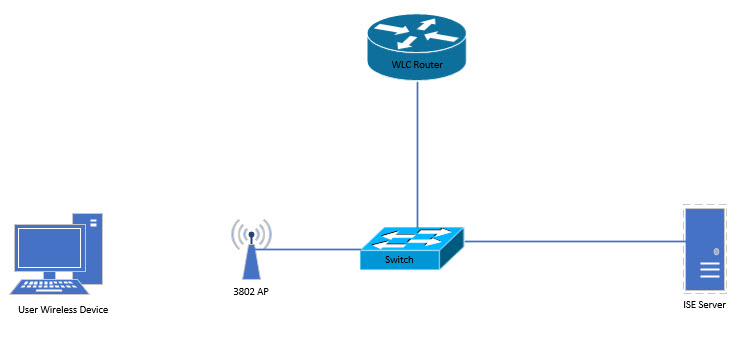
I previously went through how to deploy wired 802.1x authentication using EAP-TLS and Cisco ISE. In this post, I'm going to utilise Cisco ISE to do Wireless 802.1x EAP-TLS authentication for my home network. For this Lab I will be using a Cisco 1100 series router running Cisco Mobility Express and a Cisco 3802 AP that is connected to the ME WLC. Below is a quick overview of the Lab topology for this post.
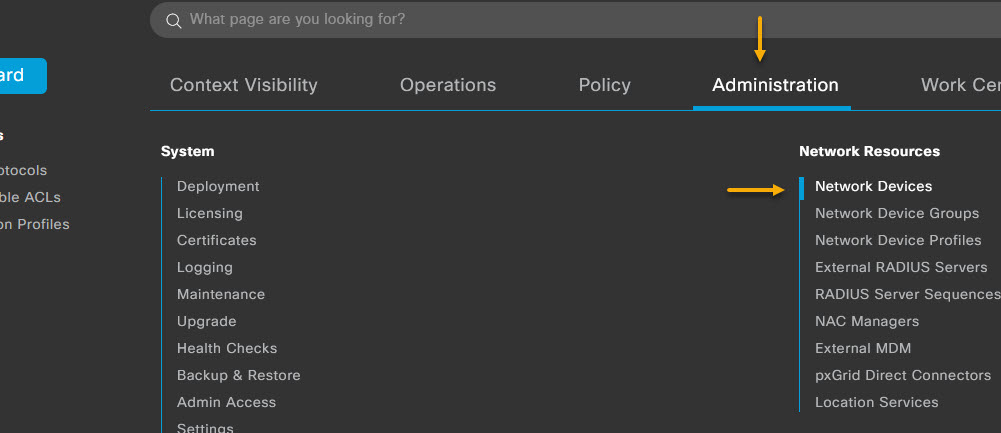
Given I've already configured the allowed protocols list and the certificate identity profile in my previous post, I wont repeat that here. If you need to know how to do that, please click here. So, I'll start by adding the WLC to the Network Devices list in ISE. To do that navigate to Administration -> Network Resources -> Network Devices
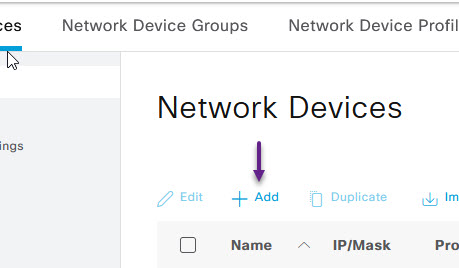
From the Network Devices page, click on the + Add button to add the WLC device.
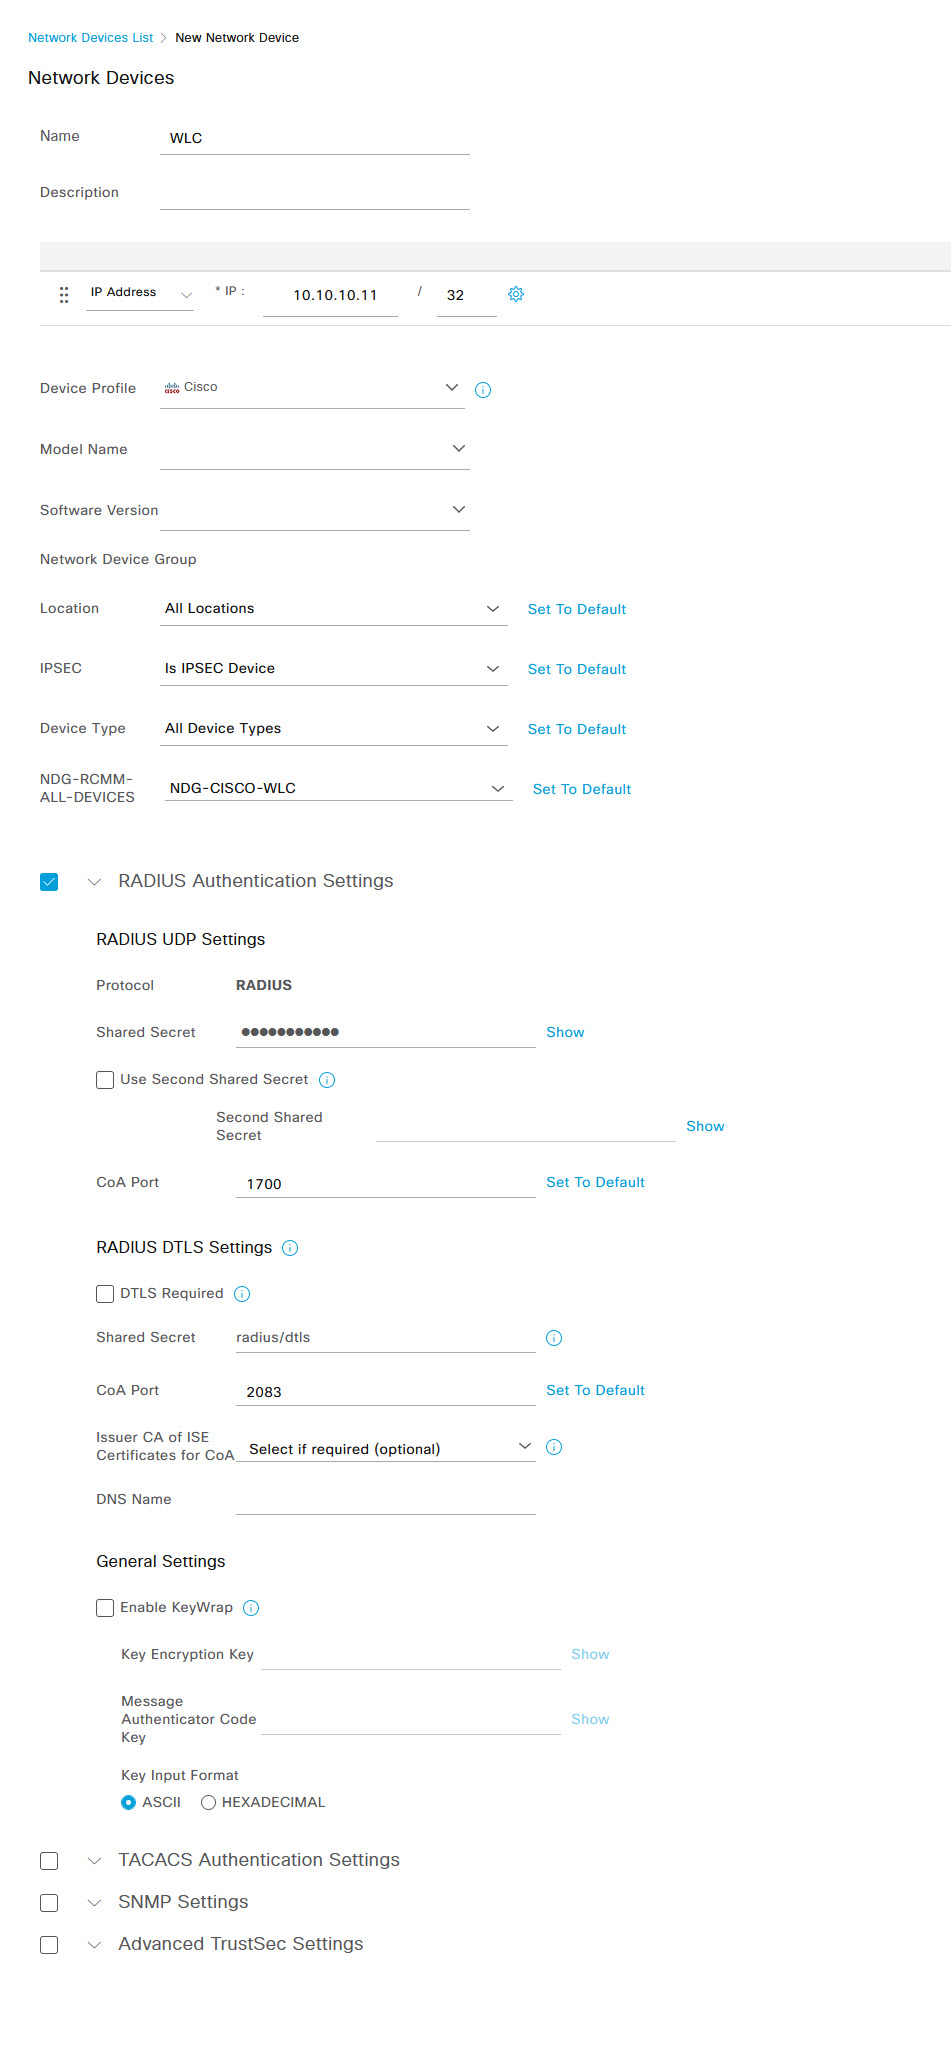
Fill in all the required device information such as Name, IP Address, and Device Type etc. Select the RADIUS Authentication Settings tick box and enter the Radius shared key. Once you're done, click Submit. Note that I have created device group profiles which I use to group devices together so you won't have the NDG line in your ISE configuration unless you've also created your own device groups.
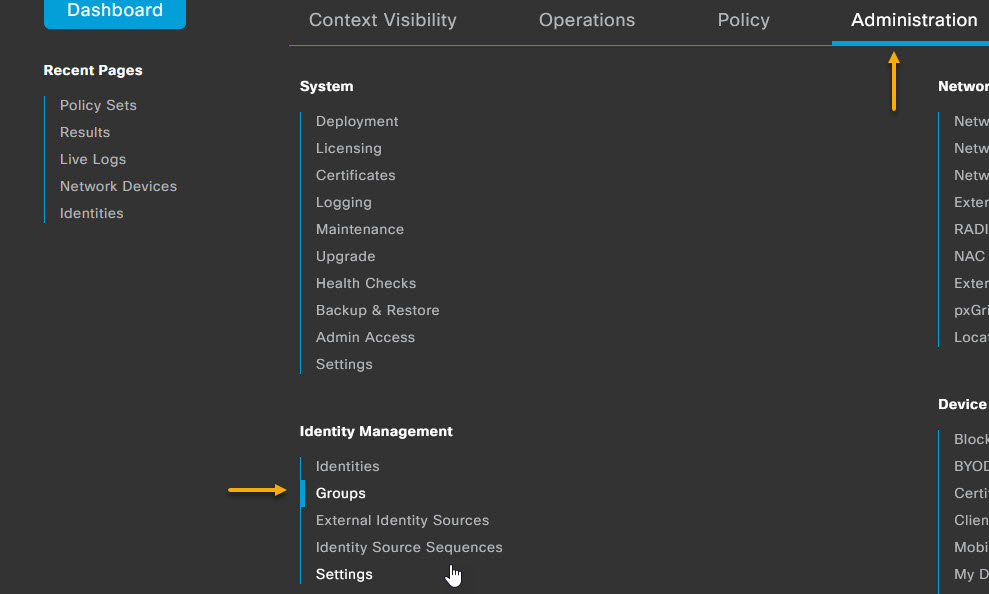
With the WLC added, it's time to create the Wireless User Identity Group that will be used to match your wireless users to permit access. To do that, navigate to Administration -> Identity Management -> Groups.
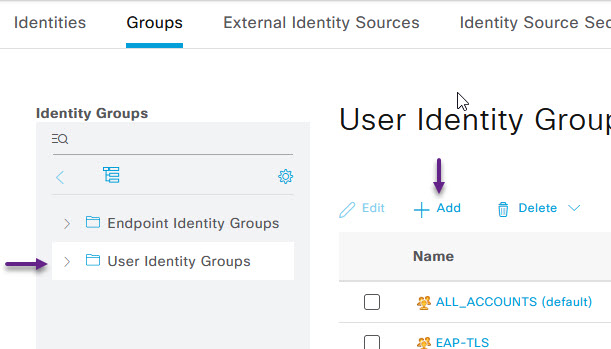
Select User Identity Groups from the menu on the left and click the + Add button.
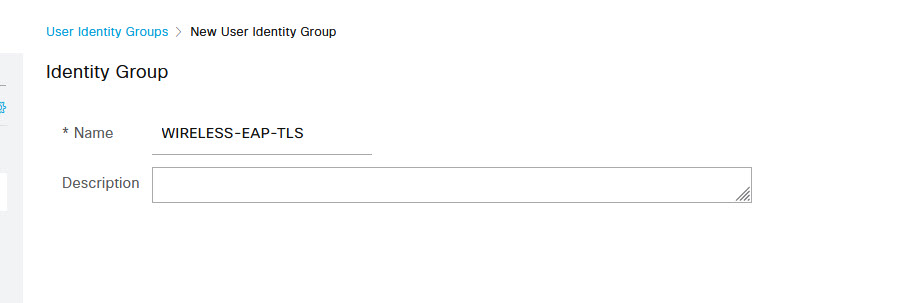
Give the group a name such as WIRELESS-EAP-TLS and click the Submit button.
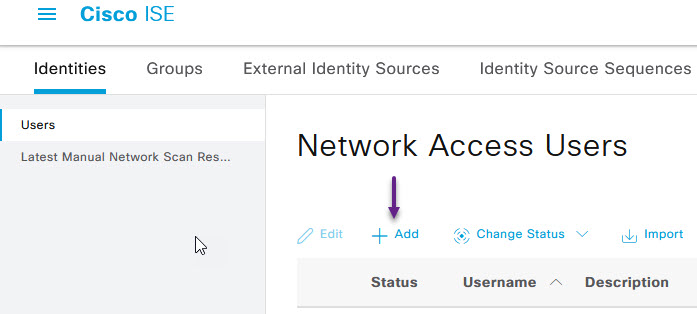
Now you can create a wireless user and assign it to that group. Navigate to Administration -> Identity Management -> Identities.

On the Network Access Users page, click the + Add button to add a new user.
Now fill in all of the user details such as username, email address, password, etc and ensure that at the bottom of the page you select the WIRELESS-EAP-TLS group under User Identity Groups as this is what the Radius policy will match against.
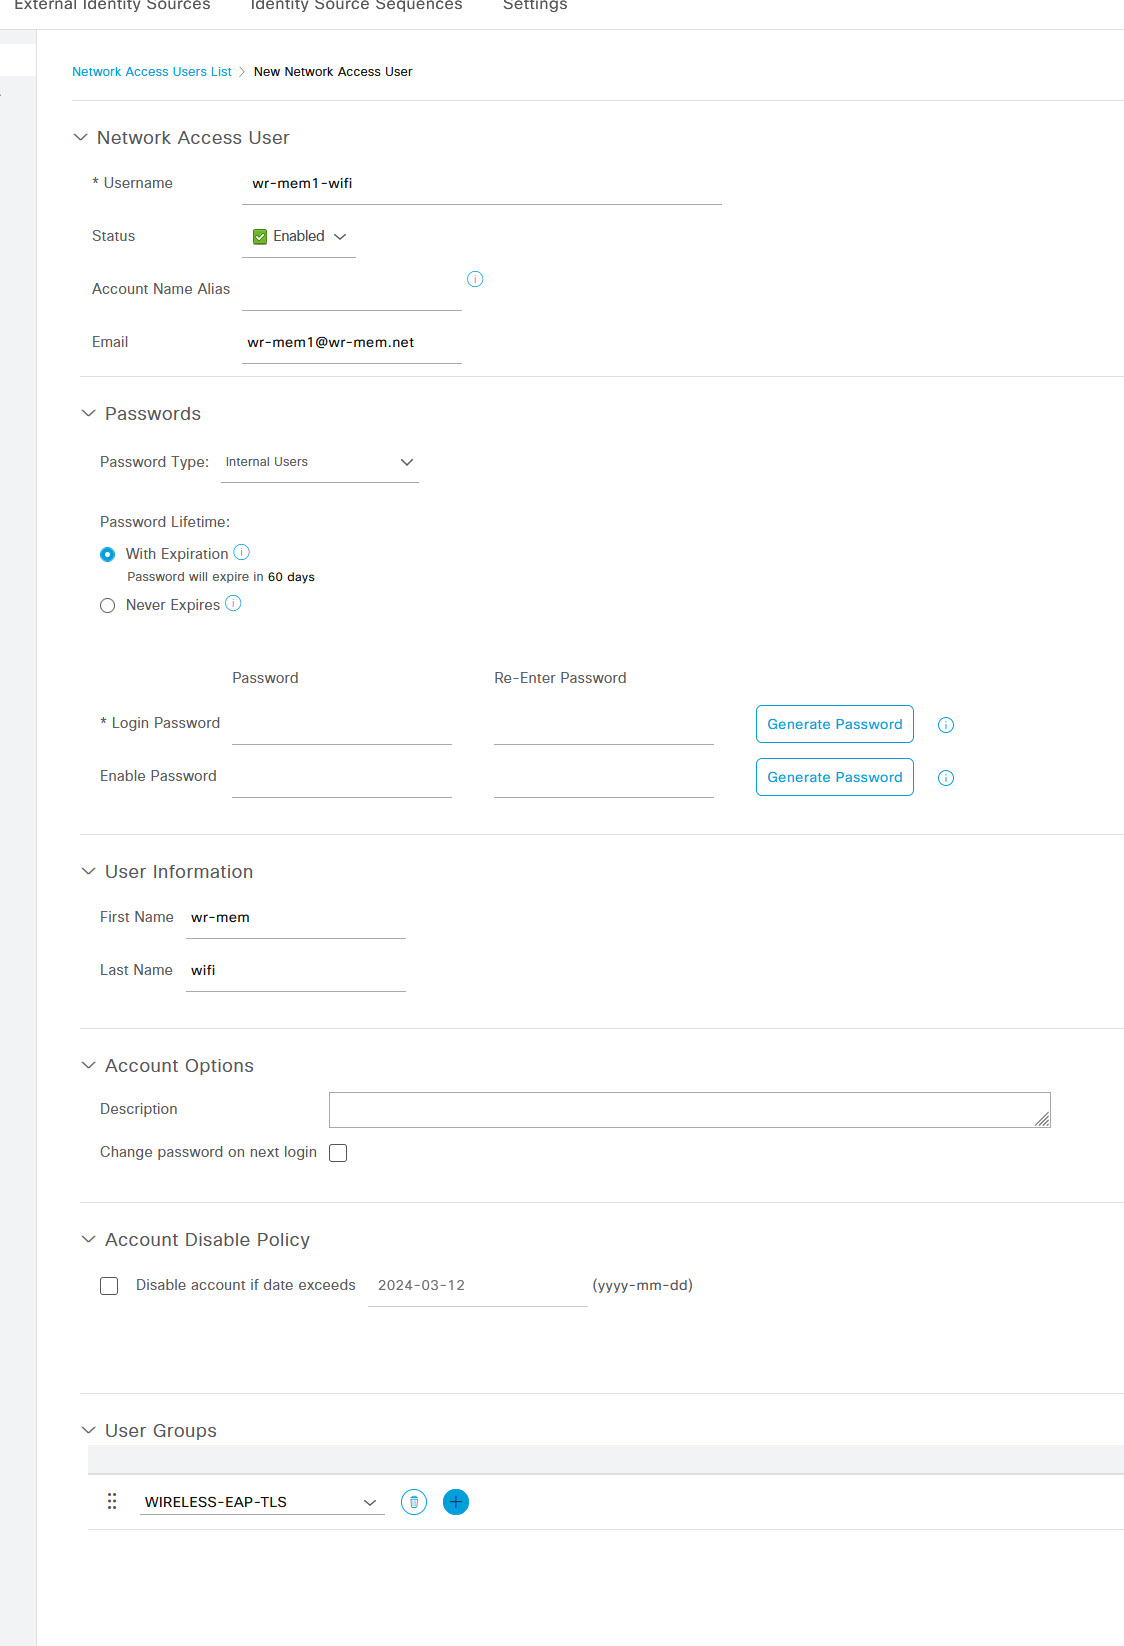
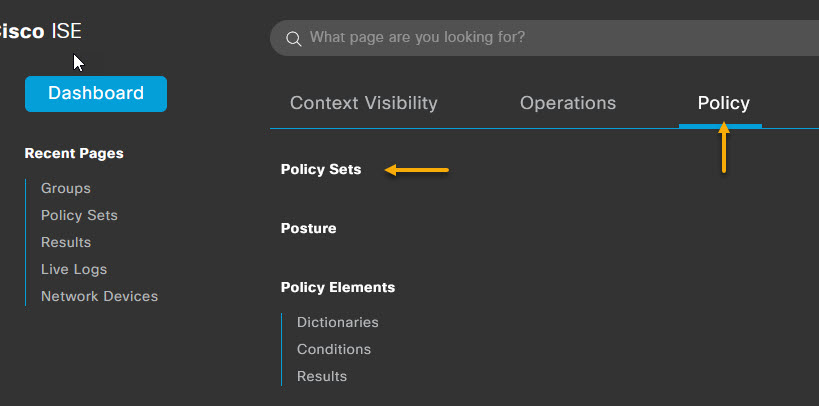
Once you've filled in all of the information, click Submit at the bottom of the page. Now it's time to create the wireless 802.1x Radius policy. To do that, navigate to Policy -> Policy Sets.
If you've followed my previous post and configured a Wired 802.1x policy, you should have 2 policies here already, the Default policy and the Wired 802.1x policy. To add the Wireless policy, you can select the cog on either policy and insert new row above/below the existing policy.

Once you've added the new row, click in the Policy Set Name field and give it a name. From the Allowed Protocols drop down, select the WIRED_EAP_TLS service group that you created if you followed my previous post (or alternatively create a new service group for wireless access) and then click the + to add a new Condition.

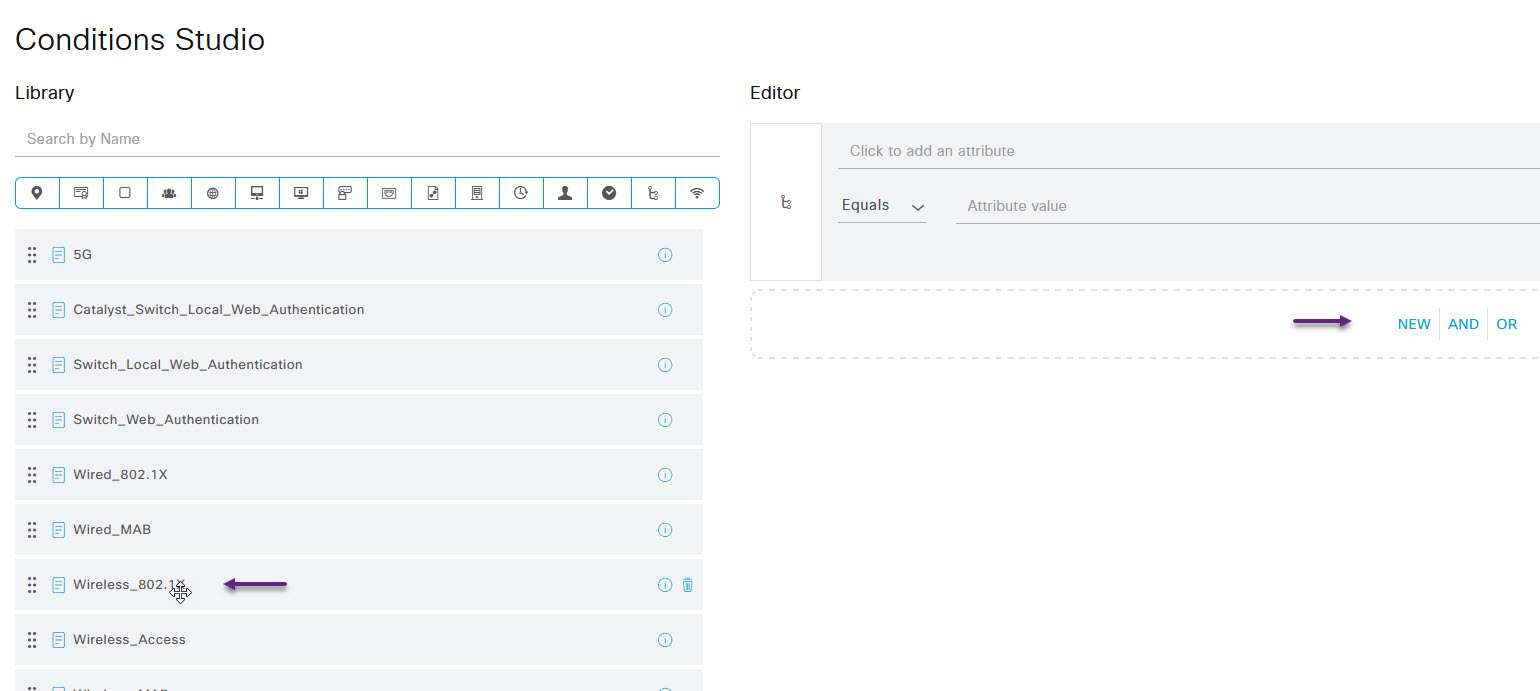
There are a couple of ways you can handle this policy condition, you can either select the device group as the WLC that you added if you have a group created, or you can simply select Wireless 802.1x from the pre-build libraries in the menu on the left. You can also select specific SSIDs to match against as well but I'm not going into that here. For this post, I've gone with the easiest option of selecting Wireless 802.1x. Click and drag it over to the NEW|AND|OR side of the page. Once done, scroll to the bottom of the Conditions Sudio page and click Use.
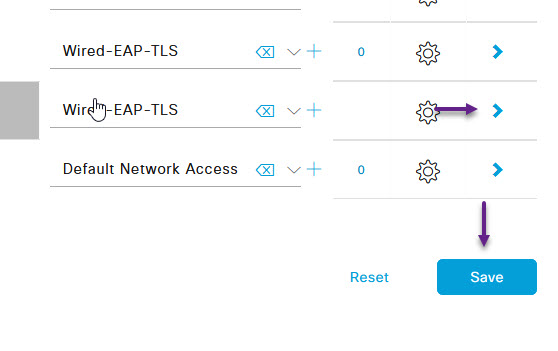
With the policy configured, click the Save button and then click the > next to the new Wireless 802.1x Policy to edit the authentication and authorisation settings.
On the Wireless 802.1x policy settings page, expand the Authentication Policy section. Once again there are a couple of ways to do this, you can either add a new authentication policy and select the correct Use option, or simply alter the Use drop down of the Default policy to be that of our Certificate policy that we created. (See previous post about wired 802.1x)

Now expand the Authorization Policy section and select the Cog on the right of the Default policy and select Insert new row above to add a new Authorisation policy.

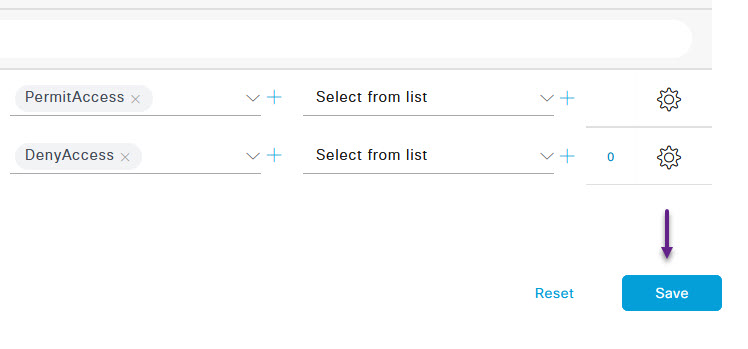
Once again, you can create many custom options and policies here but this is a basic configuration so, select the Rule Name field and give it a name. From the Profiles drop down menu select PermitAccess, and once done, click the + under the conditions column.

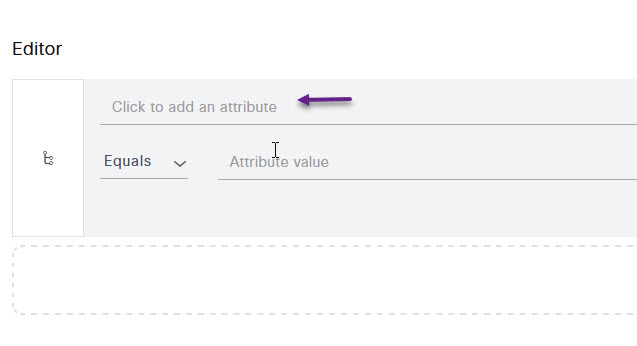
On the Conditions Studio page, we're going to click to add an attribute.
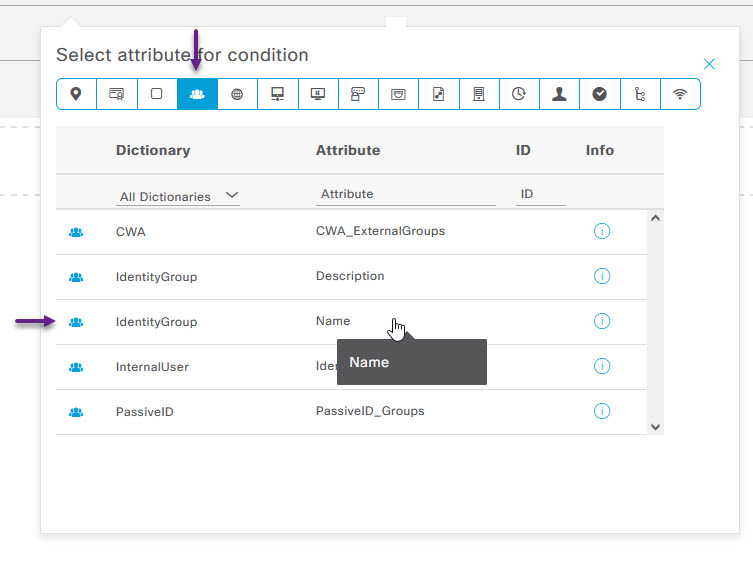
From the Select attribute page, select the icon that looks like a group of people, and then select IdentityGroup Name from the options list.
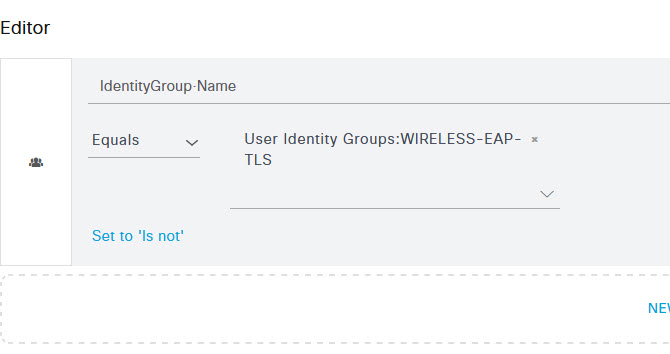
Once selected, ensure that the Equals drop down option is selected and from the Choose from list or type field, select the WIRELESS-EAP-TLS Group that we created.
Once done, scroll to the bottom of the Conditions Studio page and click Use. Then on the Wireless 802.1x policy page, click the Save button at the bottom.
And that's it, You now have a wireless 802.1x EAP-TLS Radius policy ready for use.
Configure WLC
The next thing you will need to do is configure your WLC for the ISE Radius server and create an SSID and configured it to use WPA2Enterprise authentication. As I've only got access to a Mobility Express WLC the concept is the same but the configuration menu's and options may differ compared to a full Cisco WLC configuration.
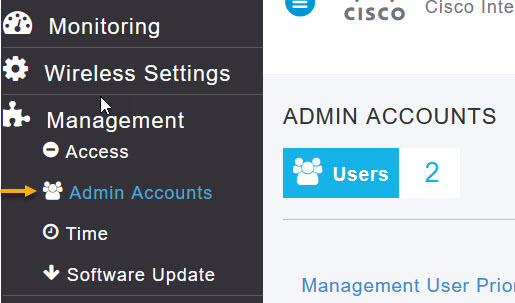
In Cisco ME (Mobility Express), to configure a radius server you must first switch to Expert View. To do that, click on the Expert View icon in the top right hand corner of the WLC web gui. You will be prompted with an are you sure message so click OK.

Once in expert view, navigate to Management -> Admin Accounts
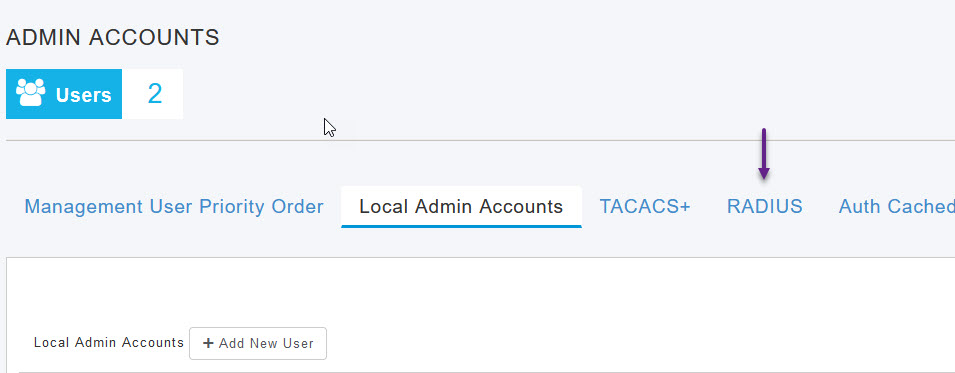
On the Admin Accounts page, select the RADIUS tab
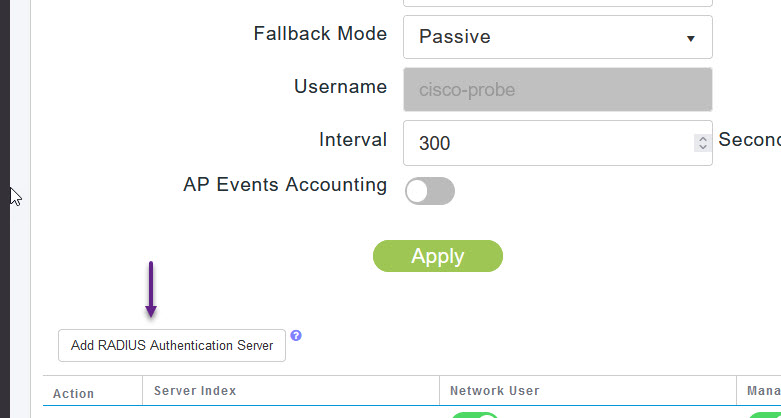
There are a few options you can configure under the Radius settings, however the defaults should work fine. To add a Radius server, click the Add RADIUS Authentication Server button.
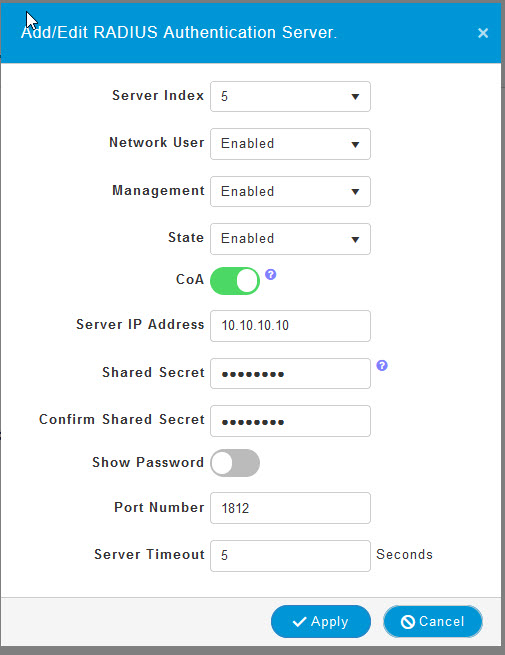
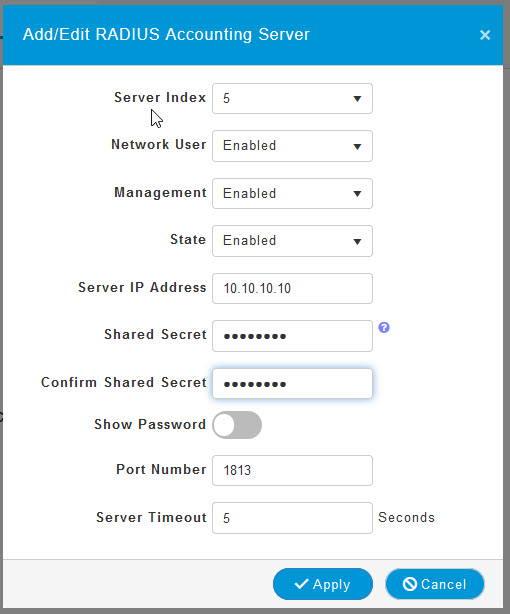
Enter in the server IP address and the Radius secret that you configured in the ISE device configuration. Once done, click Apply.
You will also need to repeat these steps for Add RADIUS Accounting Server.
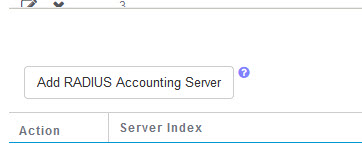
On the Radius Accounting server page, enter in the same server details and click Apply
\
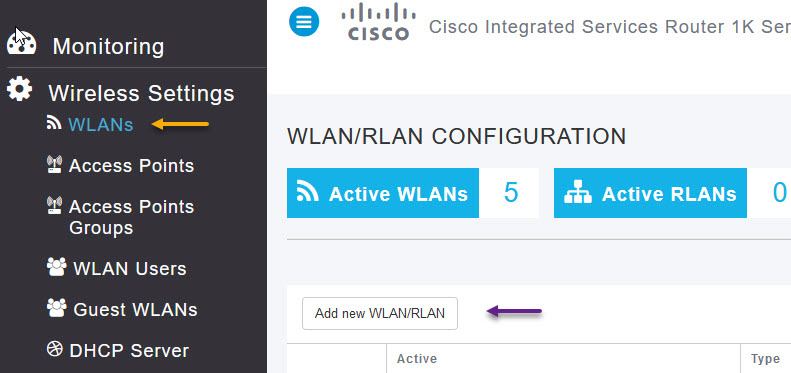
Now that the Radius server is configured, you will need to create an SSID and configured it for Radius Authentication. Navigate to Wireless Settings -> WLANs and on the WLAN/RLAN Configuration page, click the Add new WLAN/RLAN button.
On the Add new WLAN/RLAN page, enter in the Profile Name which is the same as the SSID by default unless you want to manually change the SSID. You can also set the Radio Policy if you have one configured. Once done, click on the WLAN Security tab at the top.

On the WLAN Security page, select WPA2Enterprise from the Security Type drop down and then click on both Add RADIUS Authentication Server and Add RADIUS Accounting Server and add the new servers that were created.
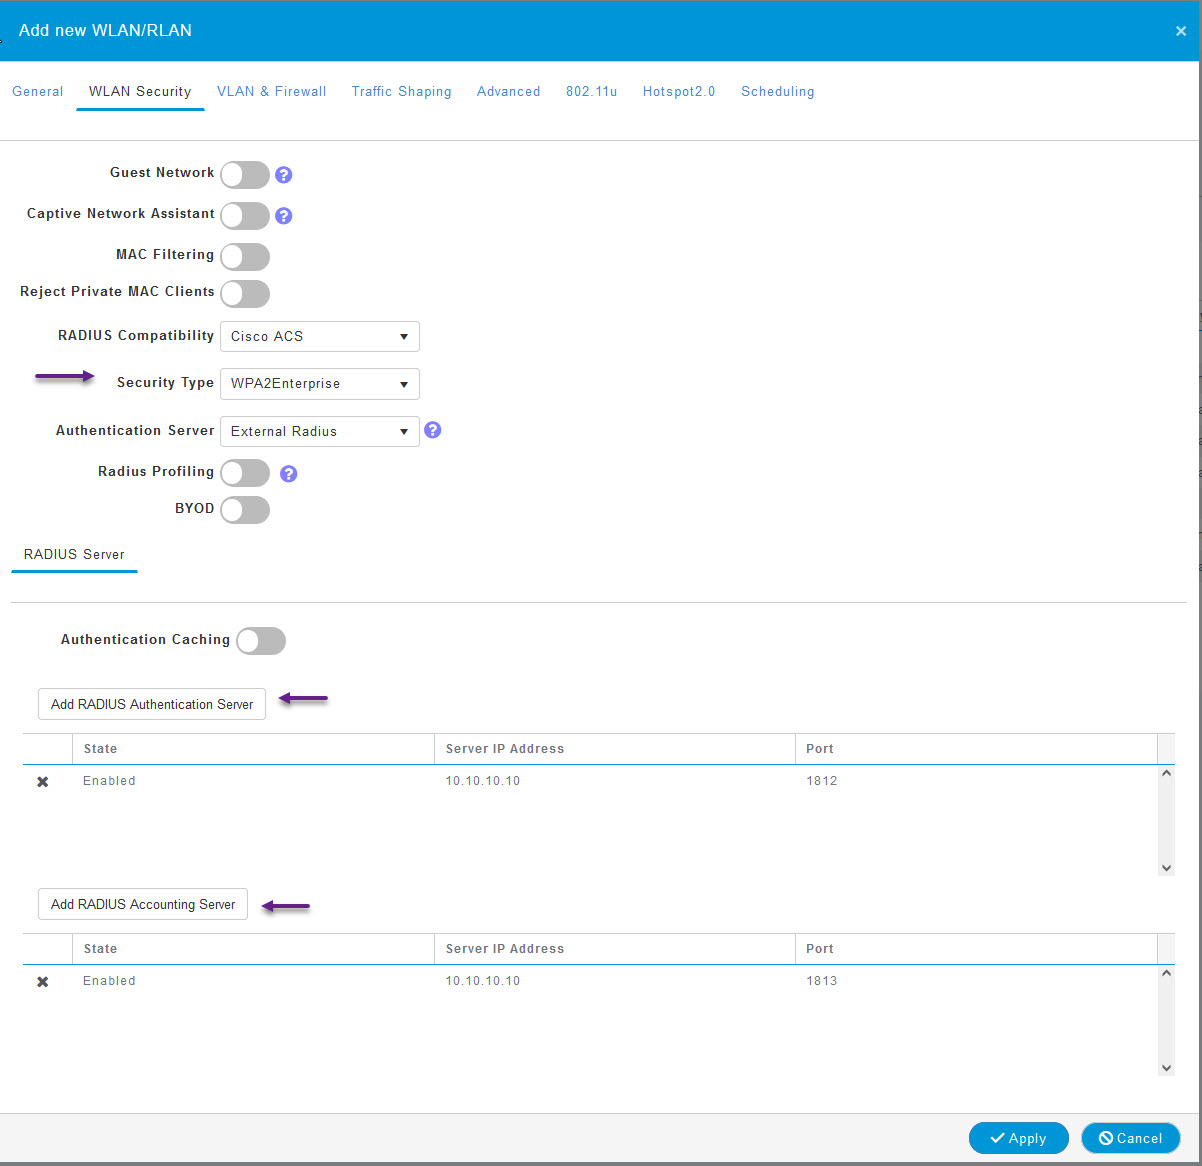
You can leave the reset as defaults and click Apply. You should now see your new SSID in the list of WLAN's. And that's it for the WLC configuration. Now you just need to create your certificates, upload them to your devices and connect to your WiFi.
Certificates
As with any EAP-TLS setup you will need to have certificates on everything. If you haven't configured ISE already with trusted certificates and a signed EAP-TLS server certificate, check out my previous post here on how to do so.
The process for user certificates is the same as for wired EAP-TLS. If you have your own PKI setup then you will know how to create user certificates however if you're using the PKI build I posted about then I will run through how to create and sign user certificates.
SSH into your ICA server (Or CA server if you only built a CA) as the pkiadmin user. Once in, change to the ica folder under the pkiadmin homedir, and edit the file openssl_user_csr.cnf.
[pkiadmin@WRMEMPKI02 ~]$ cd ica
[pkiadmin@WRMEMPKI02 ica]$ vi openssl_user_csr.cnf
Below is an example configuration of the openssl_user_csr.cnf file. You will need to change the settings to suit your network and user requirements. I've specified the password in this configuration file but you don't have to, you can enter the password manually. Make sure if you do specify the password, you remember it.
[ req ]
prompt                  = no
distinguished_name      = client
default_bits            = 4096
input_password          = MySecret123
output_password         = MySecret123

[client]
countryName             = AU
stateOrProvinceName     = Queensland
localityName            = Brisbane
organizationName        = WR-MEM
emailAddress            = wr-mem2@wr-mem.net
commonName              = "wr-mem2"
Now run the below openssl req command, to generate the user CSR that will need to be signed by the ICA server.
sudo openssl req -out requests/wr-mem2.csr -newkey rsa:4096 -nodes -keyout private/wr-mem2.key -config openssl_user_csr.cnf

pkiadmin@WRMEMPKI02 ica]$ sudo openssl req -out requests/wr-mem2.csr -newkey rsa:4096 -nodes -keyout private/wr-mem2.key -config openssl_user_csr.cnf
[sudo] password for pkiadmin:
...+.........+.+..+....+.........+.........+...+...+..+.......+............+.....+...+.............+.....+....+...+........+...+......+...+...+.......+.....+......+.......+..+.......+++++++++++++++++++++++++++++++++++++++++++++++++++++++++++++++++*..+...+.......+..+....+..+++++++++++++++++++++++++++++++++++++++++++++++++++++++++++++++++*..+.........+......+....+...+......+......+...........+...+....+......+.................+..........+............+......+.........+.....+............+..........+........+.+......+......+..............+....+..+....+.....+.+..+.......+.......................+.......+.....+....+..+.............+.....+.+.....+...+............+...+..................+.............+.........+..+.+.........+...+..+...+...+.......+......+...........+...+......+.........+.......+.....+.+........+.......+...+...........+.+...+..+..................+.+...+.....+.......+........+...............+...+.......+............+.....+.+.....+...+.......+..+...+............+.............+........+.......+...............+..+.+..+...+....+...+...............+........+..........+..+..................+....+.....+.+..+.......+.....+............+.+..+..........+...............+..+.............+......+...........+...+................+.........+..+...+............+...+..........+..+......+...+......+.............+.................+++++++++++++++++++++++++++++++++++++++++++++++++++++++++++++++++
...+........+....+.....+++++++++++++++++++++++++++++++++++++++++++++++++++++++++++++++++*......+.......+..+...+....+.........+...........+....+......+...+..+...+......+.+..................+...+..............+...+.......+...+..+.+.....+...+....+...+............+...+.........+.....+....+..+...+..........+............+...+..............+...+++++++++++++++++++++++++++++++++++++++++++++++++++++++++++++++++*.+................+...........+.........+......+.+.........+...+...+.....+..........+..+.+..+....+.....+......+.......+......+......+......+........+.+........+...+......................................................................+...+.........+..+...............+.+++++++++++++++++++++++++++++++++++++++++++++++++++++++++++++++++
-----
Finally, with the user CSR created, you will need to sign it. (Note that I am using the freerad_user_cert extension in my openssl.cnf file as this one includes the extra bits required by Windows for 802.1x authentication. If you've used my build guide, then you will have these extra extensions already.
sudo openssl ca -config openssl.cnf -extensions freerad_usr_cert -notext -in requests/wr-mem2.csr -out certs/wr-mem2.crt

[pkiadmin@WRMEMPKI02 ica]$ sudo openssl ca -config openssl.cnf -extensions freerad_usr_cert -notext -in requests/wr-mem2.csr -out certs/wr-mem2.crt
Using configuration from openssl.cnf
Enter pass phrase for /home/pkiadmin/ica/private/ica.key:
Check that the request matches the signature
Signature ok
Certificate Details:
        Serial Number:
            86:71:e6:eb:ba:87:91:7a:82:a3:2e:3e:cb:2d:1f:e3:5b:b9:04:b0
        Validity
            Not Before: Jan 13 05:32:41 2024 GMT
            Not After : Jan 21 05:32:41 2030 GMT
        Subject:
            countryName               = AU
            stateOrProvinceName       = Queensland
            localityName              = Brisbane
            organizationName          = WR-MEM
            commonName                = wr-mem2
            emailAddress              = wr-mem2@wr-mem.net
        X509v3 extensions:
            X509v3 Basic Constraints:
                CA:FALSE
            X509v3 Subject Key Identifier:
                F4:45:EA:0B:51:93:62:A8:63:D1:4A:1B:FB:41:50:D3:3C:64:24:D5
            X509v3 Authority Key Identifier:
                F5:0B:98:42:AD:2C:EC:59:8D:5A:FF:1F:5B:9B:C2:C4:B7:A7:7B:29
            X509v3 Key Usage: critical
                Digital Signature, Non Repudiation, Key Encipherment
            X509v3 Extended Key Usage:
                TLS Web Client Authentication
            X509v3 CRL Distribution Points:
                Full Name:
                  URI:http://crl.wr-mem.net/ica.crl.pem
Certificate is to be certified until Jan 21 05:32:41 2030 GMT (2200 days)
Sign the certificate? [y/n]:y


1 out of 1 certificate requests certified, commit? [y/n]y
Write out database with 1 new entries
Data Base Updated
[pkiadmin@WRMEMPKI02 ica]$
If you're using the certificates on a Windows machine, you will also need to convert them to pfx format which includes the private key. To do that use the following command. The password for this is the same password that you used to create the user certificate.
[pkiadmin@WRLABPKI02 ica]$ sudo openssl pkcs12 -export -out certs/wr-mem2.pfx -inkey private/wr-mem2.key -in certs/wr-mem2.crt -certfile ca-ica-chain.crt
Enter Export Password:
Verifying - Enter Export Password:
And if you're creating a certificate for an Android phone, you will need to convert it to a p12 certificate. To do that, use the following command
[pkiadmin@WRLABPKI02 ica]$ sudo openssl pkcs12 -export -out certs/wr-mem2.p12 -in certs/wr-mem2.crt -inkey private/wr-mem2.key
Configuring User Devices
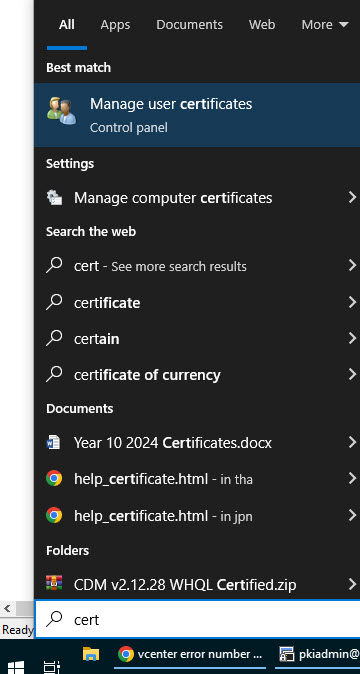
Okay, now that all our certificates are created, all that's left is to copy the certs to your end devices and connect to the WiFi. To connect to a Wireless EAP-TLS network in Windows, first add all of the required certificates. To add the CA and ICA certificates, click on the Start button and type in certificate. The search dialogue should bring up a Manage User Certificates application. Note that there is also a Manage Computer Certificates application but we want to manage user certificates for this configuration.
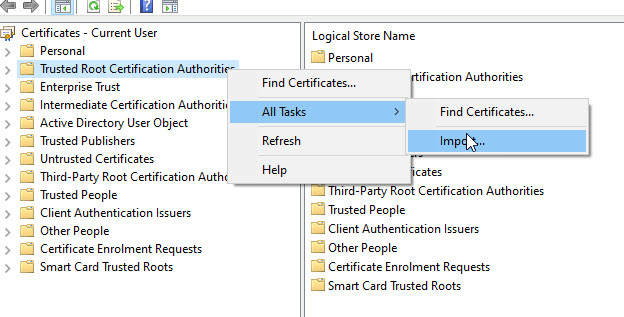
In the certmgr application, right click on Trusted Root Certification Authorities and select All Tasks -> Import.
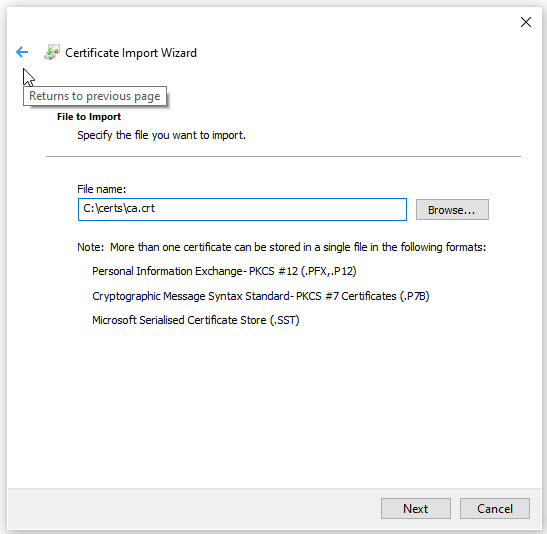
On the Certificate Import Wizard first page, select Next.

Click on the Browse button on the next page and locate your CA certificate. Once selected, click Next.
Leave the Certificate Store selection as default and click Next and on the last page, confirm the details and click Finish.

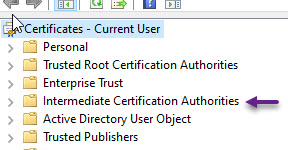
You will need to repeat this process for your ICA certificate under the Intermediate Certificate Authorities section in certmgr if you have an ICA.
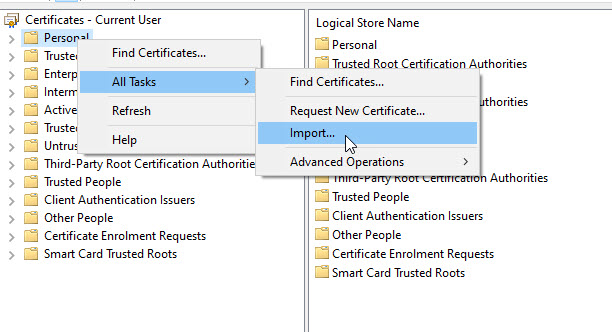
With the CA and ICA certificates imported and Trusted in the store. You will now need to import your user certificate. To do that, in certmgt, right click on Personal and select All Tasks -> Import.
On the first page of the Wizard, click Next

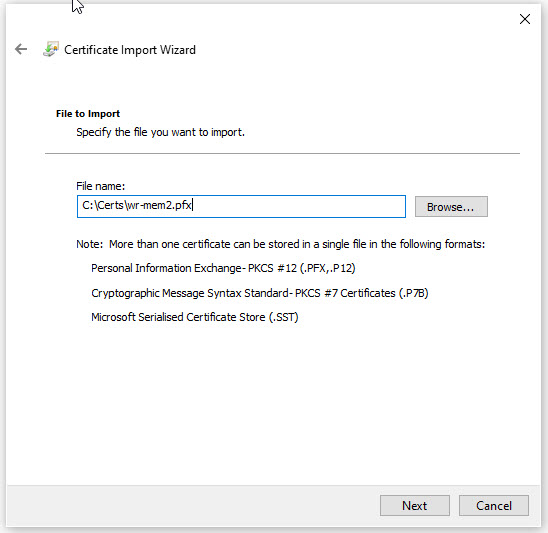
Click Browse and navigate to your user pfx certificate and click Next.
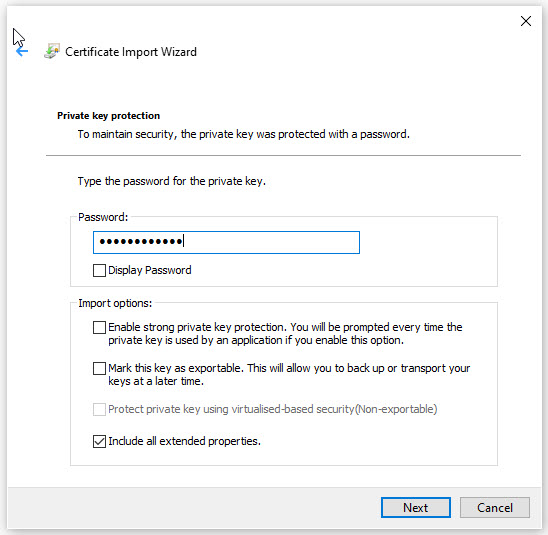
On the next screen, enter the user certificate password. This is the same password that you used to both create the user certificate and convert it to the pfx format.
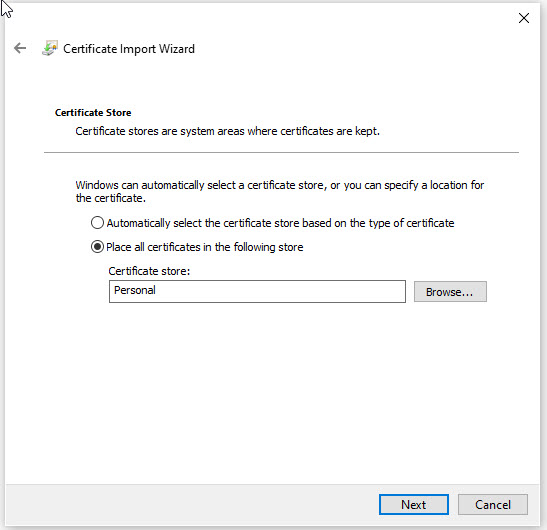
Leave the Certificate Store as the default, and click Next and the click Finish on the last page.
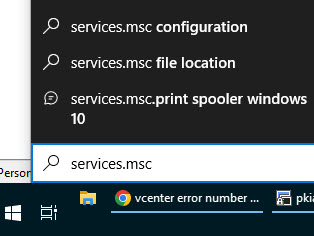
You should now have all the required certificates imported to your Windows PC. Now you will need to configure Windows for Wireless 802.1x authentication. To do that first you will need to start the WLAN AutoConfig service. Click the start button and type in services.msc and press enter.
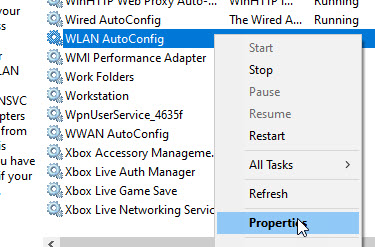
In the Services window, scroll down until you see WLAN AutoConfig and right click on it and select Properties.
On the service properties window, select the Startup type as Automatic, and click the Start button to start the service. Once done, click OK and close the services window.

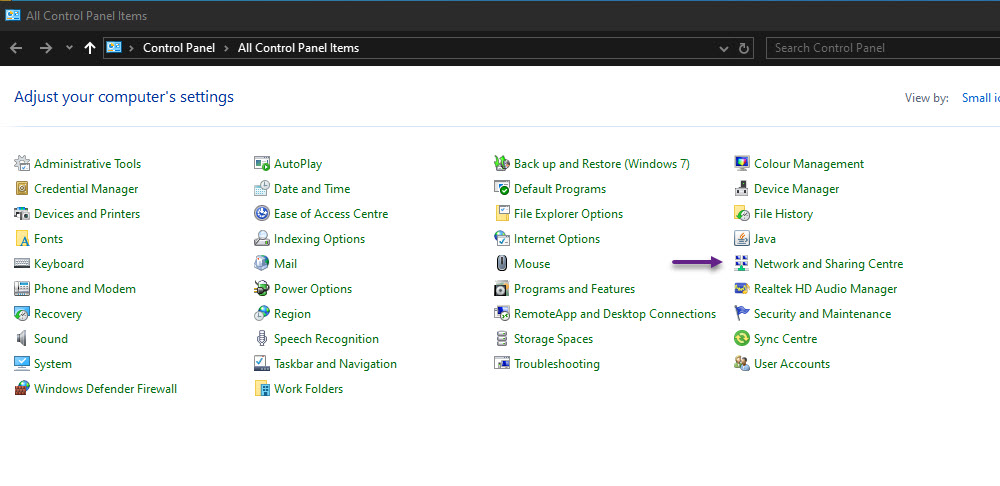
Now you will be able to configure Authentication under your Wireless adapter settings. To edit the settings, open up control panel and then browse to Network and Sharing Centre.
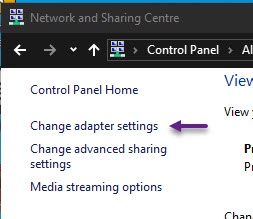
Click on Change adapter settings on the menu on the left.
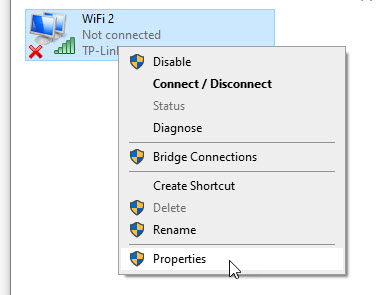
On the Network Connections window, right click on your Wireless adapter and click properties.
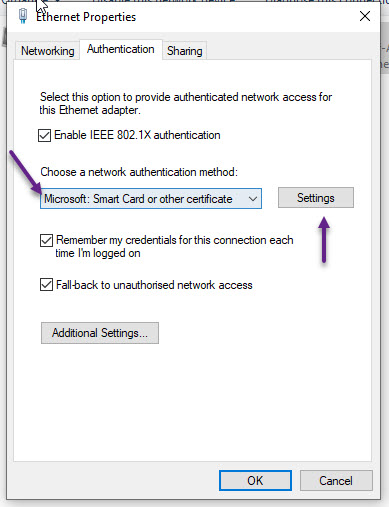
Click on the Authentication tab and under Choose a network authentication method, select Microsoft: Smart Card or other certificate from the drop down and then click the Settings button. Also make sure that you tick the Remember my credentials for this connection each time i'm logged in on the Wireless Adapter Properties window.
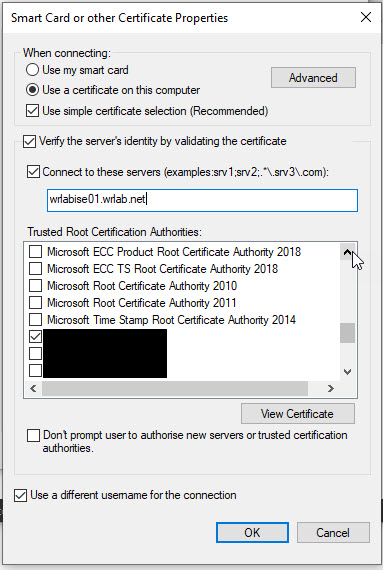
Most of the settings should be okay by default but ensure that you have Use a certificate on this computer selected and Use simple certificate selection ticked as well. Also enable Verify the server's identity by validating the certificate. You can also enable the Connect to these servers tick box and specify the FQDN of your Radius Server here. This should match the certificate FQDN. And lastly, under the Trusted Root Certification Authorities, scroll down the list till you find your CA certificate, and tick the check box next to it.
Once done, click OK, and OK again to exit out of all of the configuration setting and you're ready to go. You should now be able to connect your PC to your EAP-TLS Wireless Network. One thing I'll mention is that if you experience issues connecting, on the Smart Card or other Certificate Properties window, you may need to set some of the Advanced options regarding certificate selection. Open the Advanced options and tick Certificate Issuer and scroll down the list and tick the boxes that specify your CA and ICA server certificate. Once done click OK.
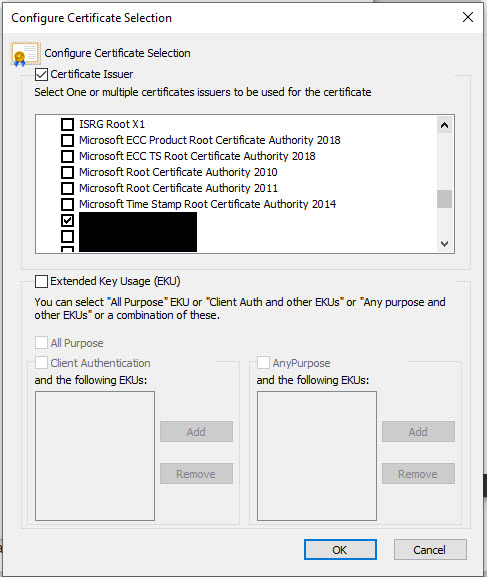
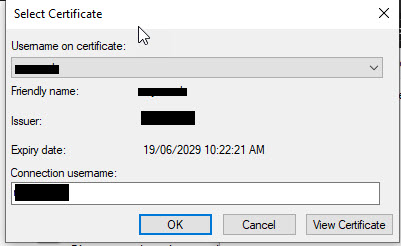
Note that if you have multiple user certificates installed on your PC and have selected multiple Certificate Issuer in the Advanced options you will be prompted to select a certificate to use to authenticate.
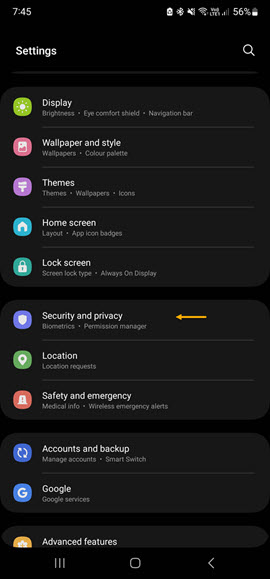
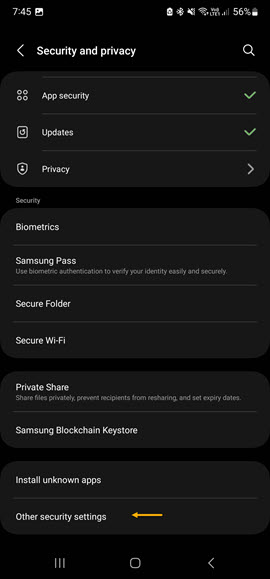
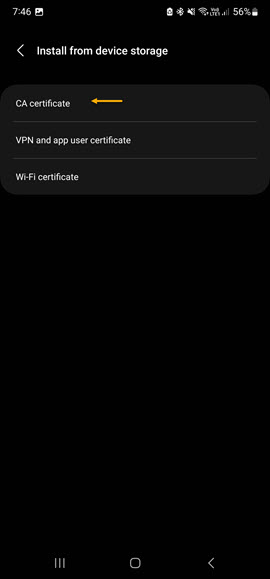
To configure an Android phone, Samsung in particular, for Wireless EAP-TLS, you will need to copy the CA/ICA certificates and the user p12 certificate to the phone. Once you've copied them navigate to Settings -> Security & Privacy -> Other Security Settings -> Install from device storage.
 |  | 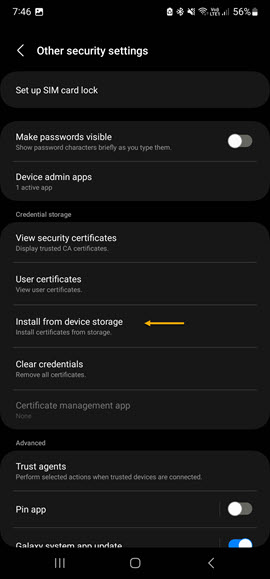 |
From the next screen select CA certificate option. You will be prompted with an are you sure message, just click Install anyway. You will then be prompted for your pin/finger print for security measures, Once you've authenticated to the phone, browse to where you saved the CA/ICA certificate and press Done.
 |  |
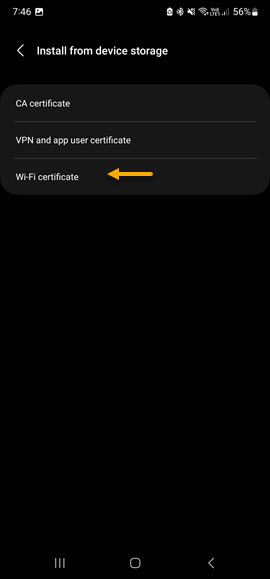
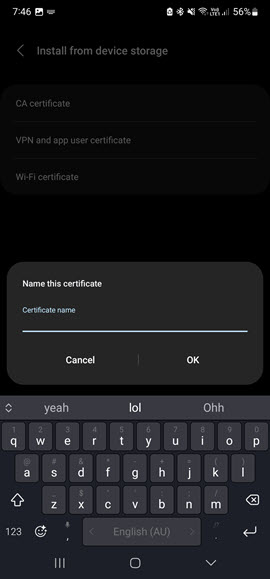
Now press on Wi-Fi Certificate option and again navigate to where you saved the CA/ICA certificate file (Not sure why but you also need to import it here, maybe you don't need to do the CA part in the previous step but i haven't tested that yet) Once you've selected the certificate, press done to install it. When you press Done, you will be prompted to enter a name for the certificate. Give it a name that you can recognise and press OK.
 |  |
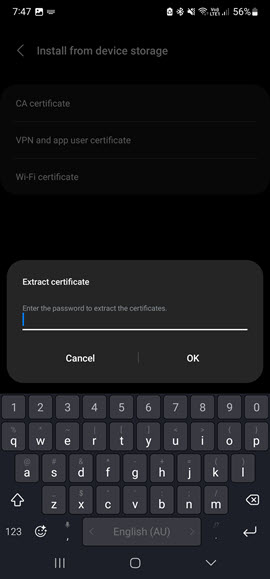
Repeat the Wi-Fi Certificate install process again but this time select the user certificate that you created and downloaded to the phone. You will be prompted for a password this time. This password is the User Certificate password that you entered in the openssl_user.cnf file. Enter the password and press OK.
 |  |
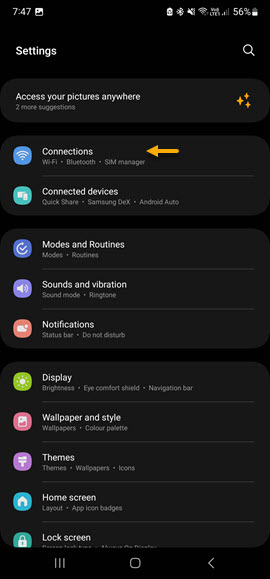
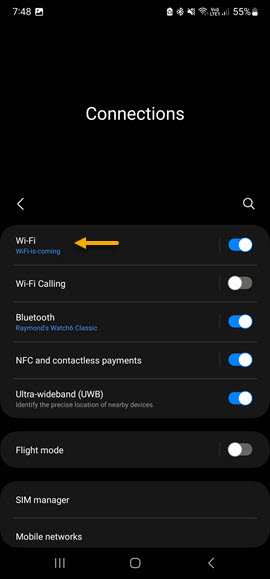
Once all of the certificates are imported, Navigate to your WiFi connection settings and select the SSID that you created for EAP-TLS authentication. To access the Wireless network settings, navigate to Settings -> Connections -> Wi-Fi and select the SSID.
 |  | 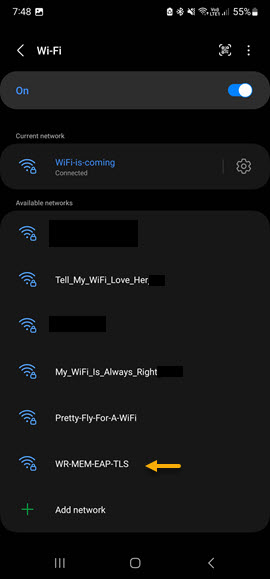 |
On the WiFi options page configure the authentication as follows
- EAP Method: TLS
- Identity: This is the certificate username
- CA Certificate: The CA certificate you installed in the Install Certificates section
- Online certificate status: Request Status for all certificates
- Domain: the domain name that the certificate is for ie. wr-mem.net
- User Certificate: Select the user certificate you imported in the certificate steps

You can also alter the View more settings if you wish to do so. Once you're done, click Connect and you should now be connected to your EAP-TLS SSID.
That's it for today. Thanks for checking out my blog. If you've noticed anything missing or have any issues setting this up, please leave a comment and let me know.
Add new comment