Nexus 9000v Physical Network Connectivity
I've finally managed to get it to work. The N9Kv switch physical connectivity issues i've been having are no more. The issue was, that with the Nexus Switch image, the default interface MAC addresses for the data ports, isn't pulled from the ESXi host. They are default Cisco MAC addresses and this creates issues with actual physical network connectivity to your network because, ESXi doesn't know where to send frames destined to the MAC address that to ESX, doesn't exist. This makes sense if you think about it, but I had thought that allowing MAC Address changes in ESX would have resolved this issue but it doesn't seem to. In order to get actual network conectivity to your physical network, you will need to change the Nexus N9Kv switch port to an L3 port by issuing the no switchport command. You will then need to statically configure the port MAC Address using the command mac-address xxxx.xxxx.xxxx on the switch interface. To help explain this, I will be using the below topology. In this LAB, the device R1 is my actual physical home Router (Cisco 1113) and the device Switch1 is my physical switch (Cisco 3560x). I have already configured the SVI on R1 and the necessary VLANs on R1 and Switch1 here so I won't go through that part of the configuration, just know that R1 SVI has the IP 10.200.200.1/30.
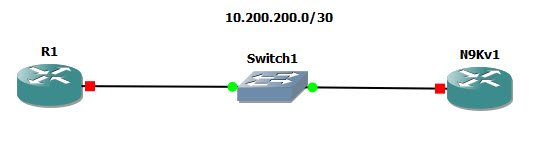
Also remember that the N9Kv1 device is a VM on an ESXi host, so the port connected to the switch is a Trunk port.
Add the vSwitch Port Group
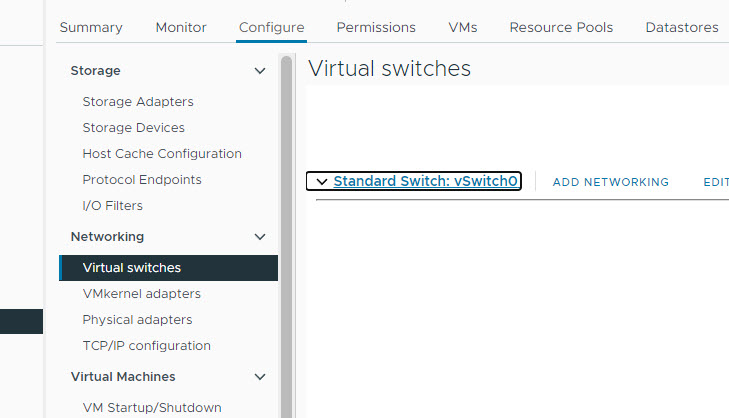
The first step here is to add the required vSwitch Port Group for the VLAN that you want to connect to your physical network. For this Lab the VLAN is 2200. To add the vSwitch, log into vCentre (Or your ESXi Host if you don't have vCentre) and select the ESXi Host that you want to configure. From here, in the ESXi host section, select the Configure Tab, and then under Networking, select Virtual switches. Under the Standard Switch: vSwitch0 (Or whatever your vswitch is) select ADD NETWORKING.
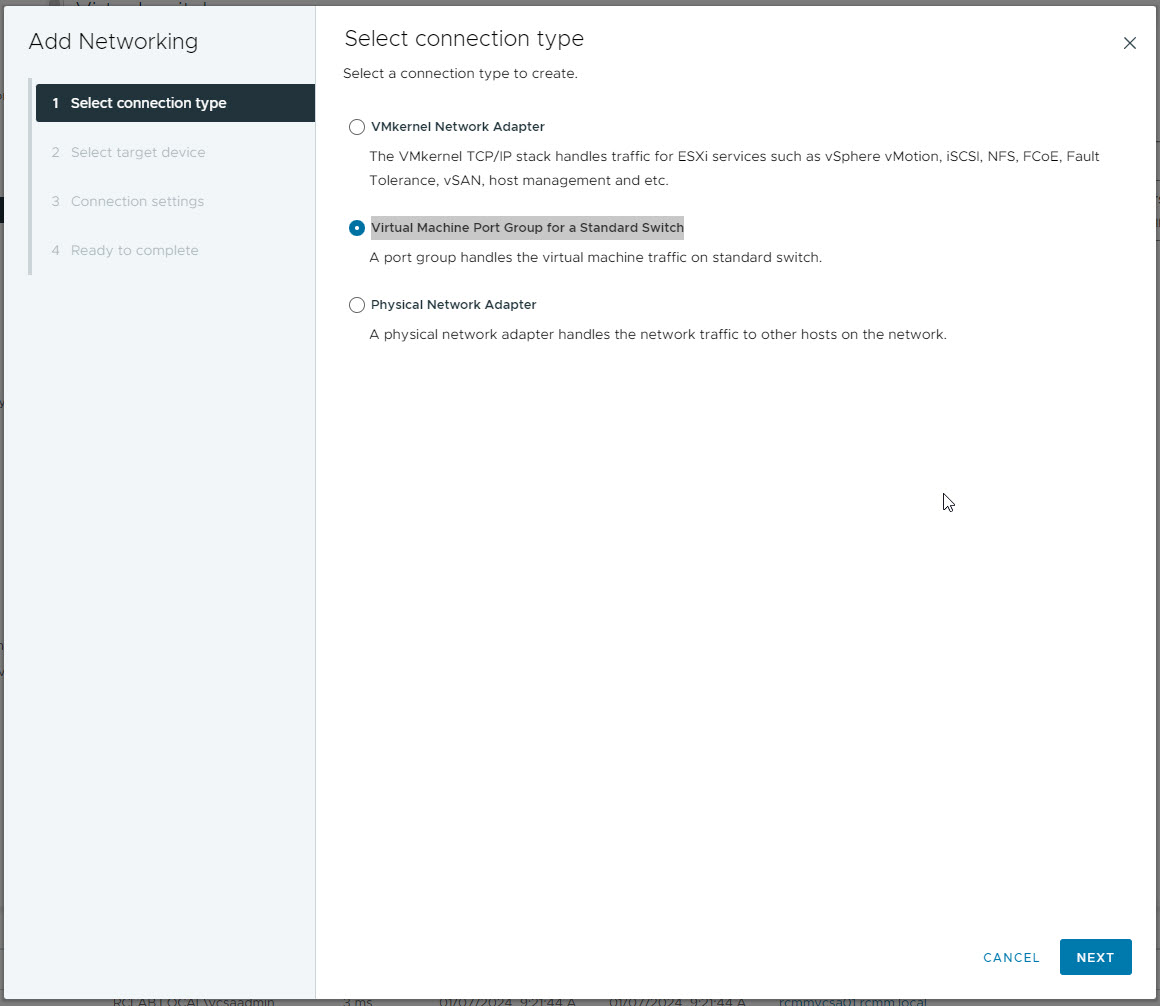
On the Select Connection Type page, select Virtual Machine Port Group for a Standard Switch and click NEXT.
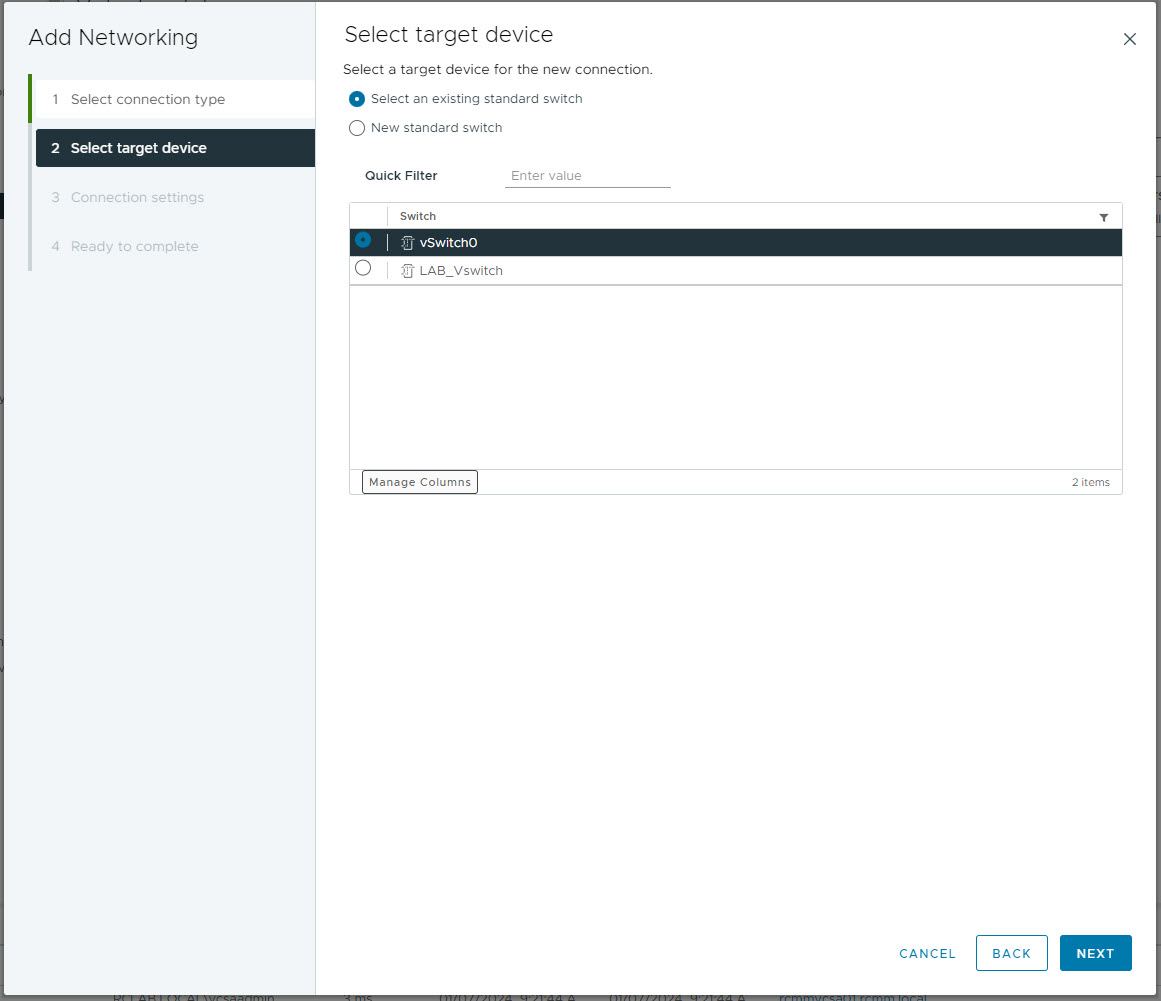
Select the target device vSwitch or create a new one if that's what you're intending on doing and once done, click NEXT.
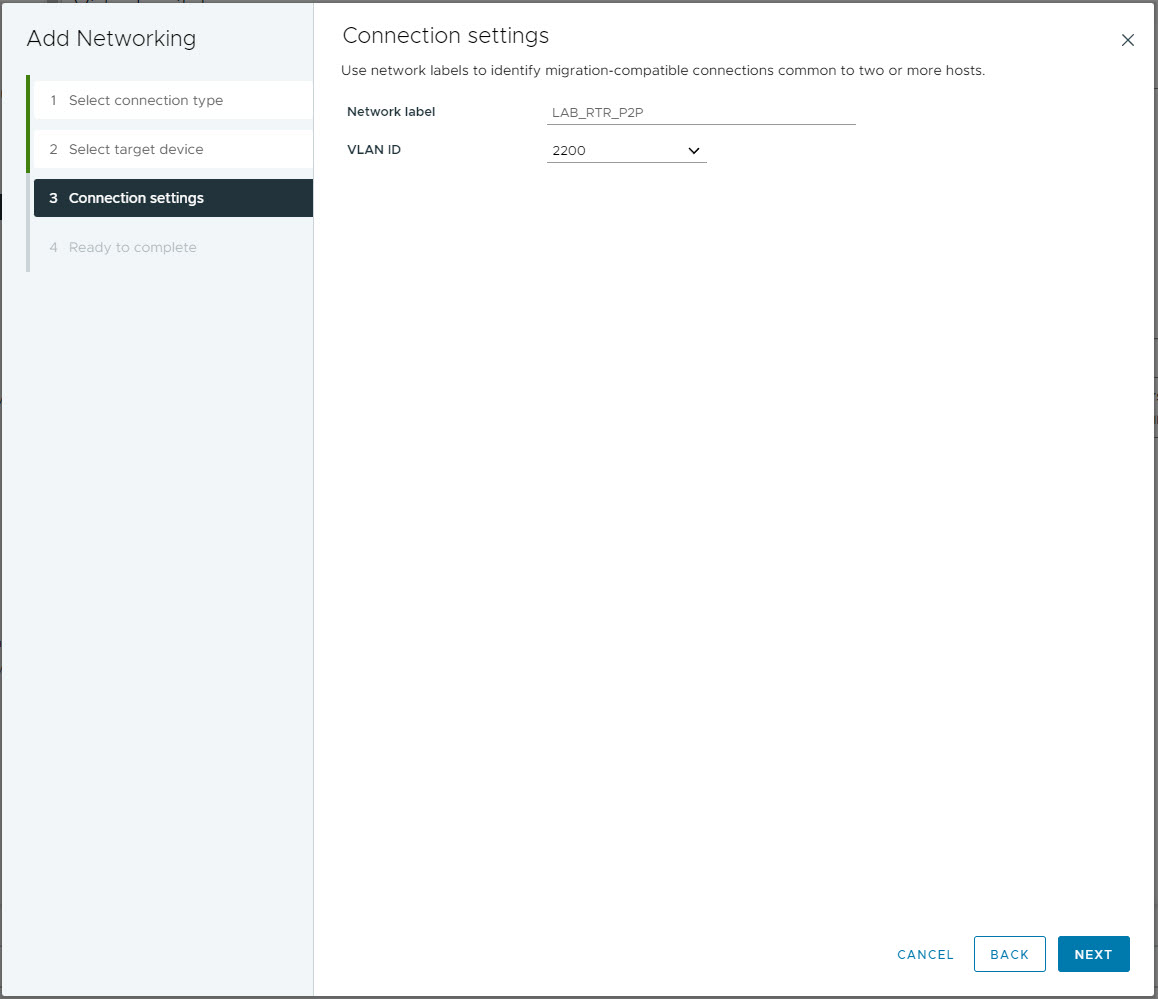
Give the Port Group a name, and enter the required VLAN. As i mentioned, i've configured VLAN 2200 in my LAB for this network. Once done, click NEXT
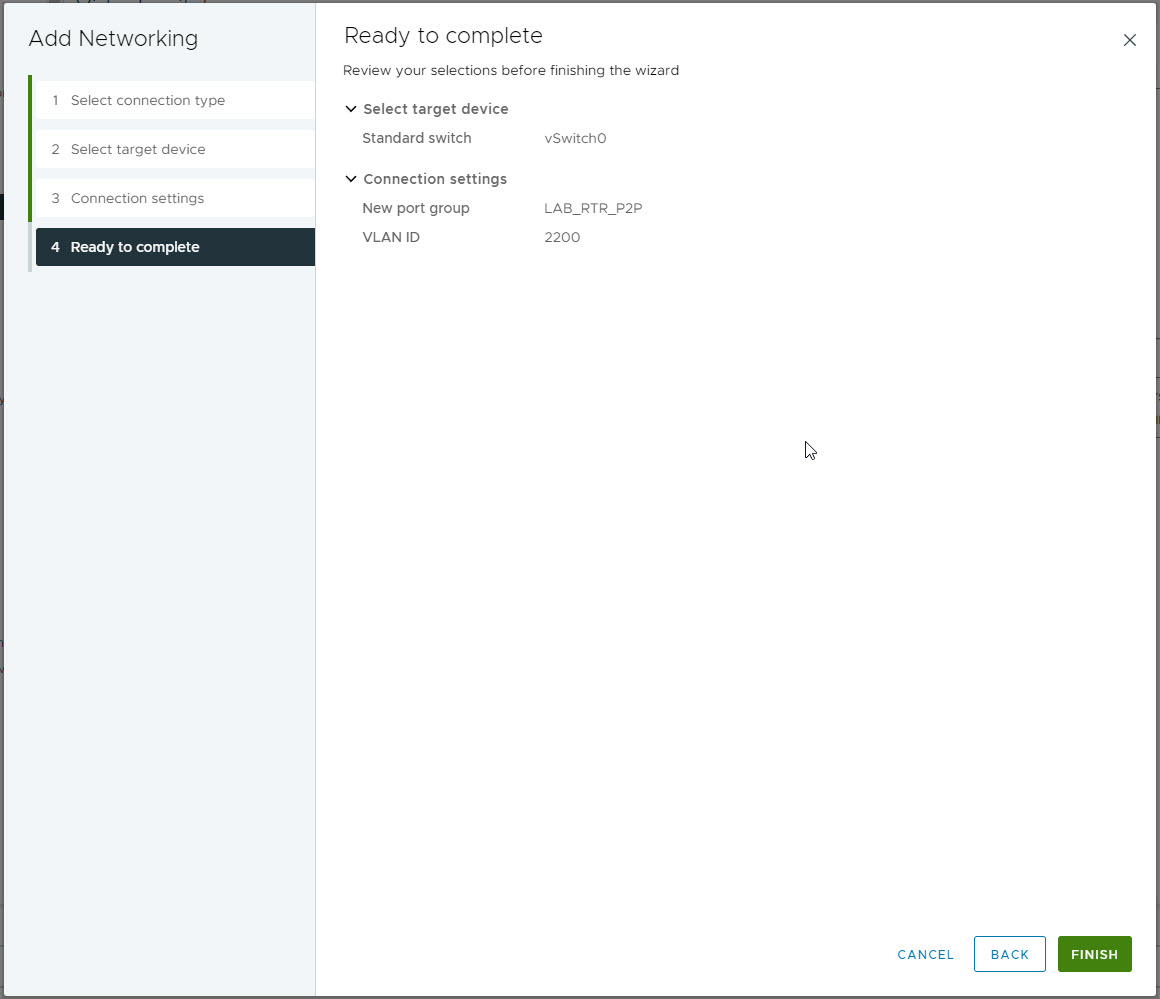
On the Ready to complete page, confirm all of the details and click FINISH.
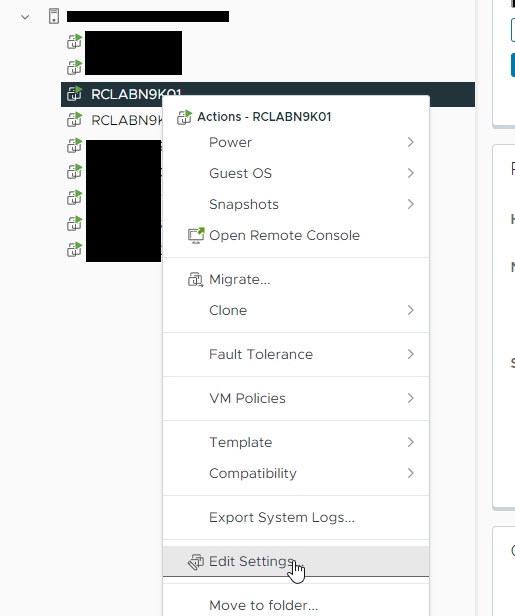
Now that you have your network, you will need to configure the N9Kv switch port for that specific network. Right click on the switch VM and select edit settings.
Under Network adapter 2 (Or whatever Ethernet port you're configuring) select the drop down and then select the newly created Port Group.
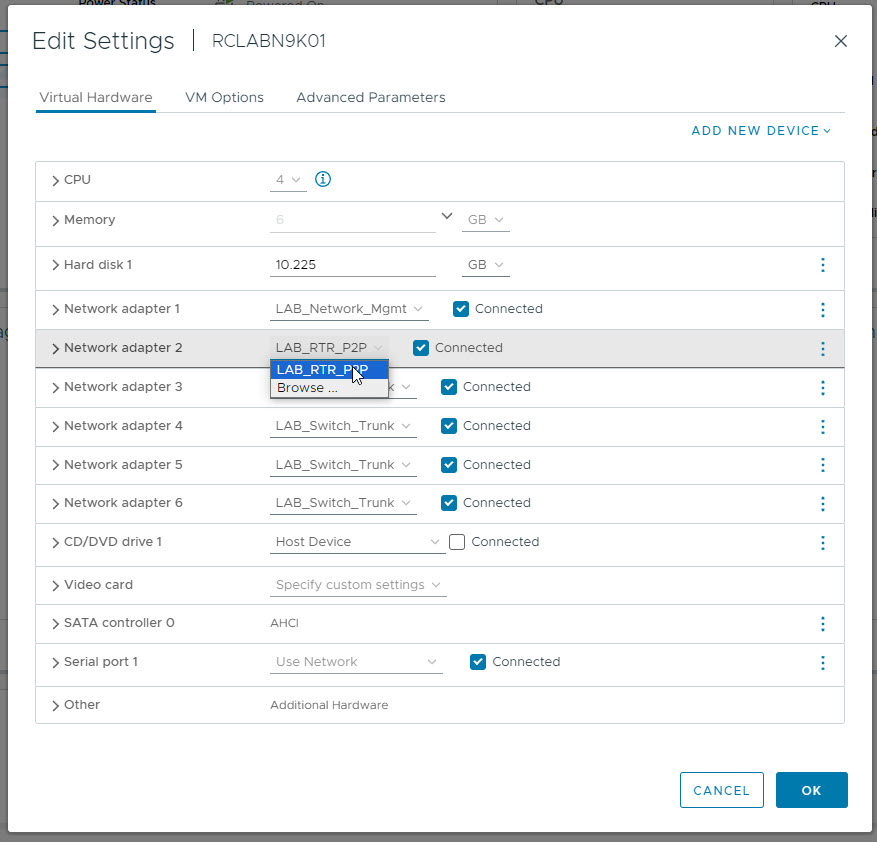
While you're on this page, also expand the Network Adapter and take note of the device MAC address as we will need to configure the port with this MAC address.
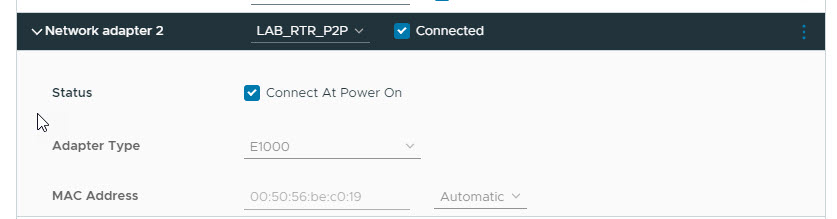
Once done, click OK on the Edit VM Settings page.
Configure your N9Kv Switch
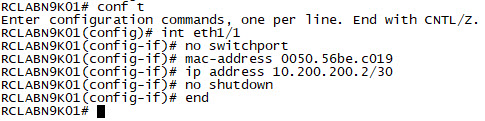
The next step is to configure the Nexus N9Kv switch port with the required details. This is a pretty straight forward configuration. First enter Interface configuration mode, and disable L2 by using the command no switchport. Once done, configure the MAC address and your static IP address for the port as below.
And that's it. You should now be able to ping your physical device.
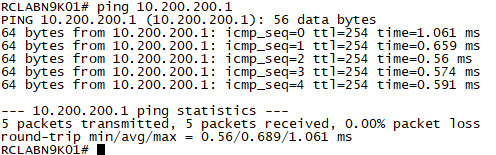
You should now have connectivity from your N9Kv switch to your physical network. This will allow you full connectivity to your Virtual Switch network in order to establish BGP or OSPF adjacencies with your physical hardware. I've configured my lab as such where my N9Kv switch 1 is the gateway to my physical network and all other virtual switches have a default route pointing to it. This allows me to access and network configured within the LAB environment as long as I have a route to it from my physical router.
Add new comment