Cisco ISE dACL configuration
In my previous Blog posts i've talked about wired and wireless 802.1x authentication. In this post, i'm going to run through adding a dACL to that configuration.
dACL's (Downloadable ACL) are a way of configuring port based ACL's on a switch to allow and deny access based on a users authorisation profile when using 802.1x. When a user connects to an 802.1x enabled switch port, and you have a predefined ACL configured on that port allowing only specific access to DHCP or a PXE server for example, then using Cisco ISE (Or other radius server) you can send a dACL attribute to tell the switch the apply specific ACL's to that users port. This also means that if you do specify an ACL on a switch port, and a user authenticates to the network, unless you have a dACL configured on your Radius server, that user will still only have access to the network based on the default ACL you have configured. I have been caught out with this before when I was playing around. I had a default ACL applied to the port that I had forgotten about and no dACL in the Authorisation profile. Took me a while to work out why I could get to some websites (www.cisco.com for example) but not others and why I could also still ping everywhere. Turns out cisco.com resolves to an IPv6 address so that's why I could access that, and the default ACL I had applied allowed ICMP so that explains why I could ping everywhere.
Okay so let's take a look a at how dACL's work and how to apply them. Say we have the following ACL configured on an 802.1x enabled switch port
permit udp any any eq domain
permit udp any any eq bootpc
permit udp any any eq bootps
deny ip any any
This ACL will allow DNS, and DHCP requests to be sent through but then denies everything else. When a user connects to the switch port, they will be able to obtain an IP address, and reach the DNS server but that's it. Now let's say that this user has an authorisation profile that applies the following dACL.
permit tcp any any eq 8080
permit udp any any eq dns
permit tcp any any eq smtp
permit tcp any any eq 22
deny ip any any
Once the user authenticates, the dACL is sent to the switch and applied to that users port. The above ACL would then only allow that user to be able to access a proxy server (port 8080), DNS, SMTP and SSH. While the switch port will still show that the first ACL is physically configured on the switch, the output of the show auth sessions int <interface> command, will show that a dACL has been applied.
WRMEMSW01#sh run int g0/1
interface GigabitEthernet0/1
 ip access-group DOT1X in


WRMEMSW01#sh auth sessions int g0/1
            Interface:  GigabitEthernet0/1
          MAC Address:  34dc.42ff.3a60
           IP Address:  10.10.10.110
            User-Name:  wr-mem1
               Status:  Authz Success
               Domain:  DATA
      Security Policy:  Should Secure
      Security Status:  Unsecure
       Oper host mode:  multi-auth
     Oper control dir:  both
        Authorized By:  Authentication Server
          Vlan Policy:  10
              ACS ACL:  xACSACLx-IP-PERMIT_ALL_IPV4_TRAFFIC-57f6b0d3
      Session timeout:  N/A
         Idle timeout:  N/A
    Common Session ID:  AC10C7020000004C03616B6E
      Acct Session ID:  0x00000053
               Handle:  0x9600004D

Runnable methods list:
       Method   State
       dot1x    Authc Success
       mab      Not run

WRMEMSW01#sh ip access-lists
Extended IP access list xACSACLx-IP-PERMIT_ALL_IPV4_TRAFFIC-57f6b0d3 (per-user)
    10 permit ip any any
As you can see, using port based ACL's and dACLs, can be an easy way to provide extra security on your network and easily allow access to certain parts based on a user profile. So let's take a look at how to configure a dACL in Cisco ISE. For reference this is the basic topology for this configuration.
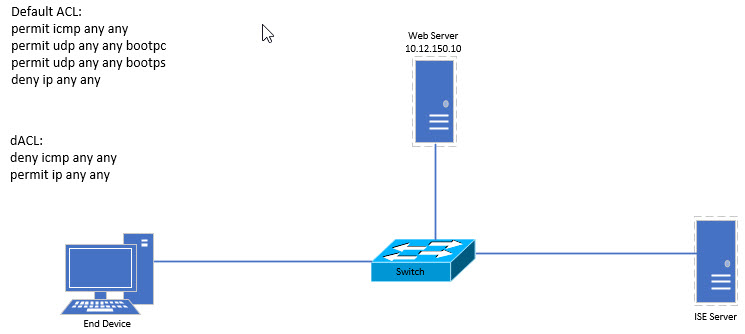
This configuration uses a default ACL that will permit ICMP and DHCP requests but deny everything else. Once the user has authenticated, the dACL will deny ICMP access to the network and permit all other access. Let's start by configuring the default ACL. Let's call it DOT1X_DEFAULT
WRMEMSW01#conf t
Enter configuration commands, one per line.  End with CNTL/Z.
WRMEMSW01(config)#ip access-list extended DOT1X_DEFAULT
WRMEMSW01(config-ext-nacl)#ermit icmp any any
WRMEMSW01(config-ext-nacl)#permit udp any any eq bootpc
WRMEMSW01(config-ext-nacl)#permit udp any any eq bootps
WRMEMSW01(config-ext-nacl)#deny   ip any any
Okay, now that we have the default ACL configured, let's configure a switch port with the default ACL.
WRMEMSW01#conf t
Enter configuration commands, one per line.  End with CNTL/Z.
WRMEMSW01(config)#int g0/1
WRMEMSW01(config-if)#ip access DOT1X_DEFAULT in
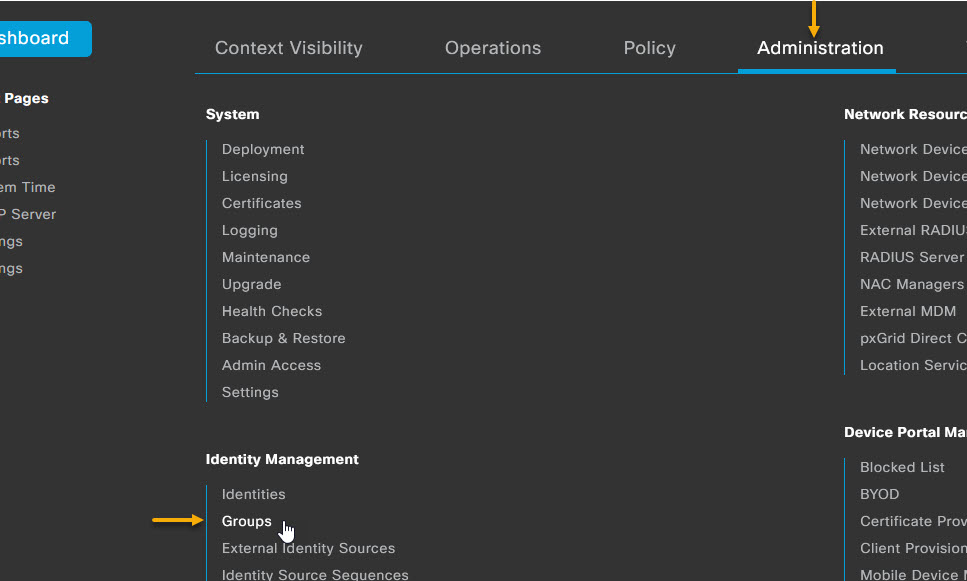
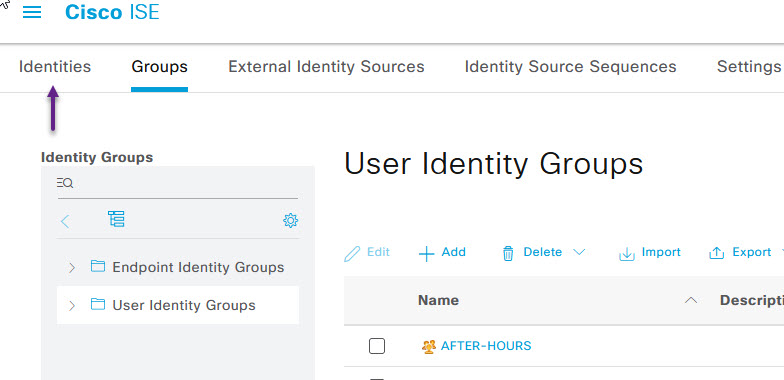
Okay, that's the switch side done. Let's move on to the ISE configuration. To start with, I'm going to create a user group called DENY_ICMP. To do that, navigate to Administration -> Identity Management -> Groups
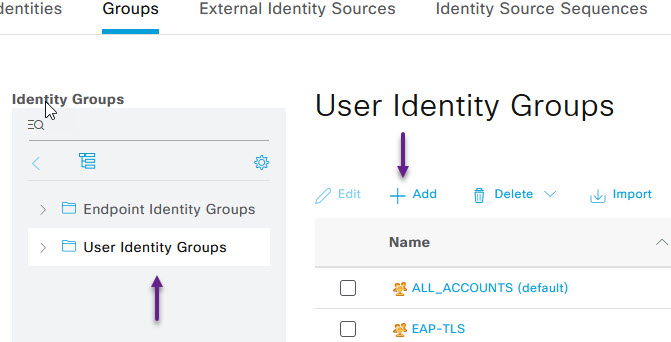
On the Groups page, select User Identity Groups from the menu on the left and click on the + Add to create a new group.
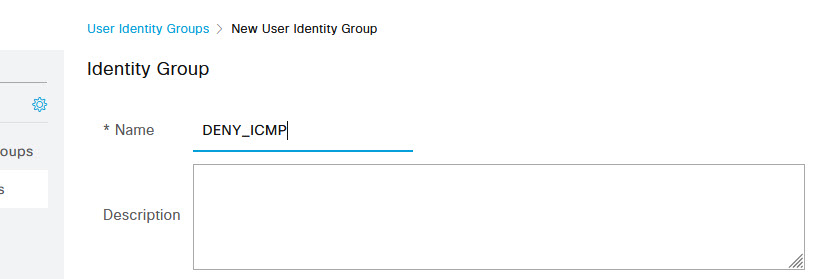
On the new Identity Group page, give it a name and a description if you like and click Submit.
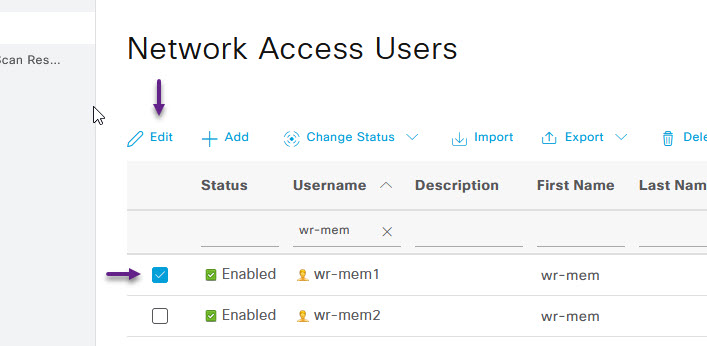
Now we can add a user to that group. I'm going to use the same user I configured for the wired 802.1x post, wr-mem1. To add a user to a group, from the User Identity Groups page, select Identities from the menu at the top.
From here, you can either create a new user, or select an existing user. Once selected click on the Edit button.
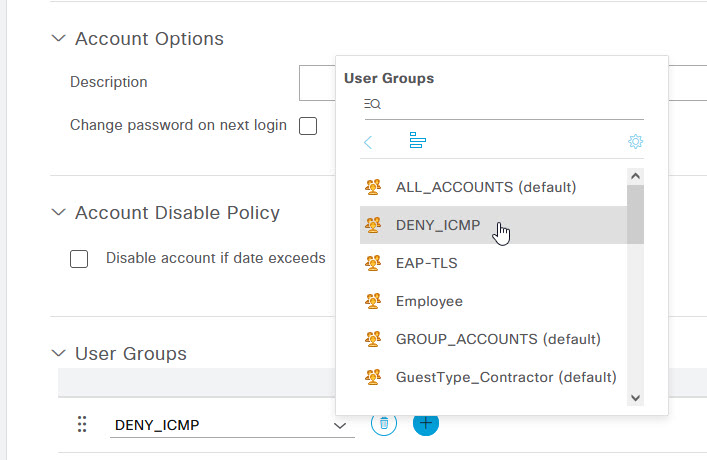
Scroll down to the bottom of the User page and select the User Groups drop down. From the drop down select the new group that was created. Once done, click Save.
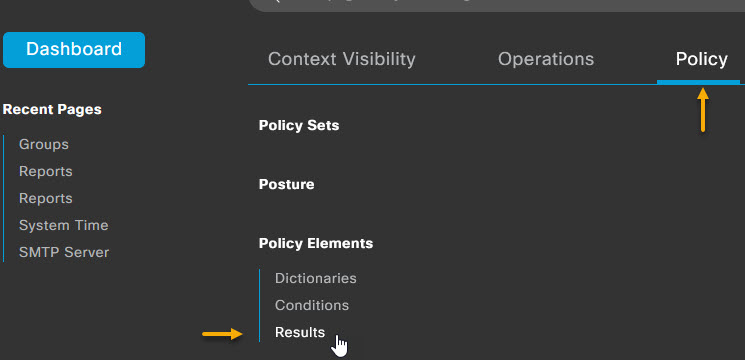
Okay that's the user done. The next step is to create the dACL and the Authorisation Profile for the DENY_ICMP group. Navigate to Policy -> Policy Elements -> Results
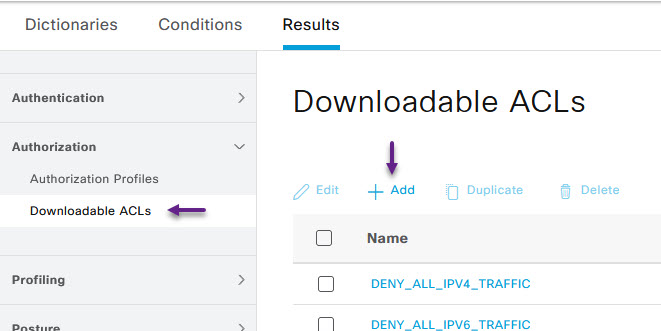
From the menu on the left, select Authorization -> Downloadable ACLs and on the Downloadable ACL's page, click + Add
Give the dACL a name and select IPv4. Now in the DACL Content field, you must enter the full ACL commands as it would be in the running configuration. Once you're done expand the Check DACL Syntax to confirm that the DACL is valid and then click Save

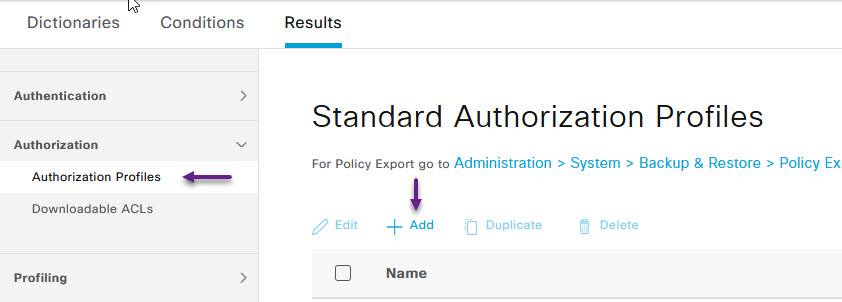
Now we can create an Authorisation profile to assign the DACL to. In the menu on the left, Navigate to Authorization -> Authorization Profiles. On the Standard Authorization Profiles page, click the + Add to create a new profile.
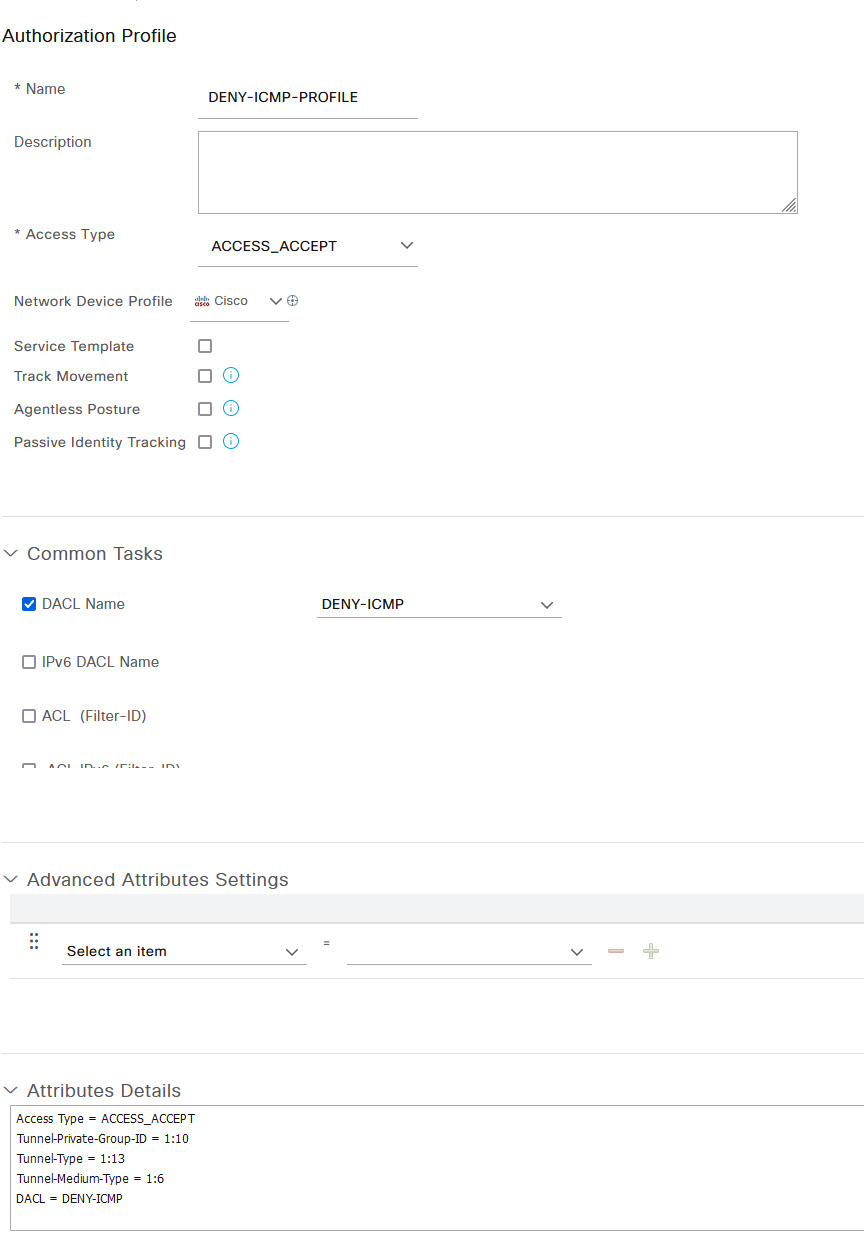
Give the profile a name such as DENY-ICMP-PROFILE and under Common Tasks, select DACL and then from the drop down, select the DENY-ICMP dACL that you created. The rest can be left as defaults however I've added a VLAN to my configuration as that's how my switch port 802.1x configuration is set. I'll go through this in another blog. Once done, click Submit.
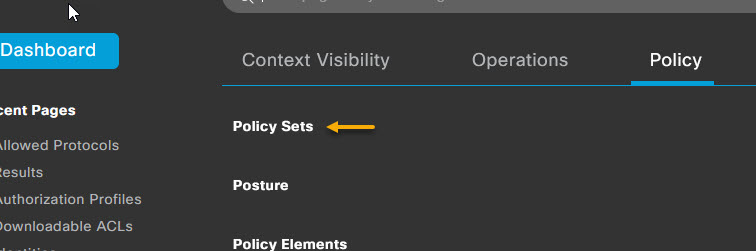
Okay, with the dACL and authorisation profile configured, all that's left is to configure the Radius policy. To do that, navigate to Policy -> Policy Sets
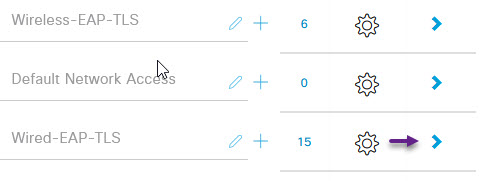
On the Policy Sets page, select the > arrow on the Wired 802.1x policy set.
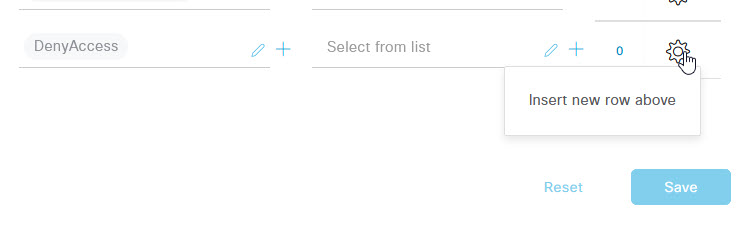
On the Wired 802.1x Policy page, expand the Authorization Policy section, and on the Default rule, click the cog on the right of the page, and select Insert new row above.
In the new rule line, on the left hand side, give the rule a name and under the Profiles column, select the DENY-ICMP-PROFILE option from the drop down. Lastly, click the + to add a new condition for this rule.

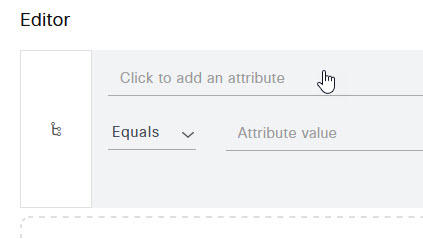
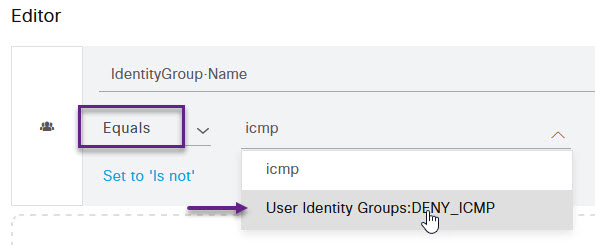
On the Conditions Studio page, we're going to click the Click to add an attribute line to add our User group.
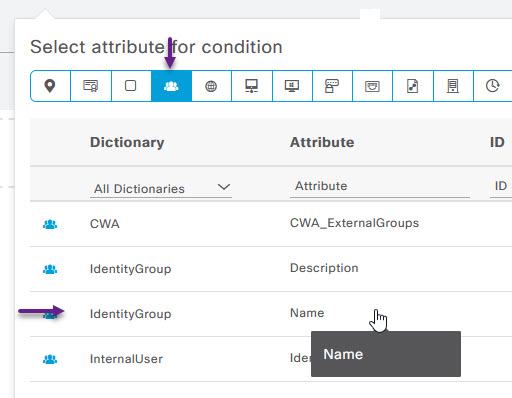
On the Select attribute for condition page, click the option at the top that looks like a group of people, then from the list, select IdentityGroup Name.
Ensure that the option for matching is set to Equals, and then select the DENY_ICMP group from the drop down list.
Once done, scroll down to the bottom of the conditions studio page and click Use. This will bring you back to the Policy page. You can now click Save.

That's it. If you connect to the network as the user in the DENY_ICMP group, you should have full network access but not able to ping anywhere. Let's confirm. My PC is connected to port G0/1 of the switch. I have disconnected my port and reconnected and the port has successfully authenticated. If I now take a look at the ISE Radius logs, you can see the successful authentication, and the ACL download log entry.

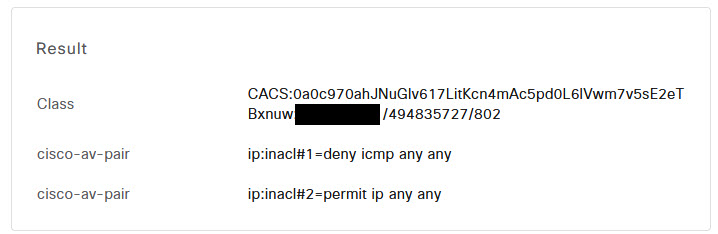
If you click on the details of the log entry and scroll to the bottom, you can see the ACL that was downloaded to the switch port.
And if you log into the switch and enter the command show auth session int <interface> you can see the ACL name that was downloaded along with all of the other 802.1x information.
WRMEMSW01#sh auth sess int g0/1
            Interface:  GigabitEthernet0/1
          MAC Address:  34dc.42ff.3a60
           IP Address:  10.10.10.110
            User-Name:  wr-mem1
               Status:  Authz Success
               Domain:  DATA
      Security Policy:  Should Secure
      Security Status:  Unsecure
       Oper host mode:  multi-auth
     Oper control dir:  both
        Authorized By:  Authentication Server
          Vlan Policy:  10
              ACS ACL:  xACSACLx-IP-DENY-ICMP-65ab9c22
      Session timeout:  N/A
         Idle timeout:  N/A
    Common Session ID:  AC10C702000000BF1506CD74
      Acct Session ID:  0x0000017B
               Handle:  0x5A0000C0

Runnable methods list:
       Method   State
       dot1x    Authc Success
       mab      Not run
You can also see the details of the ACL that is applied by using the show ip access-list command.
WRMEMSW01#sh ip acces xACSACLx-IP-DENY-ICMP-65ab9c22
Extended IP access list xACSACLx-IP-DENY-ICMP-65ab9c22 (per-user)
    10 deny icmp any any
    20 permit ip any any
Well, that's it for dACL's for this post. There are some limitations to dACLs like you can't have more than 4096 lines of ACL code, but in all honesty, if you have that many lines, you should be using SGT's or something else anyway. Also another one that I know off the top of my head is you must use an any in the source of the ACE. I would like to note, that i've yet to get dACLs to work when specifying things like a time-range command as well. Not sure if that's just because of the model switch i'm using or not but the ACL doesn't seem to apply correctly when i add the time-range command. If/when i get it to work, i'll be sure to update.
If you've noticed anything missing or have any issues setting this up, please leave a comment and let me know.
Add new comment