Palo Alto Firewall Backups using API
I've been playing around with API's on my Palo Alto firewall a bit lately and have been looking for a way to automate backing them up in my home network as any good engineer should. I was doing the slow and silly manual thing by regularly logging in and exporting the device state and configuration and also do the same thing any time I made any changes and that's just not ideal for many reasons, the main one being it relied on me actually remembering to do it. So I figured since i'm currently looking into automation and Ansible etc, why not try using API's to backup my firewalls. As it turns out, this is actually really easy to do and only took me about 10 minutes to get the API setup and write a simple batch script to use curl to schedule the backups of the firewall device state and running config.
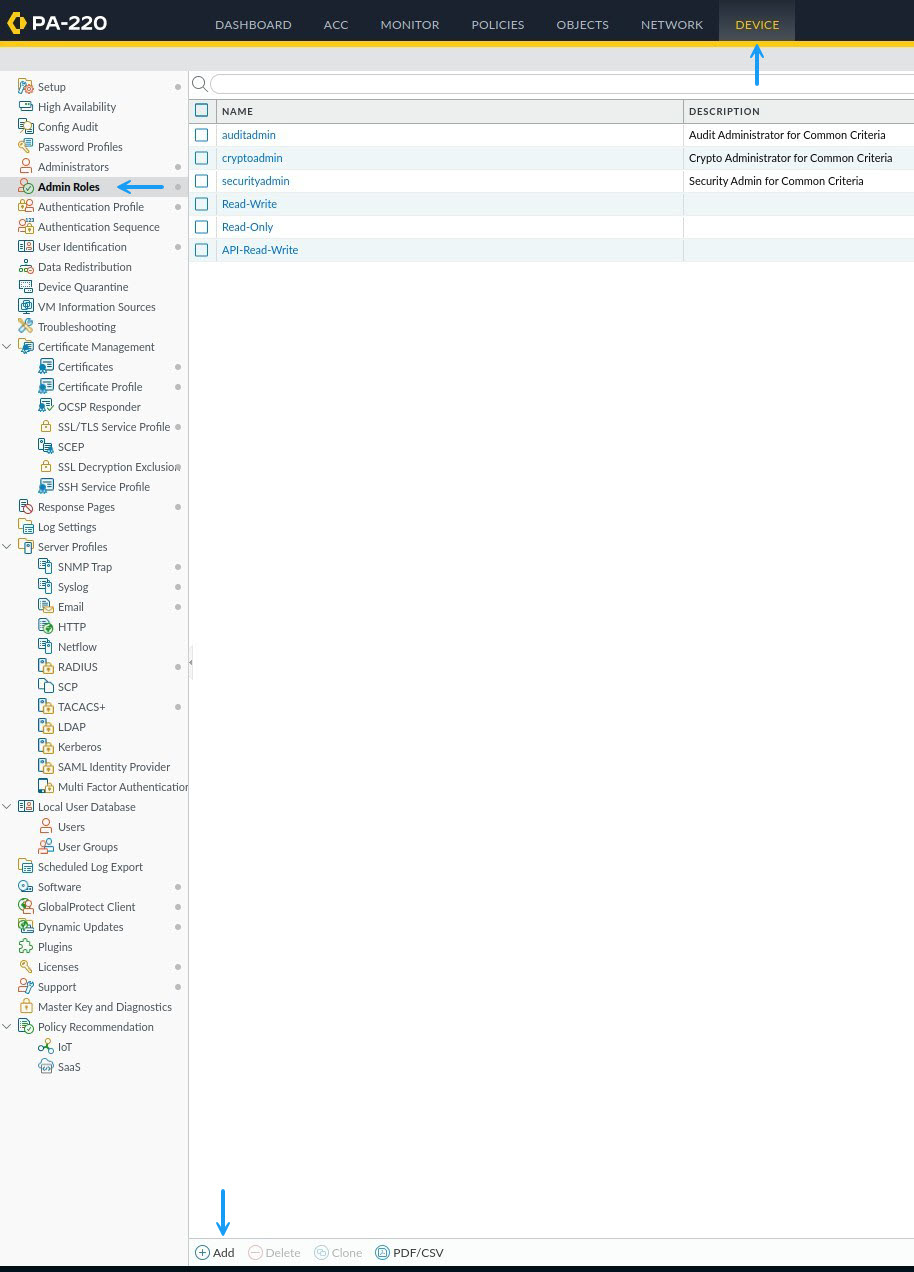
To get started, first you will need to setup the API user and get your API Keys. There are a couple of ways to go about this. You can use an existing role that is configured on your PA that has API access permissions or you can create a new admin role that allows API access and API access only. I'd already setup a user profile that was API access only, so I'll run through how to do that. My original user has Read/Write access so I'll create one for Read Only access here. To begin, log into your firewall and navigate to Device -> Admin Roles and click Add to create a new role.
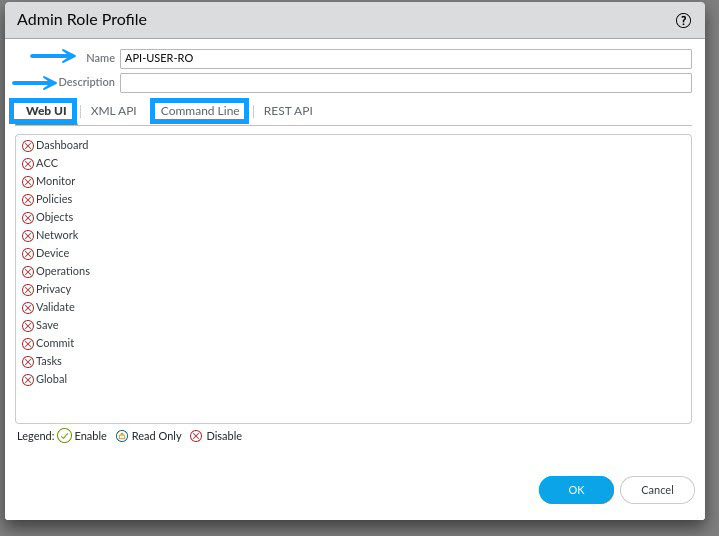
In the Admin Role Profile window, give the profile a name and a description. As I mentioned earlier, I already have a Read/Write role so I will be creating a Read Only role. Next, given this is an API specific role, you can disable all of the access for Web UI and command line as it's not needed here.
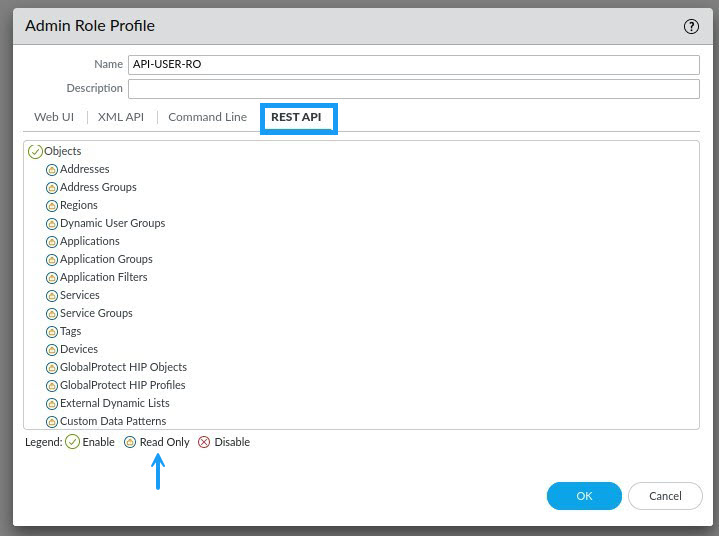
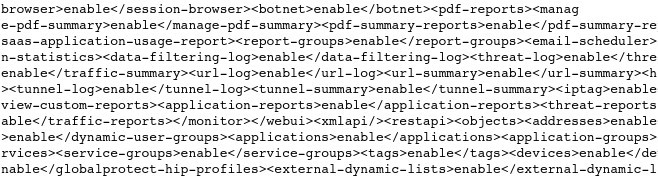
Next, on the REST API tab, select the options you want to enable for API access and the type of access. For RO access, set them to Read Only and for RW access set them to show a Tick. Because this is a Read Only account for me, I'm going to make all access read only.
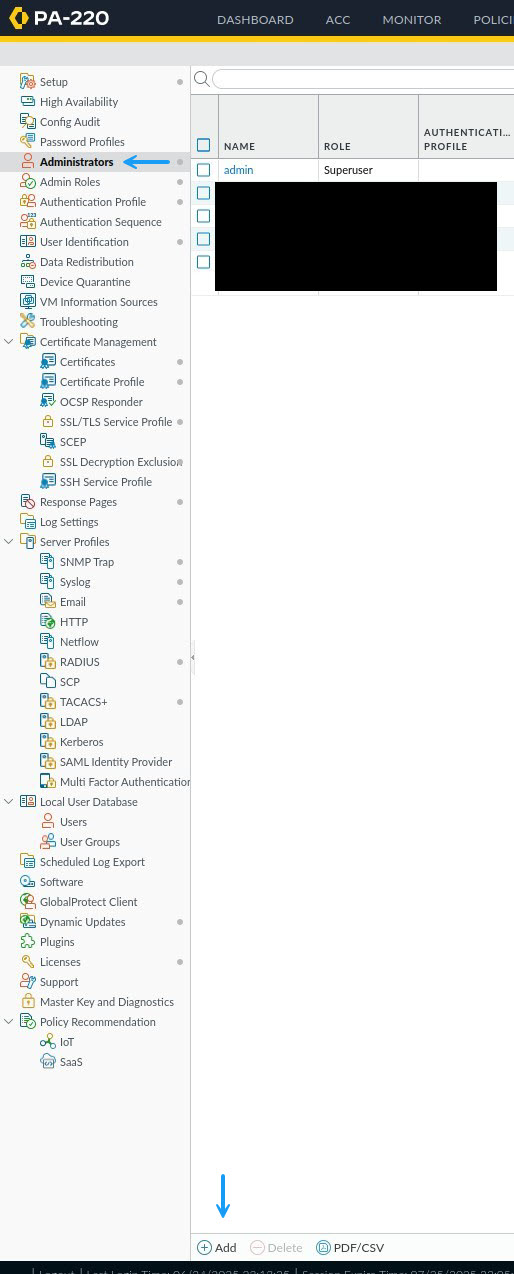
Now that you have your roles created, you need to assign the role to a user. Once again, you can either create a new user, or assign the role to an existing user. Navigate to Administrators from the Device tab and click Add to create a new user.
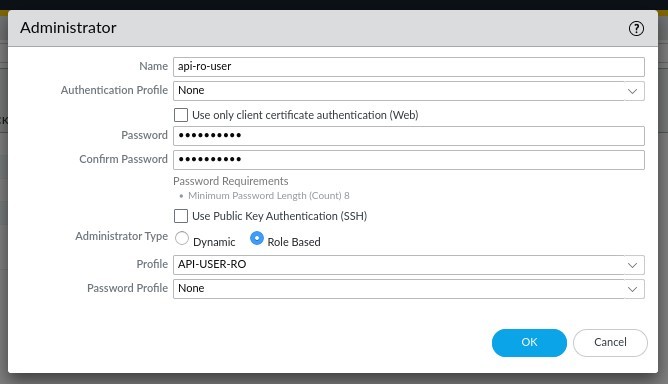
In the Administrators window, enter the username and a password or select a password profile if you have one. Next under administrator type, select role based and in the profile drop down, select the role that you created in the previous steps. Once done, click OK.
Once that's done, you can commit the changes to the firewall. The next thing to do is to get your API key for the user. To do that, use curl to access the following API on the firewall.
[ray@wrlabansbl01 ~]$ curl -k -X POST 'https://wrlabfw01.wr-mem.local/api/?type=keygen&user=api-ro-user&password=S3cr3tp@ss'
<response status = 'success'><result><key>Ljs8IYGBN9bdKJHGandlJs802nzkisjw3ndJ8Nsoqzx6uNUVYbjvHuVndk83bzindJaWNCOenMvZXBFR1JTOTduWHA1Yw==</key></result></response>
[ray@wrlabansbl01 ~]$
As you can see in the output of the curl command between the <key> </key> flags is the API key itself. Note that this includes the == at the end. You will need to copy this API key for use in any of your other scripts or if you're using it, in your Ansible playbooks. Remember do not share your API key with anyone!! On that note, for obvious reasons this is not the real user name, password or API key.
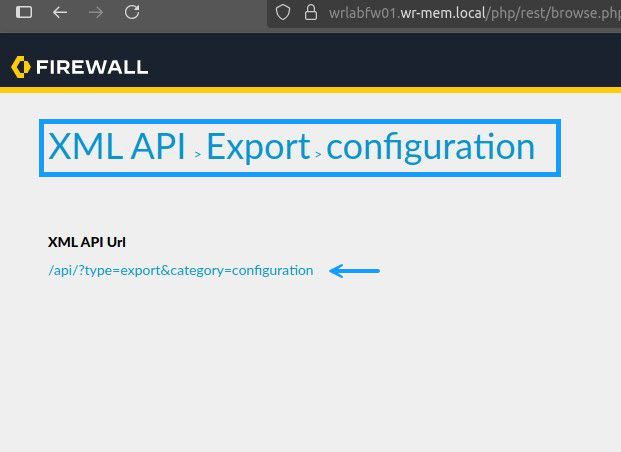
Now that you have your API key, you can use curl to do all sorts of things on these firewalls. In fact if you navigate to your firewalls Web GUI and add /api to the end of the url, you can browse all of the available API commands. Of course you have to be logged into the firewall first to be able to access the page.

On the API page, if you navigate through the menu options, you will see an API link at the bottom of the page. This is what you need to execute for your API command. For example, we want to export the configuration of the firewall, so if you click on Export -> Configuration, you will see at the bottom of the page, the link to use for your curl command.
Now that you have all of the pieces to the puzzle, it's time to put them together. Creating a curl command for this is as simple as combining the firewall FQDN with the API URL path, followed by the API key. In the example above the firewall FQDN is https://wrlabfw01.wrlab.local, the API URL is /api/?type=export&category=configuration and the API key is Ljs8IYGBN9bdKJHGandlJs802nzkisjw3ndJ8Nsoqzx6uNUVYbjvHuVndk83bzindJaWNCOenMvZXBFR1JTOTduWHA1Yw==. So let's put this all together into a single URL. https://wrlabfw01.wrlab.local/api/?type=export&category=configuration&key=Ljs8IYGBN9bdKJHGandlJs802nzkisjw3ndJ8Nsoqzx6uNUVYbjvHuVndk83bzindJaWNCOenMvZXBFR1JTOTduWHA1Yw==. Note that you need to add &key= before the API key for the command to work. Now let's test the command by running curl -kG followed by the API URL.
As you can see this spat out a whole bunch of XML which is how the Palo Alto firewalls export their configuration. All you need to do now is redirect this output to a file. Let's run that again, however this time, redirect it to a file called wrlabfw01-backup.cfg.
[ray@wrlabansbl01 ~]$ curl -kG "https://wrlabfw01.wr-mem.local/api/?type=export&category=configuration&key=Ljs8IYGBN9bdKJHGandlJs802nzkisjw3ndJ8Nsoqzx6uNUVYbjvHuVndk83bzindJaWNCOenMvZXBFR1JTOTduWHA1Yw==" > ./wrlabfw01-backup.cfg
  % Total    % Received % Xferd  Average Speed   Time    Time     Time  Current
                                 Dload  Upload   Total   Spent    Left  Speed
100  168k    0  168k    0     0  48133      0 --:--:--  0:00:03 --:--:-- 48133
And that's it. You can now use API requests to create a backup of the current configuration from the firewall and save it to your local server. All that's left to do now is to create a simple batch script and run it as a cron job to automate your firewall backups on a regular basis.
Thanks for checking out my blog. If you've noticed anything missing or have any issues setting this up, please leave a comment and let me know.
Add new comment