Replace Palo Alto Firewall Web-UI Certificate
I've been playing around with my lab firewall lately testing some API stuff and I decided to walk through how to update the firewall Web GUI certificate with one that is signed by a trusted CA, which in my case, is my own home PKI servers. If you would like to build your own PKI server, then please see my post here.
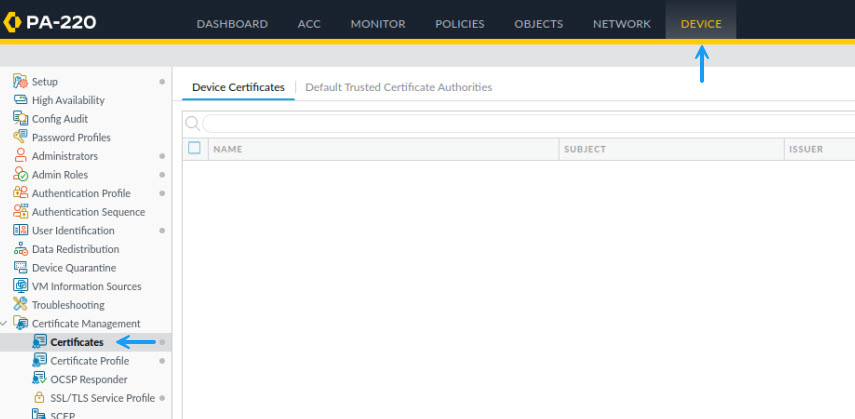
This is a pretty simple process which includes generating a CSR on the Palo Alto firewall, exporting the CSR to your pki server for signing and then importing that signed certificate back to the firewall. To start, log into your firewall and navigate to Device -> Certificate Management -> Certificates and click on Generate.

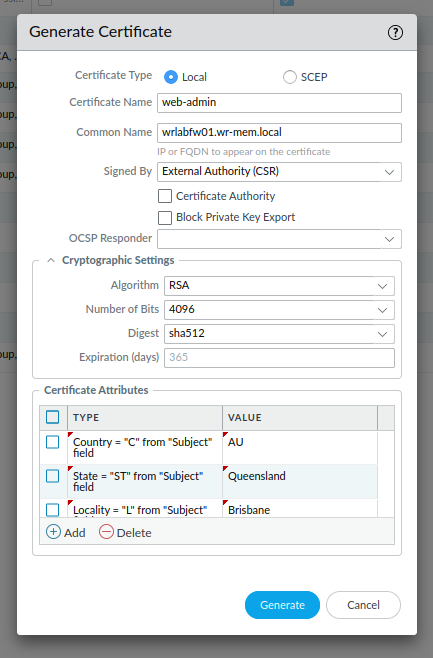
In the Generate Certificate window, fill in the certificate name, common name and select signed by an external Authority (CSR). You can also modify the certificate cryptographic settings or leave them as default. Once that's done, under the certificate attributes section, add all of the required attributes, for example, you can add the certificate Country, State, email address etc. These will depend on what your CA requires for a valid certificate. The important thing to add here is the DNS entries (SAN names) for the certificate and if you want the IP address of the host as well. Once done, click Generate.
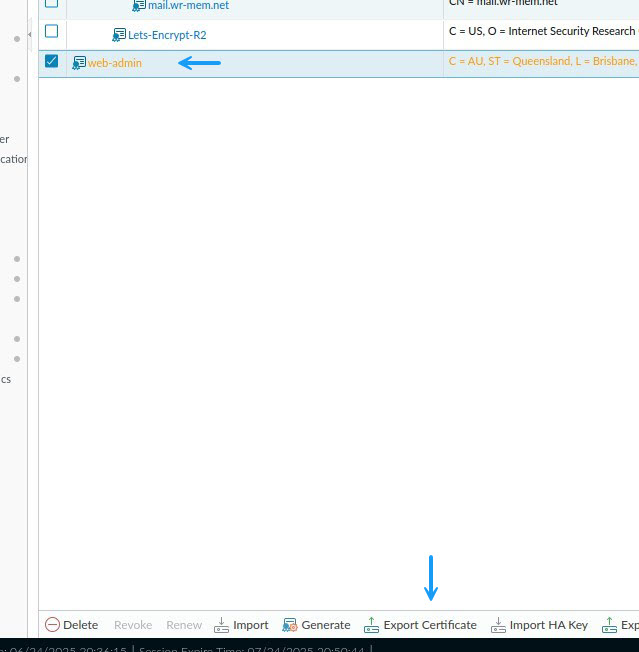
Once the CSR has been created, you will need to export it and get it signed by your CA server. This process will depend on your CA setup but once it's signed, you will need to input it again. To export the CSR, select the newly generated CSR certificate and click on Export Certificate. This will export the CSR request ready for signing.
Once the CSR has been signed and you have it saved on your PC or where you can access it, click on import on the certificates page.
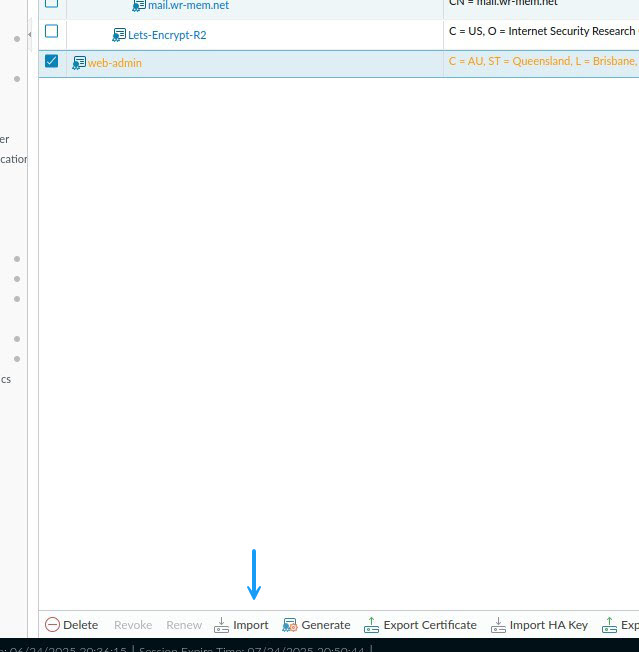
In the import certificate window, the certificate name must be the same as what you configured when you generated the CSR. Browse to the signed certificate file and once done click OK.

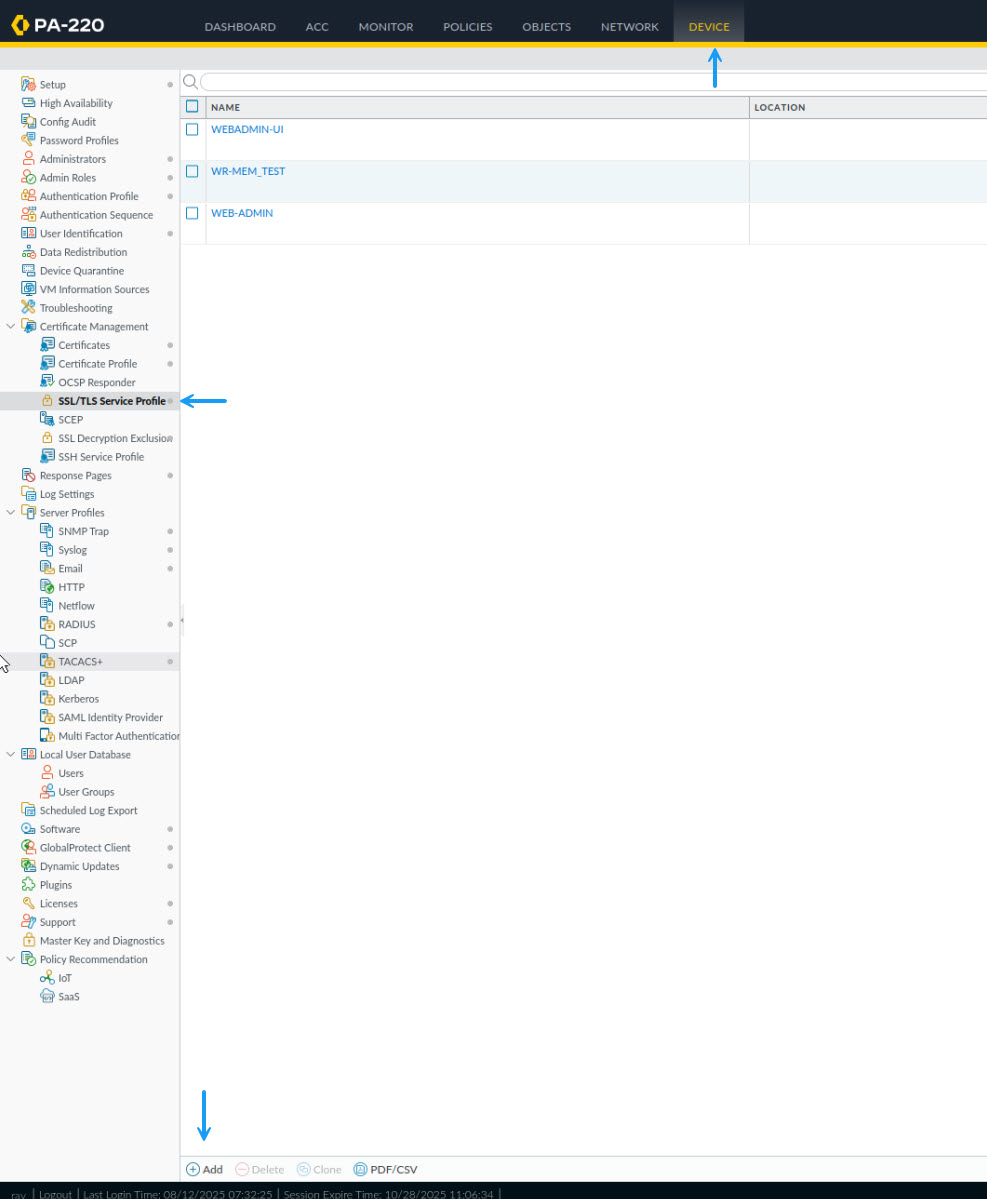
Once the certificate has been imported, you can select it as your Web admin certificate. To do that, navigate to Device - > Certificate Management - > SSL/TLS Service Profile and if you don't have a certificate profile for your Web admin already, create one by clicking on Add.
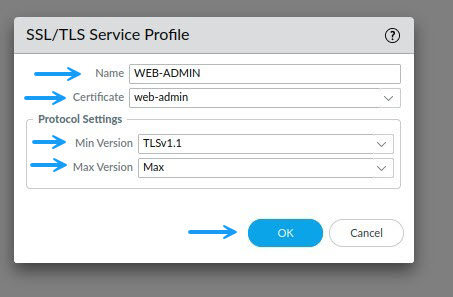
In the SSL/TLS Service Profile window, give the profile a name and select the newly signed and imported certificate along with the Min and Max supported TLS versions and click OK.
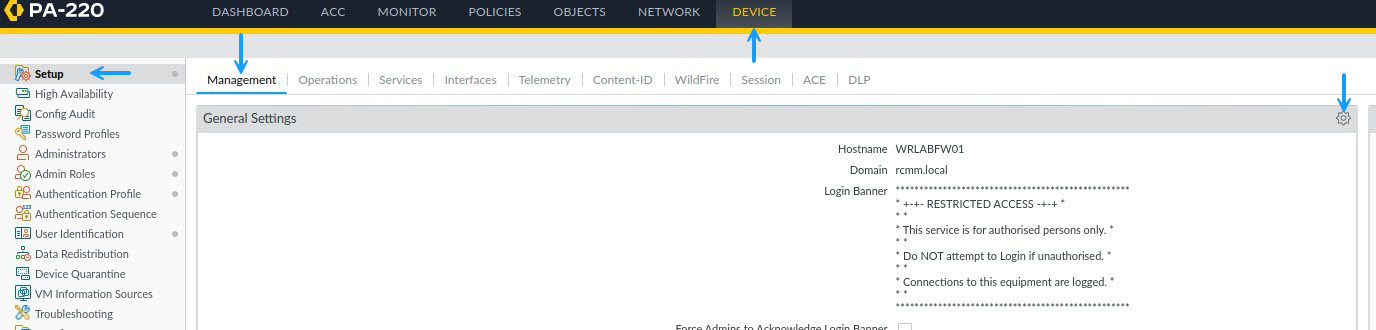
Next navigate to Device -> Setup -> Management and click the cog under General Settings.
In the General Settings Window under SSL/TLS Service Profile, select the newly create profile from the drop down and click OK.
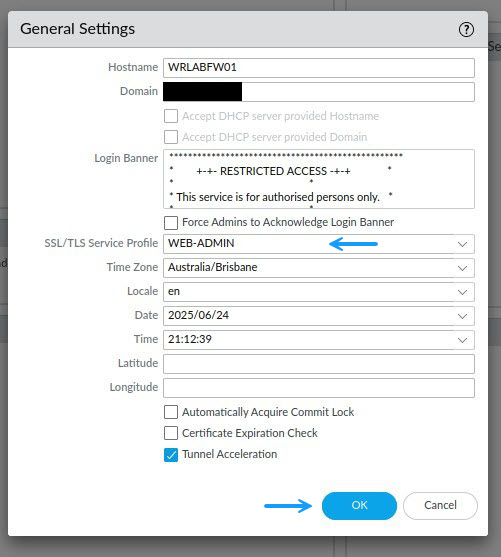
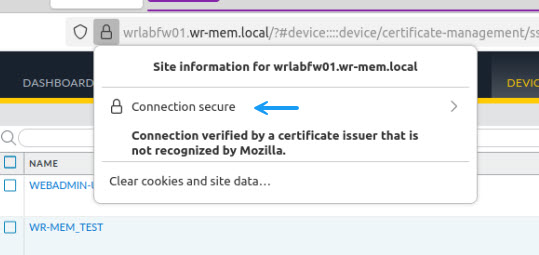
Once done. Commit the changes to the firewall. Once the commit has completed, you should now be able to browse to your firewall and have a secure connection if your CA is trusted by your device.
That's it you now have a internally signed web admin certificate for your Palo Alto firewall. Thanks for checking out my blog. If you've noticed anything missing or have any issues setting this up, please leave a comment and let me know.
Add new comment