Deploying Cisco Nexus 9Kv Switches
I've started playing around with Cisco Virtual Switches lately and have come across various issues in getting them to work and had to spend some time googling etc so thought I would walk through the process I followed here. These Nexus 9kv switches are the same switch I used in my previous post about deploying POAP. My plan is eventually when I get enough hardware, to deploy several of these N9Kv switches in my home lab environment in order to deploy a full leaf, spine, border gateway VXLAN environment. Given how resource hungry these little virtual switches are I'm going to need at least one more micro PCs with 64GB of RAM though. Each one of these Nexus 9Kv switches will consume 10GB of RAM and 4vCPUs so having a 64GB system will only give me about 5 of these switches. 5 would be enough if I didn't want to setup my lab in a multi datacenter scenario which would require 4 switches per "DC".
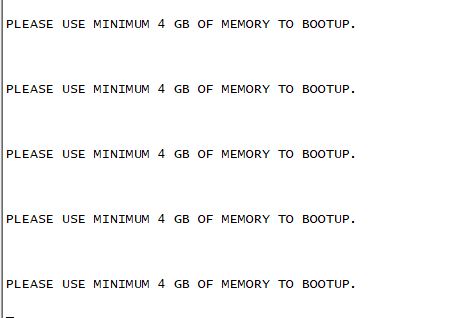
In my lab environment I'm running ESXi 7 on my micro PC's and have downloaded the Cisco Nexus 9kv ova image 10.2(6)M. This NX-OS OVA image, requires a minimum of 4vCPU's, 10GB fo RAM and 10GB HDD space. Now the RAM requirement is just for deployment and you can reduce it afterwards however I've only managed to reduce it to 6GB but that's still better than 10GB. When I attempted to reduce it to 4GB I received the below error on boot and 5GB caused the virtual switch to go into an endless reboot loop so landed on 6GB and found that stable.
Deploying the OVA
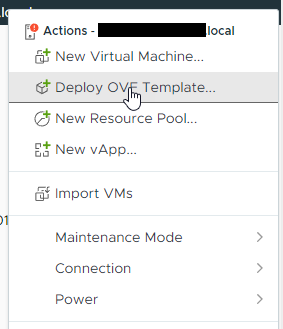
To deploy the OVA, log into your ESXi server or vCentre server if you have one. If you're using vCentre server then you will need to navigate to the ESXi host that you want to deploy the Nexus 9Kv switch to. For this demonstration, I'll be doing this on my vCentre server. Right click on your ESXi Host and select New Virtual Machine.
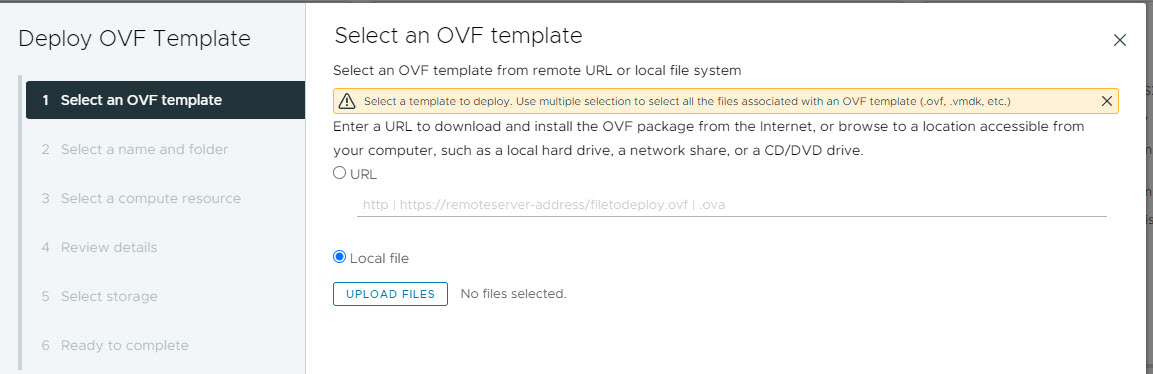
vCentre Server is a bit different to ESXi, but in the Deploy OVF Template window, select Local File and then the UPLOAD FILES button
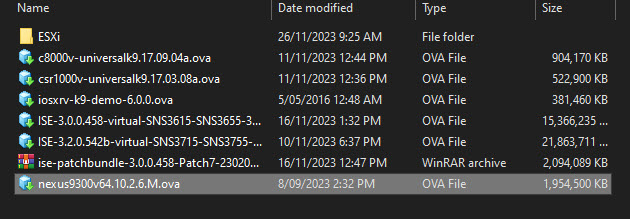
Navigate to where the OVA file is and select it. Once selected, click on the OVF Template page, click Next
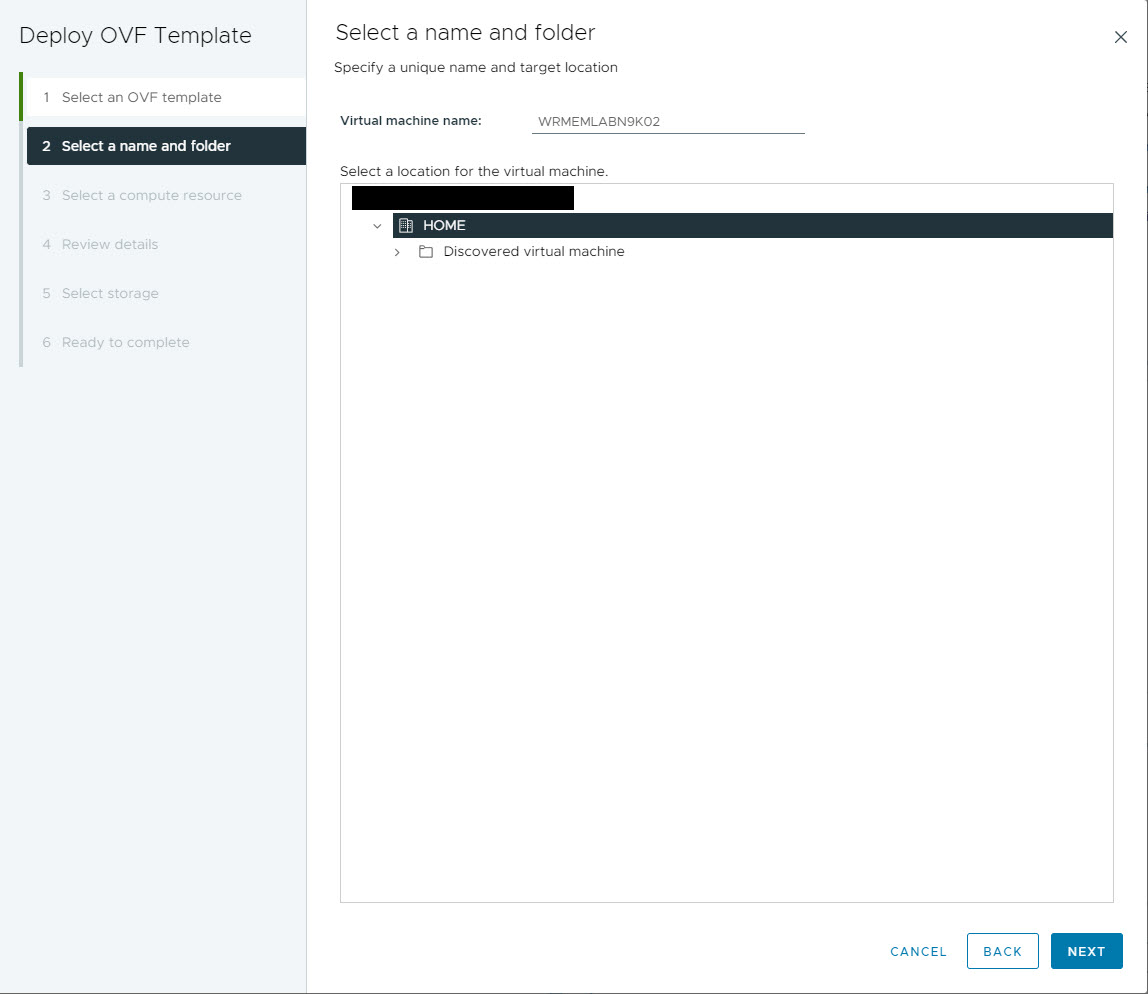
Enter the Virtual Machine name and click Next
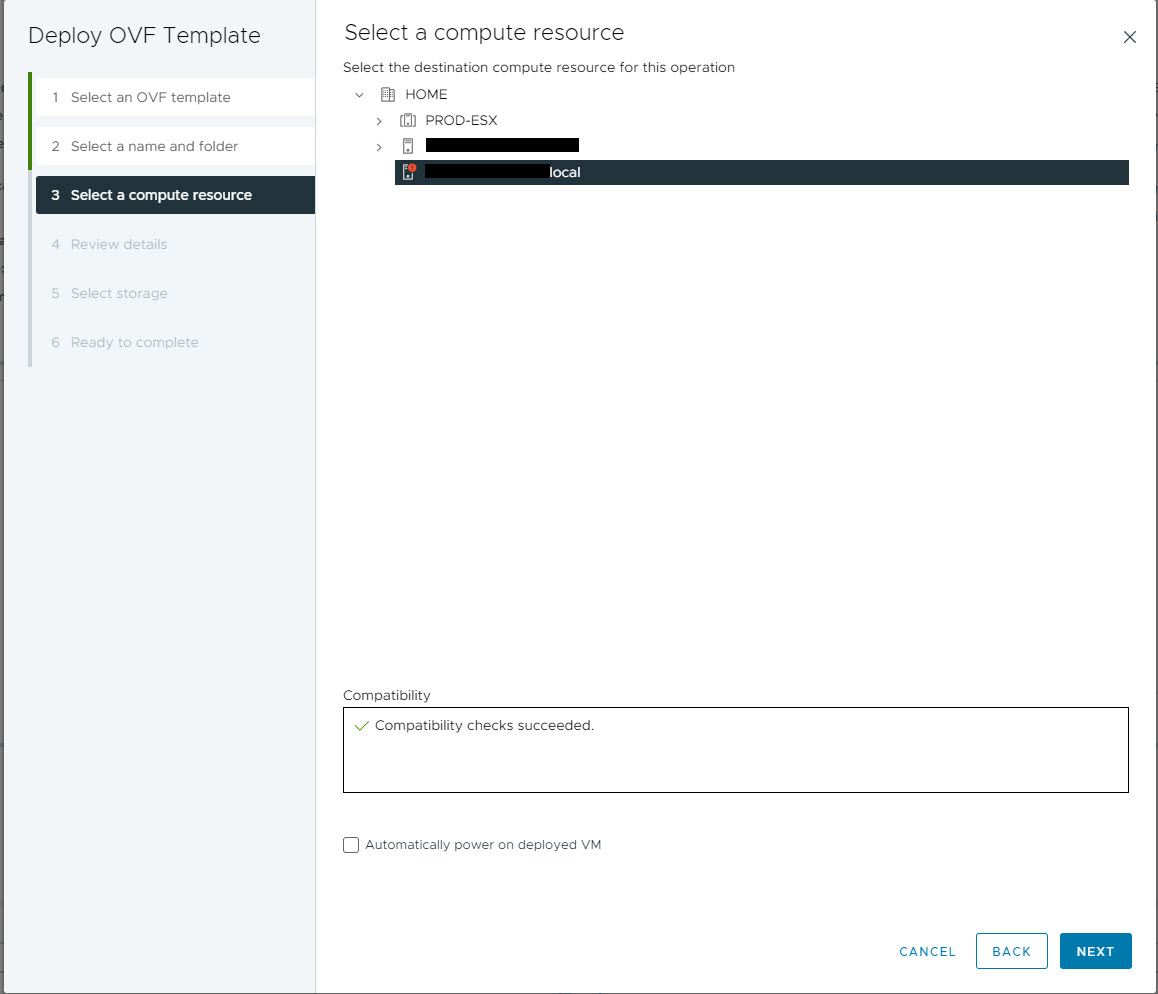
Select the ESXi Host that you want to deploy the OVA to if you're using vCentre Server. Ensure that Automatically Power on deployed VM is unticked and click Next
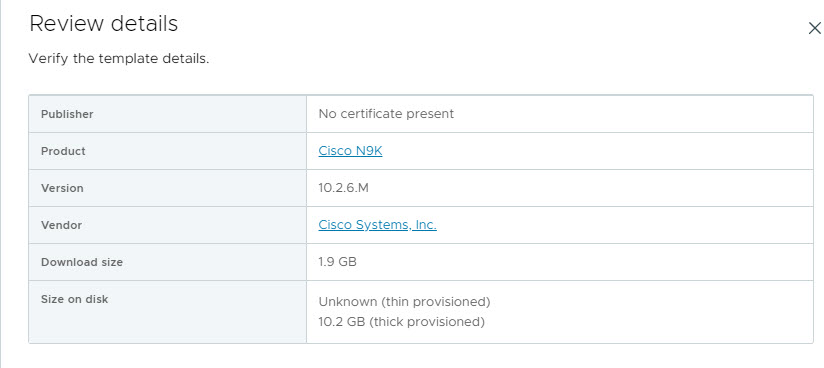
Review all of the VM details and click Next
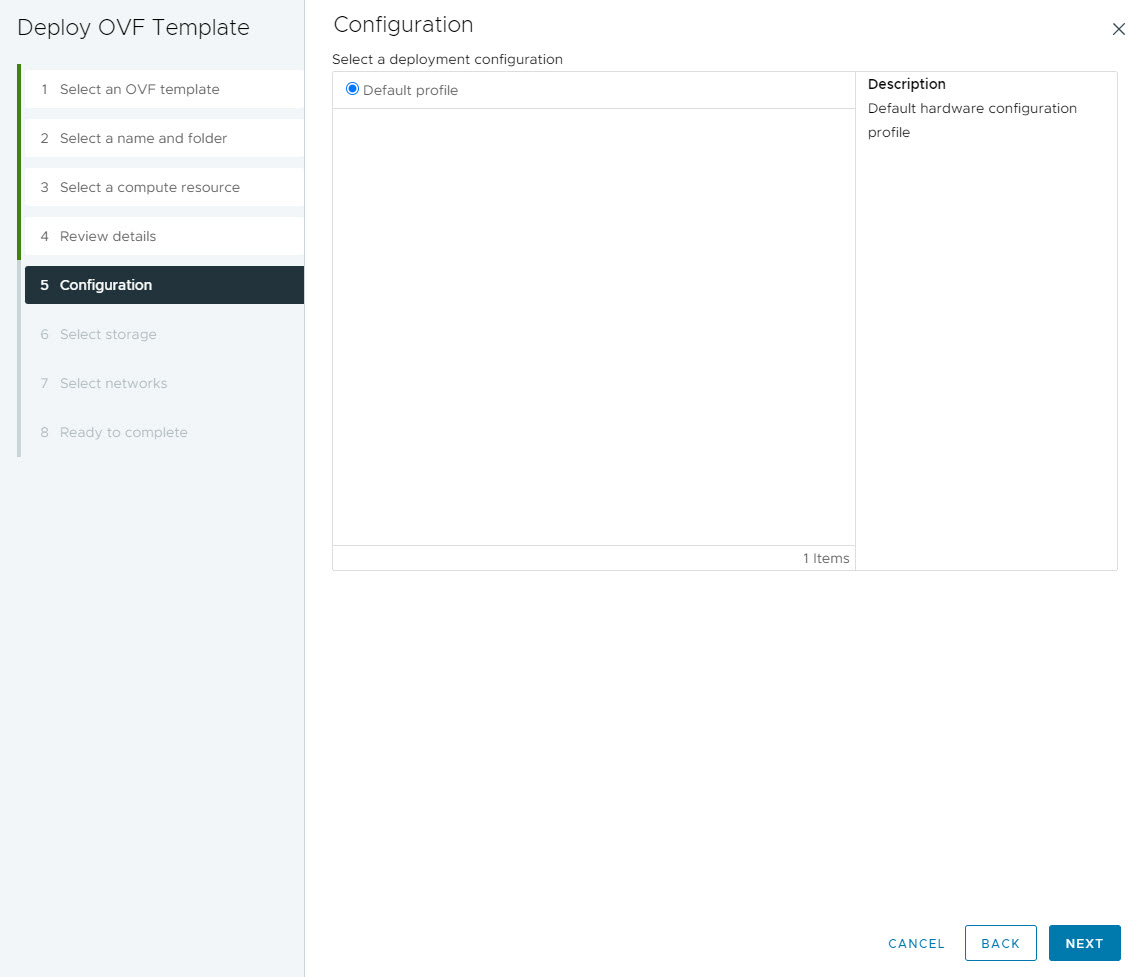
On the Configuration page there's only one profile of Default so leave that and click Next
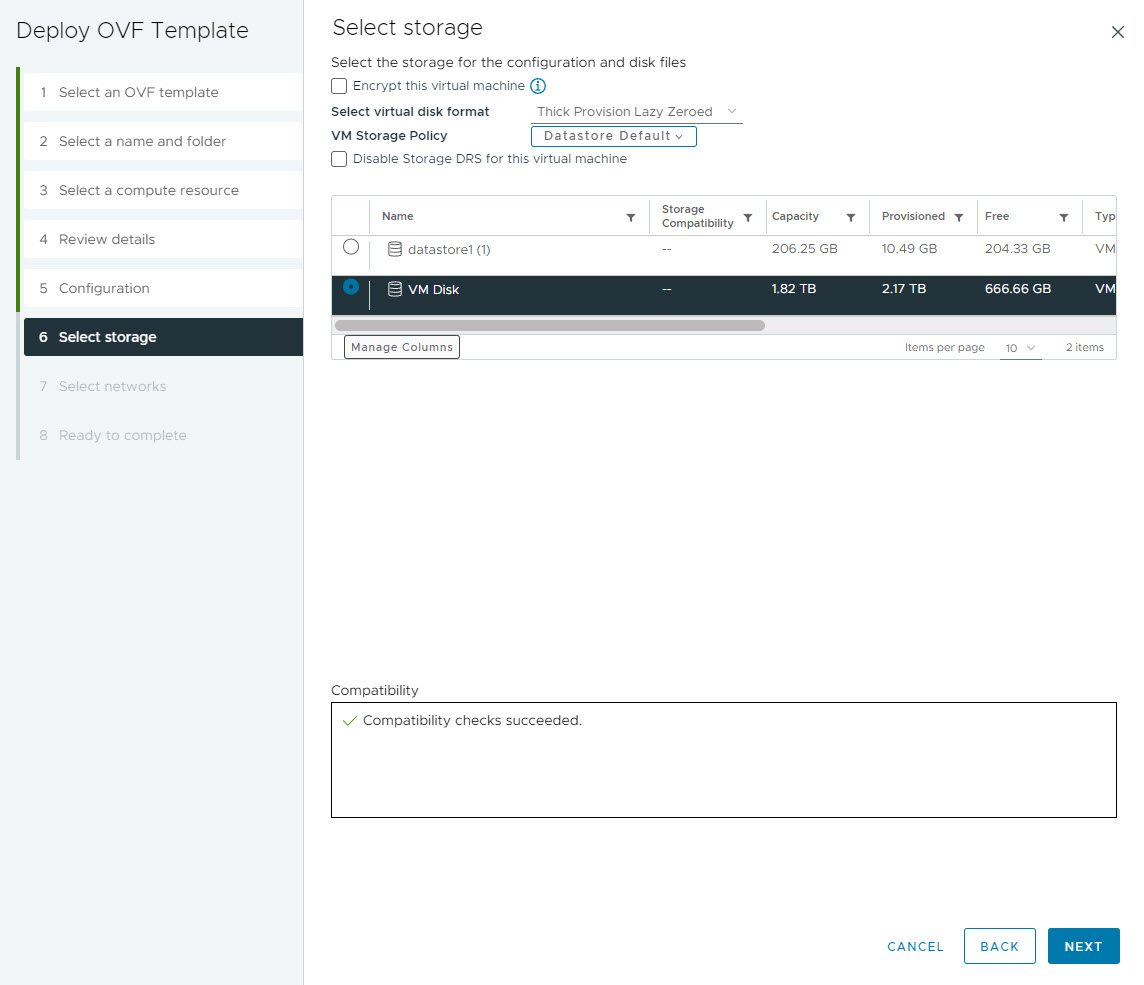
On the next page, select the Storage device that you want the VM to be deployed to on your ESXi host and click Next
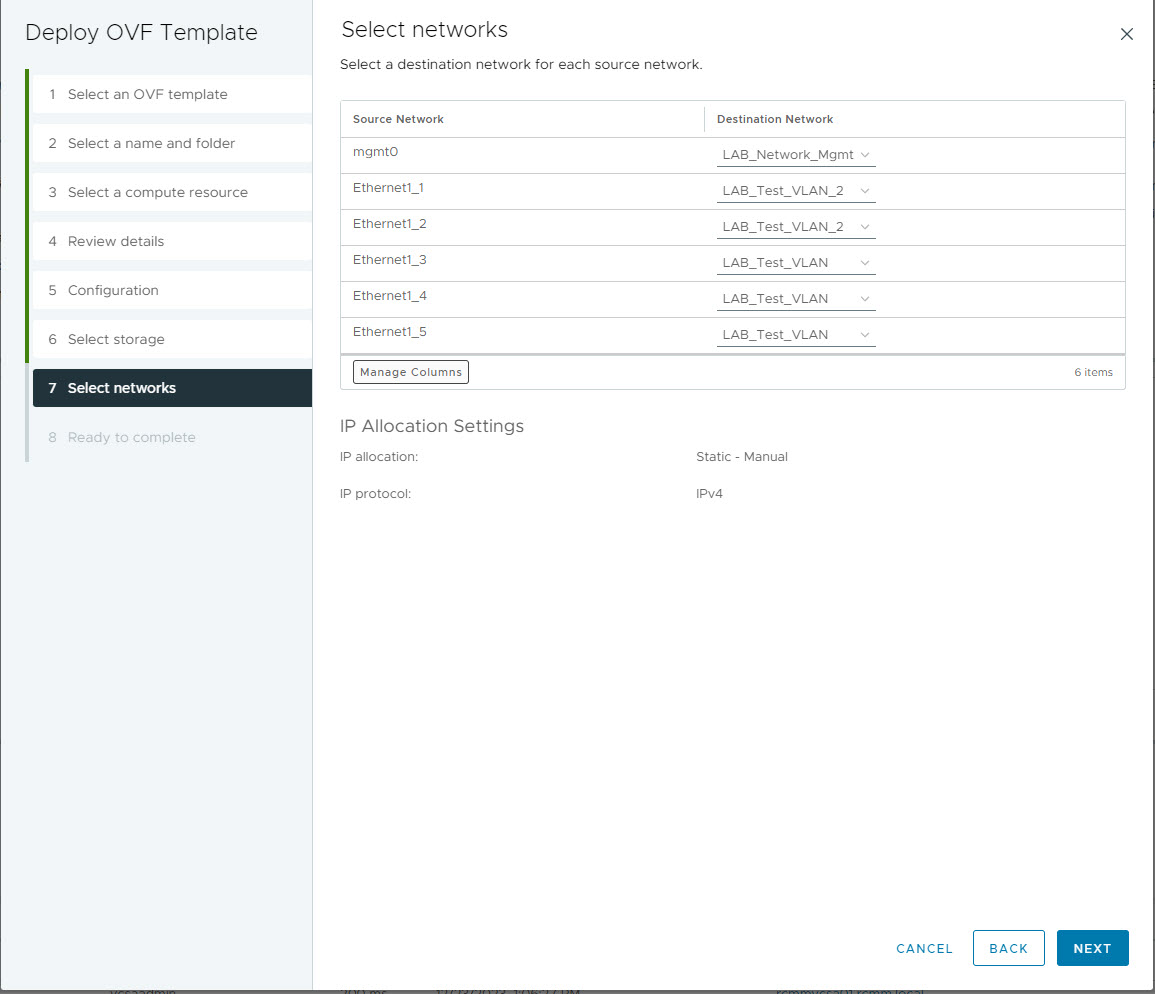
On the Select Networks page, ensure that the mgmt0 interface is connected to an actual network that you can access. I'm yet to get the other interfaces to work correctly in regard to communicating outside of the same vSwitch Port Group so for now I've just set these to a test VLAN. Configure your interfaces as per your network design and click next.
On the last page, confirm all of the VM details and click Finish

Once the OVA VM has been deployed, there's a few extra steps you need to take before you can actually connect to the device. I'm going to show you a configuration method for both with and without POAP. If you want to use POAP, see my previous blog Home LAB POAP Build.
Finishing the Install Configuration
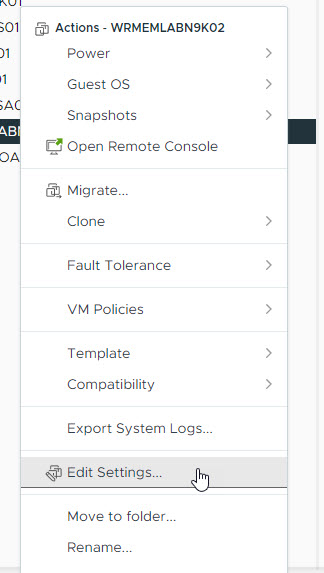
Now that you have deployed the OVA and have the virtual switch deployed, you will need to configure some additional settings like the serial interface for it. This must be done prior to first boot otherwise you get some errors and I had to delete and redeploy the switch. Ensure that the VM is turned off and right click on it and select Edit Settings.
On the edit settings page, expand the Serial port 1 section, and in the drop down, select Use Network. Ensure that Connect At Power On is selected, and the Direction is Server. In the Port URI field type in telnet://server-ip:port. The port number must be an unused value on the ESXi server above 1024. I've already used 1024 for another virtual switch so this time i've selected 1025.
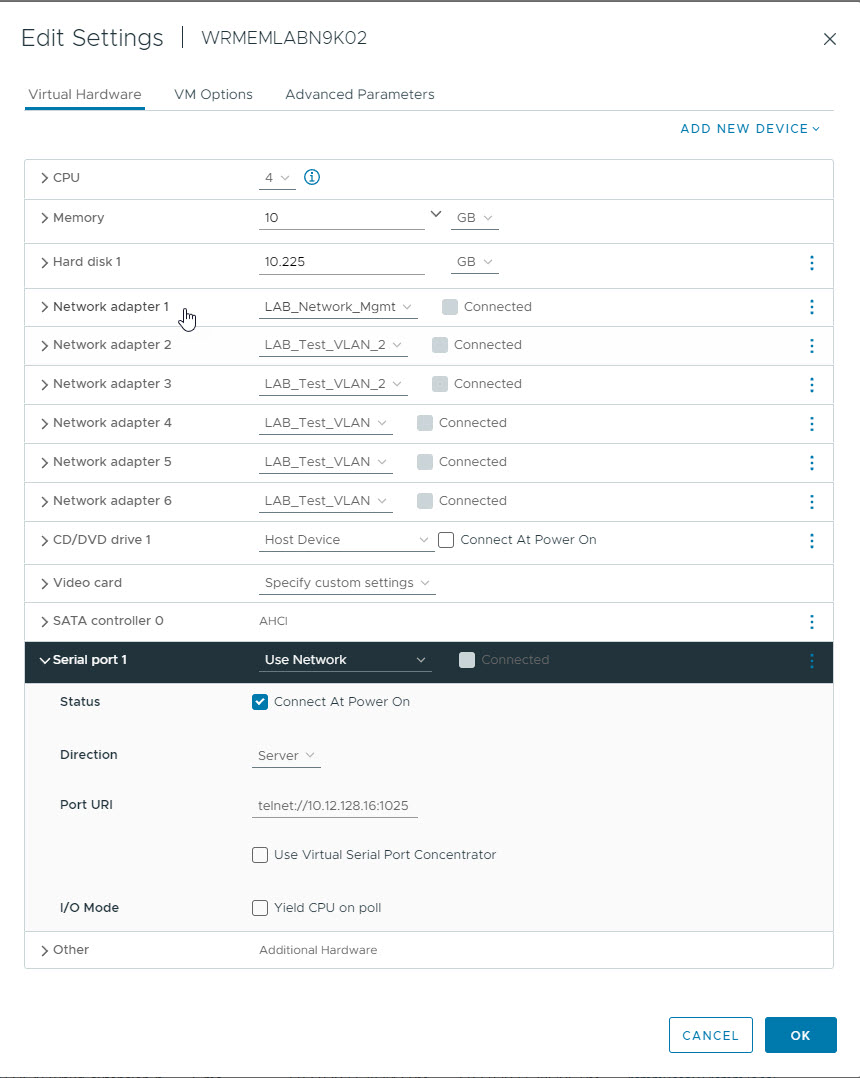
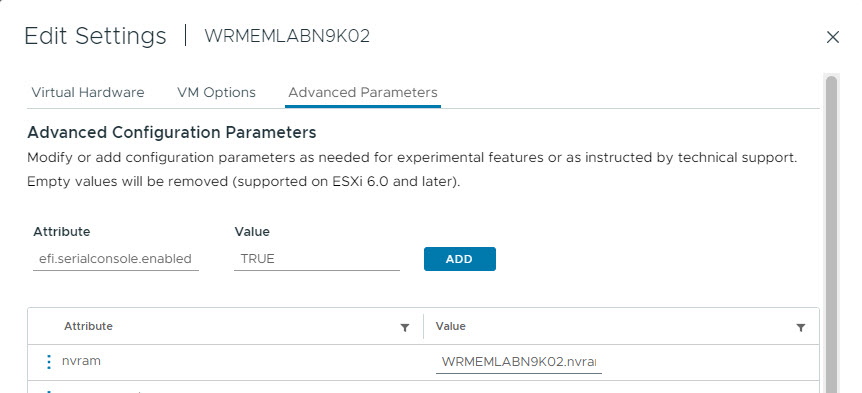
Once you've configured the Serial port, select the Advanced Parameters tab. On this tab, create a new attribute called efi.serialconsole.enabled and set the Value to TRUE and click ADD. Once done, click OK.
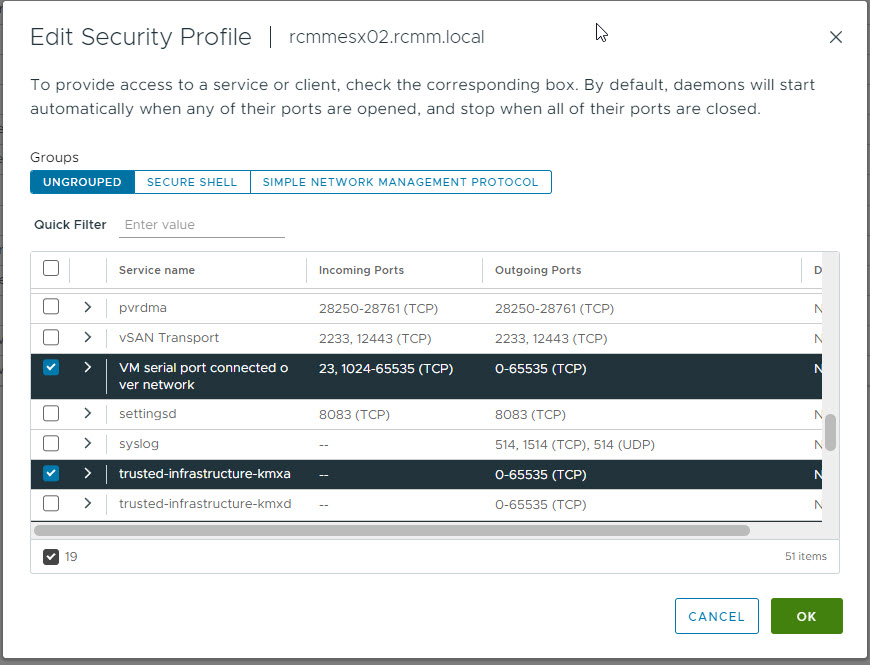
Now that you've finished editing the VM settings, you will also need to ensure that the ESXi Server is configured to allow serial telnet connections on the specified port. To do that, Navigate to the ESXi host and select the Configure tab in vCenter. From the Configure Tab select Firewall under System

Select incoming from the Connections at the top. and select EDIT on the right.

Locate the Service name VM serial port connected over network. Select that service to enable it and click OK.
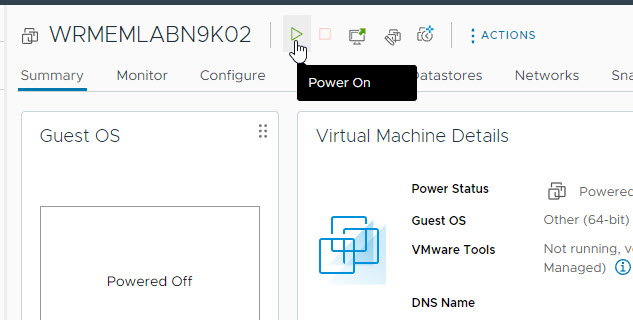
Ok with all of that done. You can finally boot you Virtual Switch. Select the VM and in the top bar, press the Triangle Power On button.
With the switch powered on, use Putty or whatever SSH/Telnet client you have, and telnet to the ESX host on the same port you configured the Serial Port on in the VM settings. For me, that's port 1025.

Once you see the line Starting Auto Provisioning, it will display the Serial number and MAC address for the device. If you're using POAP, you can now go and create your POAP configuration file to deploy to the device. Because I have already gone through how to deploy a device using POAP, I'm going to Abort the POAP process here, and show a manual configuration. To abort POAP you have a couple of options. You should see a line like below
2023 Dec 23 04:47:41 switch %$ VDC-1 %$ %POAP-2-POAP_INFO: - Abort Power On Auto Provisioning [yes - continue with normal setup, skip - bypass password and basic configuration, no - continue with Power On Auto Provisioning] (yes/skip/no)[no]:If you press Skip, the device will just boot to a login screen and you can login with the username admin and no password and configure the device as normal. If you press yes, you will be prompted for basic configuration settings as i'll show you. In the below output, I have entered yes to continue with normal setup.
Abort Power On Auto Provisioning [yes - continue with normal setup, skip - bypass password and basic configuration, no - continue with Power On Auto Provisioning] (yes/skip/no)[no]: yes
2023 Dec 23 04:49:16 switch %$ VDC-1 %$ %POAP-2-POAP_FAILURE: [9DH0PJKHFDP-00:BE:E3:4F:1B:08] - POAP Script execution failed
2023 Dec 23 04:49:20 switch %$ VDC-1 %$ %POAP-2-POAP_FAILURE: [9DH0PJKHFDP-00:BE:E3:4F:1B:08] - POAP Script execution failed, Starting the POAP USB phase
2023 Dec 23 04:49:20 switch %$ VDC-1 %$ %POAP-2-POAP_INFO: [9DH0PJKHFDP-00:BE:E3:4F:1B:08] - USB Initializing Success
2023 Dec 23 04:49:20 switch %$ VDC-1 %$ %POAP-2-POAP_INFO: [9DH0PJKHFDP-00:BE:E3:4F:1B:08] - USB disk not detected
2023 Dec 23 04:49:20 switch %$ VDC-1 %$ %POAP-2-POAP_INFO: [9DH0PJKHFDP-00:BE:E3:4F:1B:08] - USB disk not detected (message repeated 1 time)
2023 Dec 23 04:49:20 switch %$ VDC-1 %$ %POAP-2-POAP_INFO: [9DH0PJKHFDP-00:BE:E3:4F:1B:08] - Start DHCP v6 session
2023 Dec 23 04:49:20 switch %$ VDC-1 %$ %POAP-2-POAP_DHCP_DISCOVER_START: [9DH0PJKHFDP-00:BE:E3:4F:1B:08] - POAP DHCP Discover phase started
2023 Dec 23 04:49:20 switch %$ VDC-1 %$ %POAP-2-POAP_INFO:   - Abort Power On Auto Provisioning [yes - continue with normal setup, skip - bypass password and basic configuration, no - continue with Power On Auto Provisioning] (yes/skip/no)[no]:
Disabling POAP.......Disabling POAP
You will then see the disabling POAP prompt, and a screen that says rolling back, please wait. This may take 5-15 minutes. Eventually, you will see a System Admin Account Setup options and will be prompted for some configuration settings as below.
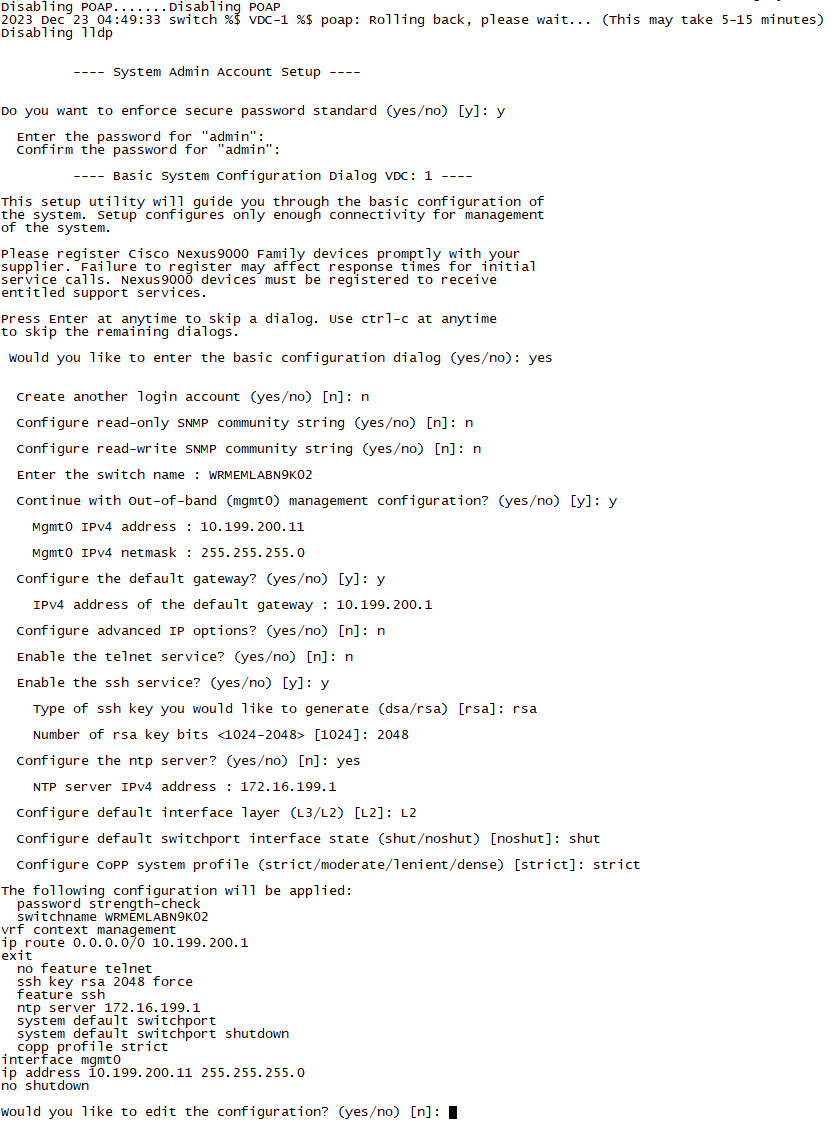
Once you have entered all of the configuration details, you will be prompted to confirm and then asked if you want to edit the configuration. If all of the settings are correct, type n and hit enter. You will then be prompted to save the configuration. Type in y and hit enter.

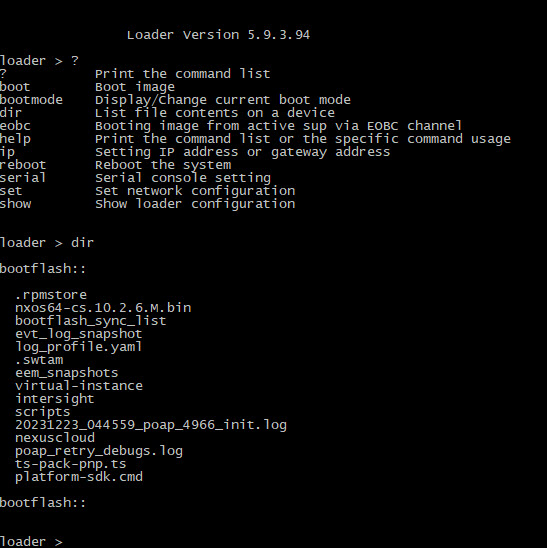
That's it. You now have a working Nexus 9Kv switch. One thing I would like to mention is that sometimes on the first boot, or if like me you forgot to enter the command boot nxos bootflash:/nxos64-cs.10.2.6.M.bin and save the configuration, you may need to tell the switch where the bootfile is. To do that, telnet to the serial console of the device as before, and you will see a Loader > prompt. If you hit ? you will see some commands that you can use. Type in dir and hit enter to confirm the boot file name.
Now that you have the nx-os image file name, type in boot bootflash:filename. Which in my case is boot bootflash:nxos64-cs.10.2.6.M.bin.
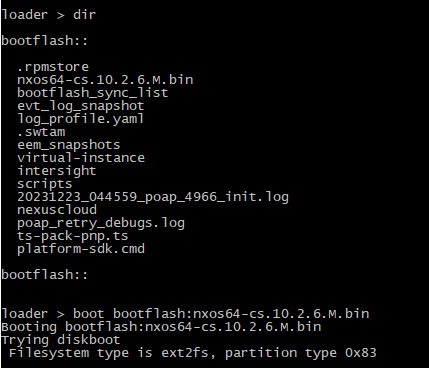
The switch should now boot as normal.
Add new comment