Cisco ISE Basic Device Profiling
In an earlier post I discuss MAB authentication for devices that don't support other 802.1x methods for authentication and authorisation to your network. In this post, I'm going to run through how to configure basic device profiling in cisco ISE that can be used in conjunction with MAB in order to make device authentication and provisioning simpler.
Device profiling isn't just for MAB authentication, it can also be used for some really cool things like BYOD profiling and certificates etc to the point where you can say if this model phone has this Android version etc etc, do this, and so much more but for the purposes of this post, I'm just going to show you how to profile a specific MAC OUI for a device group policy, and then match that device policy in your MAB policy.
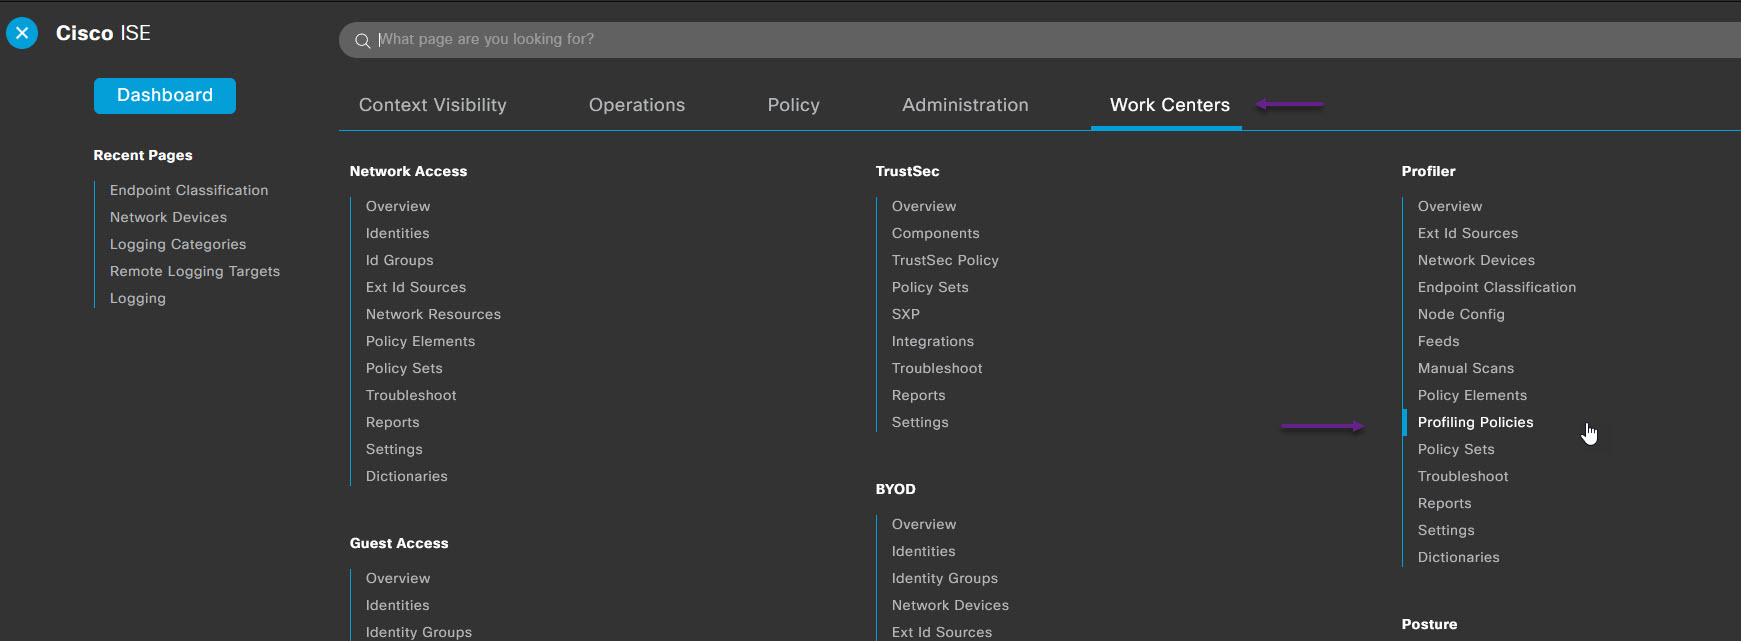
Given I've already walked through how to configure a MAB device here, I'm just going to focus on how to configure ISE to automatically profile and add that same device to the required device group. Once again, i'm going to use my DVR for this example. Let's get started by first defining the profile for my DVR system. To do that navigate to Work Centers -> Profiler -> Profiling Policies.
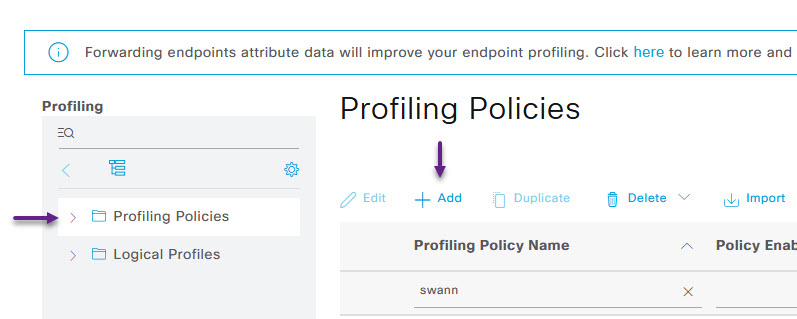
On the Profiling Policies page, select Profiling Policies from the left, and click on Add to create a new policy.
On the Profiler Policy page, configure a name and any other details you wish, and then under the Rules section, click to add a condition and select Create New Condition (Advance Option)
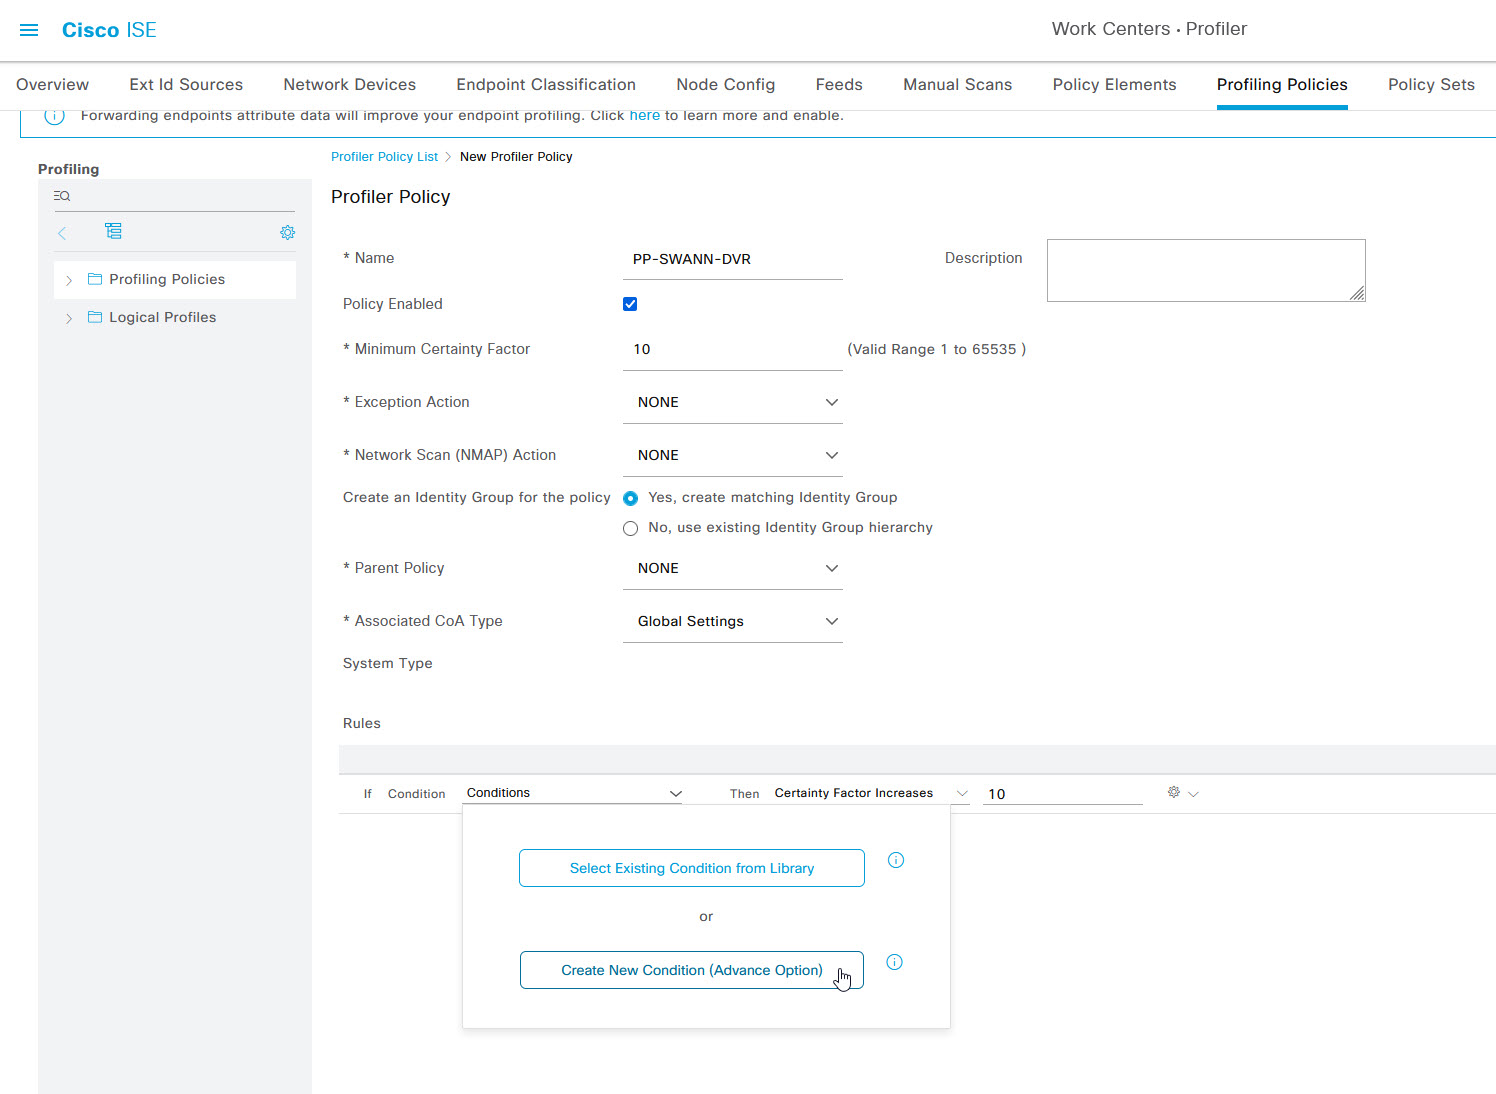
In the Select Attribute dropdown, select MAC then select OUI. In the next field select Contains, and then in the MAC field, enter the OUI for your device. In my case, it's bc:51:fe.

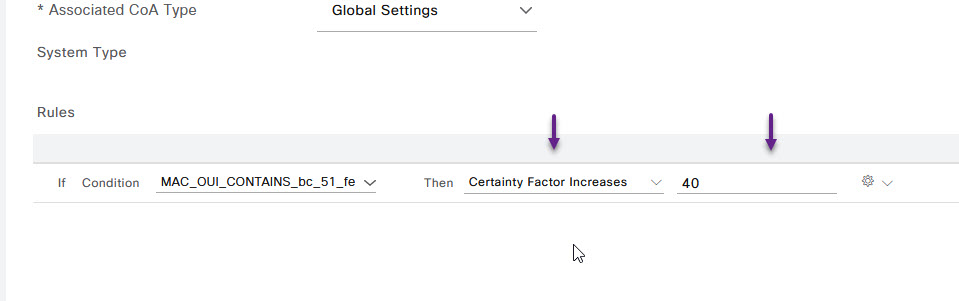
Once done, select Then: Certainty Factor Increases and give it a value. I've given mine a value of 40.
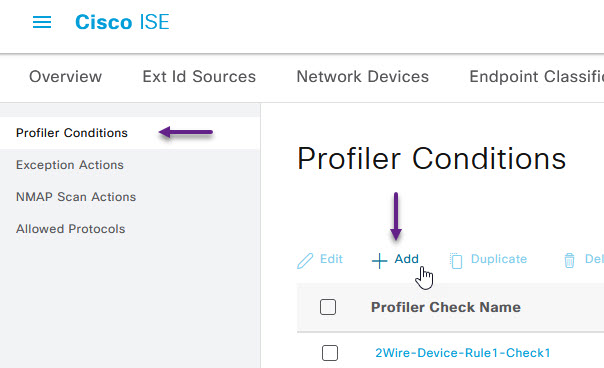
Once done, click Submit. There is an alternative way to creating a profile condition. You can pre-configure the condition by navigating to Work Centers -> Profiler -> Policy Elements

On the Profiler Conditions page, click Add
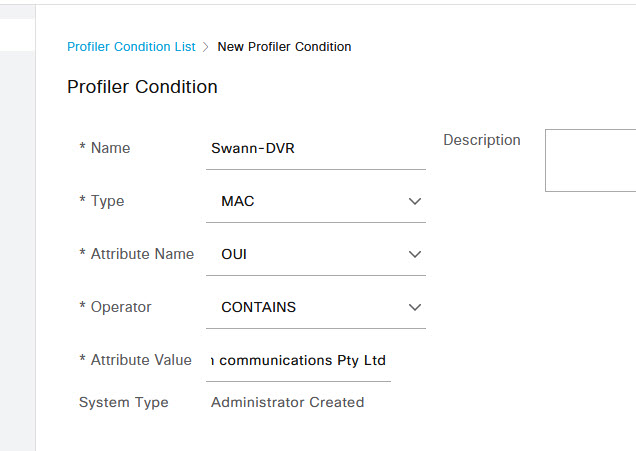
On the New Profiler Condition page, fill in the required details once again selecting MAC, and OUI and the Operator of CONTAINS. In the Attribute Value field, you will need to include the correct information. For me it is Swann communications Pty Ltd. Once done, click Submit.
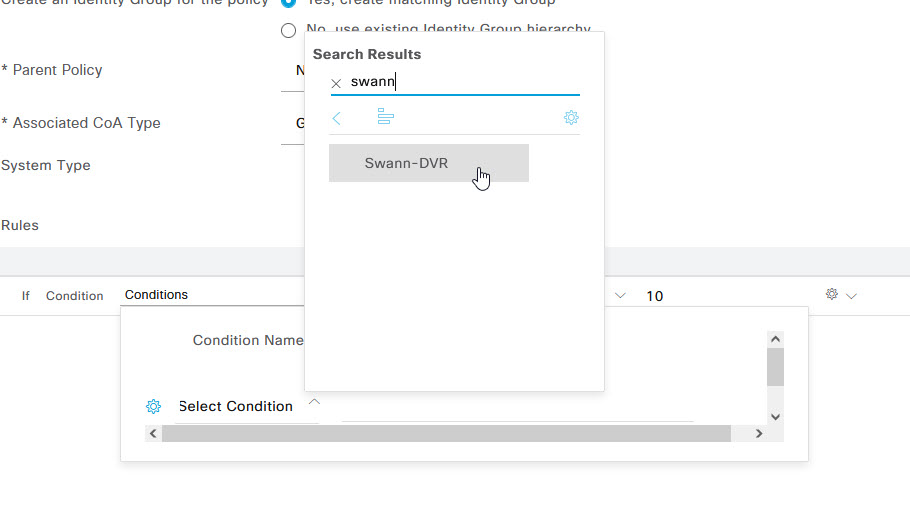
Now, on the add a condition page, instead of selecting Create New Condition, choose Select Existing Condition from Library. Under the Select Condition drop down, search for the condition that you added in the previous steps, and select it.
Once again, for the certainty Factor Increase, give it a value and then click Submit.

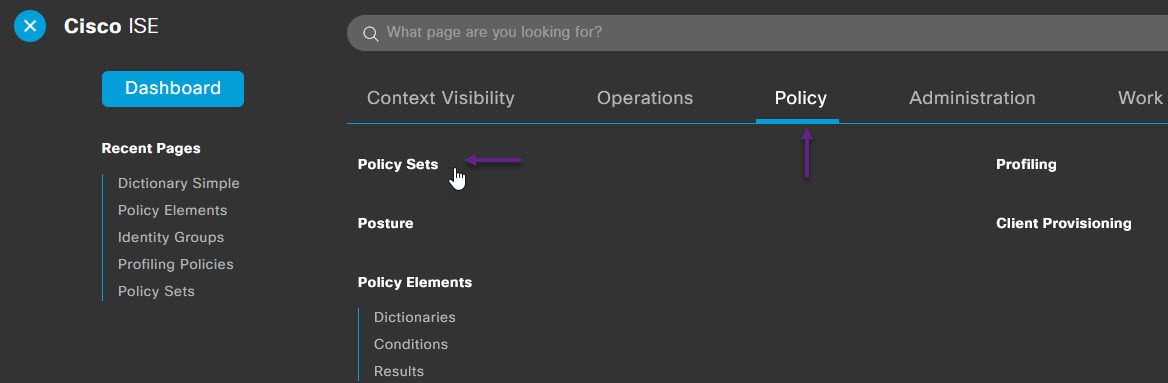
With the profile created, we can now create a policy set to match on the profile. To do that, navigate to Policy -> Policy Sets.
You should already have a MAB policy created, so click on the > to edit it.

Expand the Authorization Policy section and add a new policy by clicking on the cog on the right of an existing policy and selecting Insert new row above.

Give the rule a name, and in the Conditions section click on the + to add a new condition.

On the Conditions Studio page, select Click to add an attribute, and select the Identity Group button and then IdentityGroup: Name option.
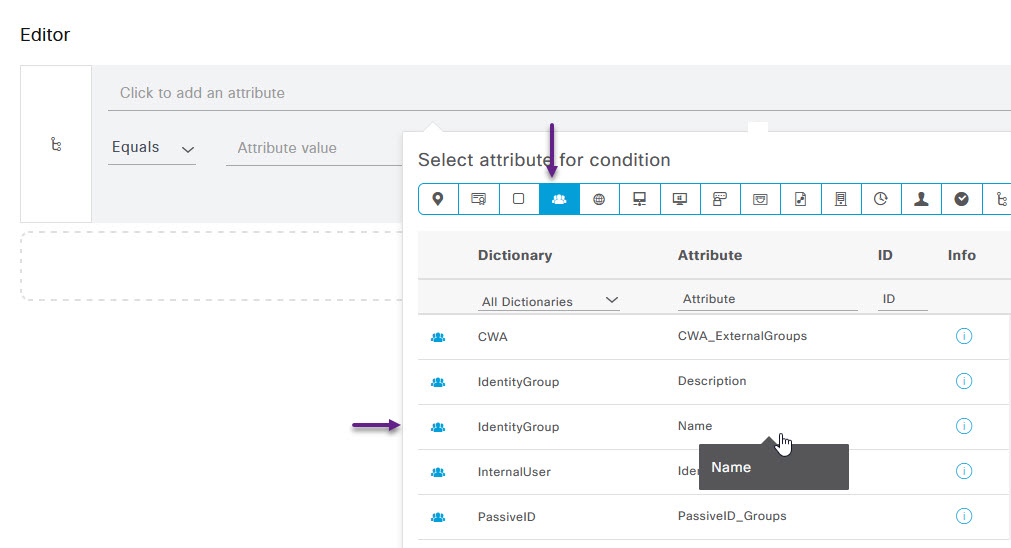
In the Attribute Value feild, select the drop down and search for the profile that you created in the earlier steps and select it.
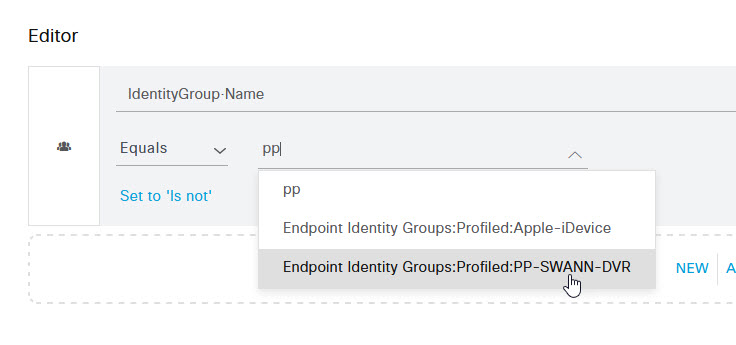
Once done, scroll down and click Use. You will now have a new Authorization Profile for the profiled group. In the Results Profiles section, add a profile and then click Save.
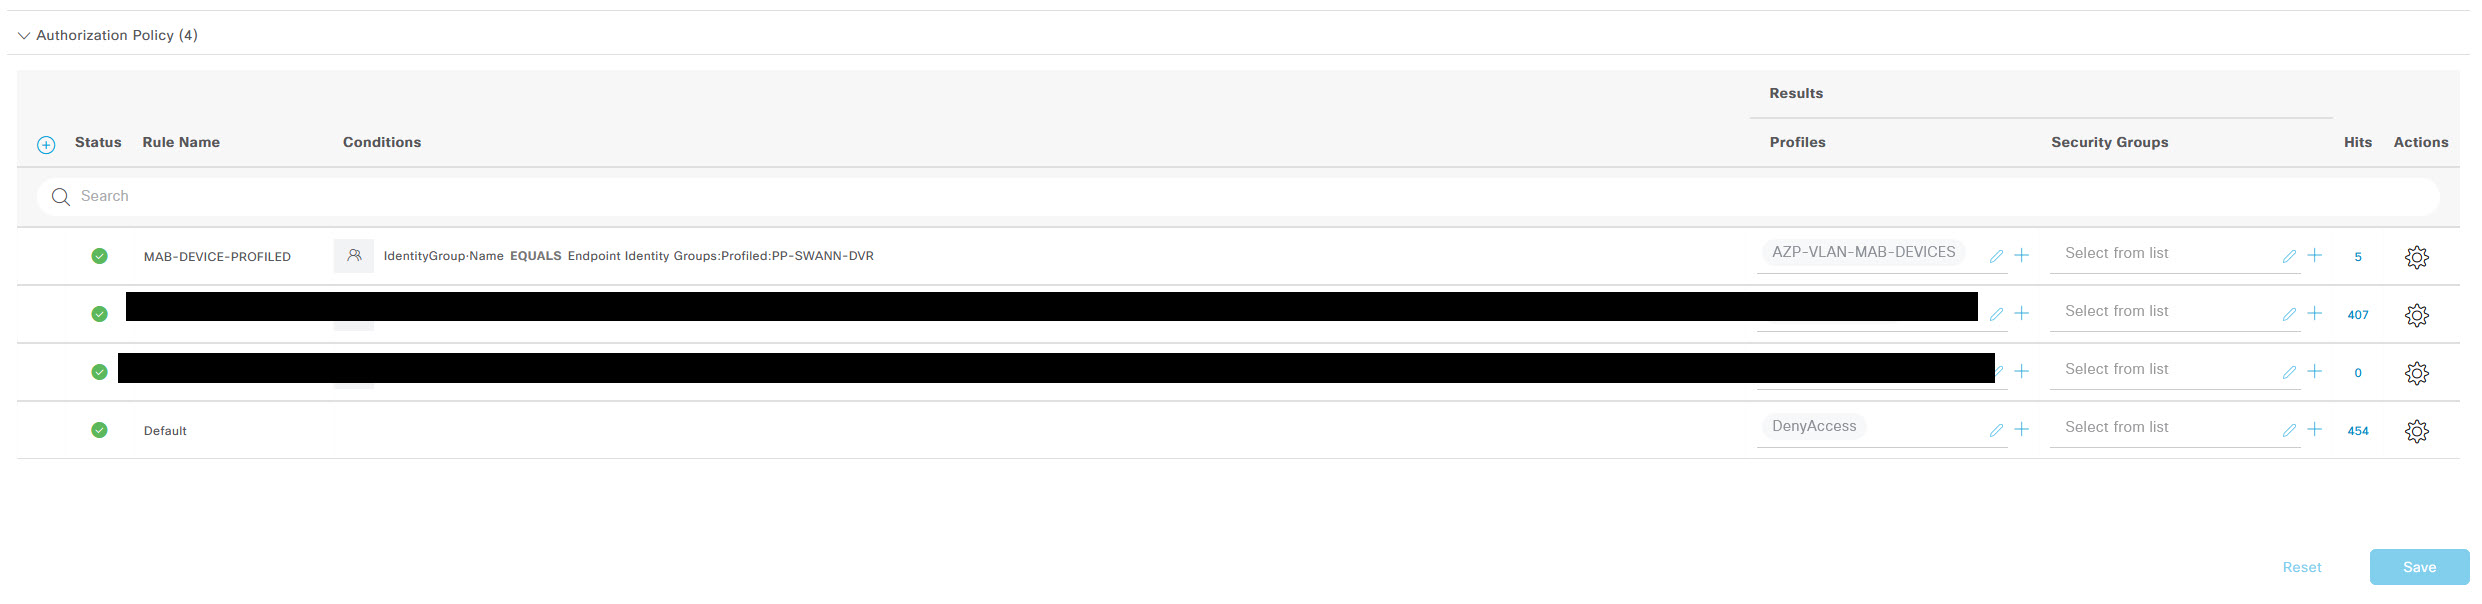
And that's it. You should now be able to plug in your device and have Cisco ISE automatically profile it and allow access based on the selected conditions. If you've noticed anything missing or have any issues with this post or just want to say Hi, please leave a comment.
Add new comment